


")
HOW TO DO A DEADLIFT
Today, I’ll be talking about what many call the king of exercises – I’m talking, of course, about the deadlift.
Hands down, the standard deadlift is of the best compound movements you can add into your workout routines. Benefits of the deadlift include:
- Build muscle mass in the posterior chain
- Gain strength in the posterior chain
- Reduce your risk for injury
- Functional lower body movement that supports many human movement patterns
BUT only if you do it with proper form.
And guess what… There’s a good chance that you’re making one or more of the most common deadlifting mistakes which include setting up in bad position with improper form. Because of the heavy weight we use in our deadlift workouts, the risk of injury greatly increases.
If you’ve been wondering how to use proper deadlift form I’m going to help you with that. What I want to do is provide you with an official proper deadlift form checklist that breaks down this exercise step-by-step so you can confidently stand in front of the barbell.
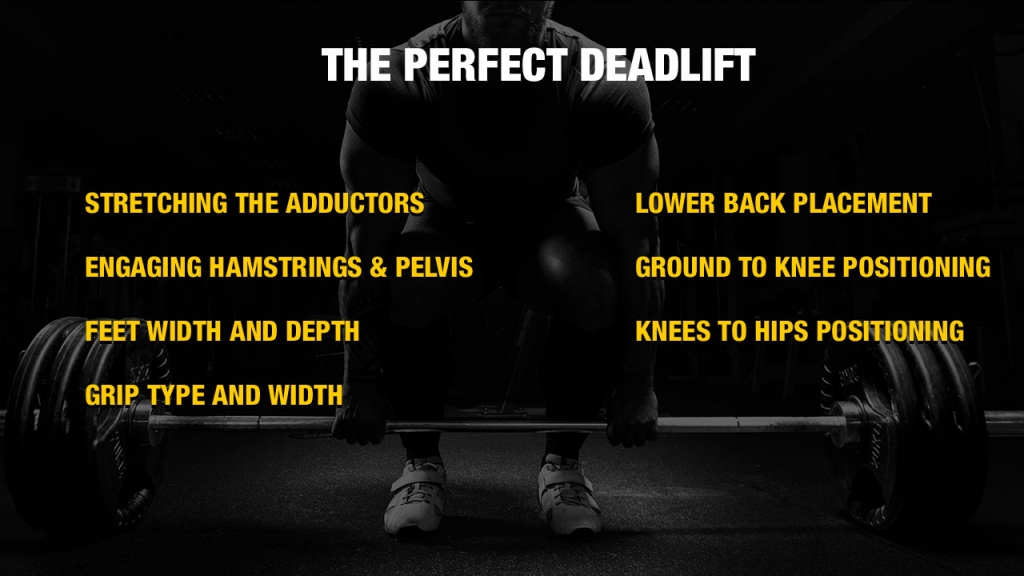
Here are some of the topics that I’ll cover in this guide to deadlift form advice:
Guys, this deadlift guide is going to make your life a hell of a lot easier! Let’s get into the details of how to incorporate this valuable tool into your training.
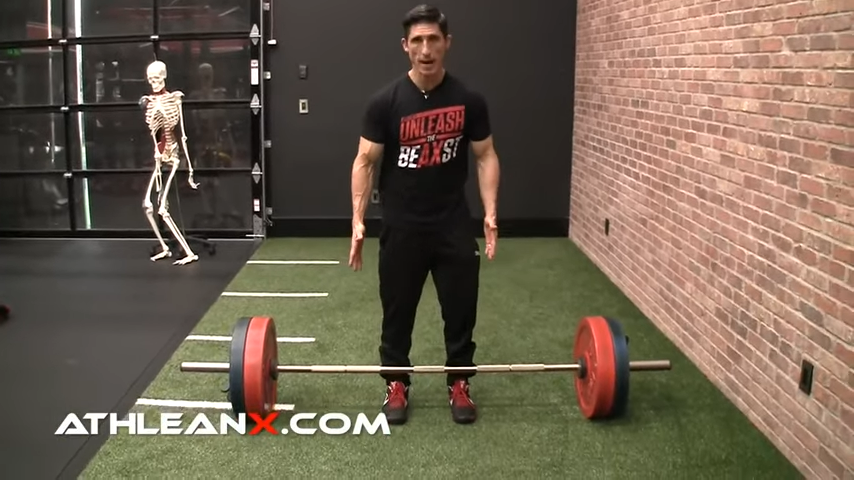
1) WHAT IS A DEADLIFT?
It’s pretty much impossible to step on to the gym floor and NOT hear the word “deadlift” being thrown around.
I think the problem a lot of bloggers and YouTubers make is that they assume that everyone knows what proper deadlift technique is.
In fact, I suspect a lot of people who say they deadlift, either get it confused with a certain variation of squat or they simply have bad form. And it’s this scenario that leads beginners to get the wrong impression of the traditional deadlift.
So, let’s answer the question, “What is a deadlift?”
Considered one of the big three compound movements of powerlifting alongside the bench press and barbell squat, the standard deadlift is a compound exercise that is essential in fitness.
Deadlifts are so important to the fitness world because they’re one of several functional compound movements that promote a variety of benefits simultaneously. Benefits of regular deadlifts include lean muscle growth, increased power, weight loss, and performance enhancement.
The conventional deadlift is performed from the ground with a barbell, hence the name. You are lifting the bar from a dead stop.
But there are types of deadlift variations that can play a part in your fitness program. Here are some common deadlift variations outside of traditional deadlifts to consider:
- Dumbbell deadlift
- Kettlebell deadlift
- Hex bar deadlift (Trap bar deadlifts)
- Single-leg deadlift
- Stiff-legged deadlifts
- Sumo deadlift
- Romanian deadlift
2) MUSCLES WORKED DURING DEADLIFTS
The traditional deadlift is a total-body exercise that activates several major muscle groups including the legs, back, core, and arms.
I think it’s important to go through all of the major muscles targeted by deadlifts so that you can see how this effective exercise works.
More importantly, this will help you develop a mind-to-muscle connection during your deadlift sessions.
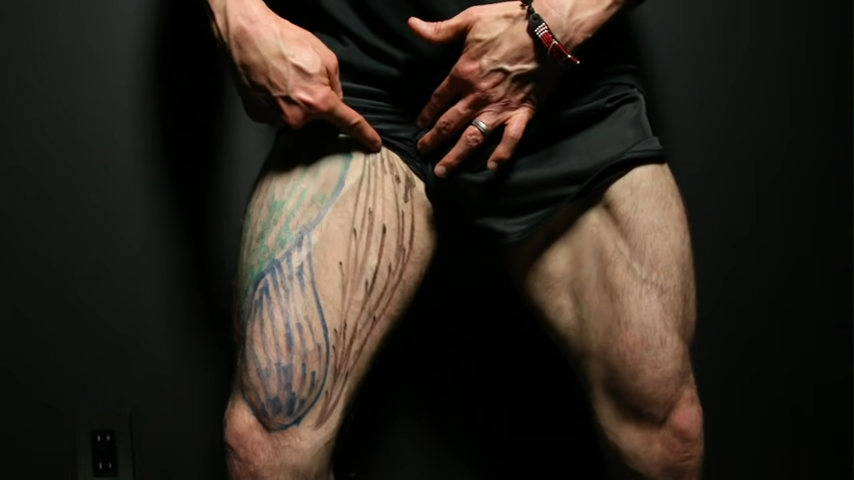
We’ll start with the muscles of the quads, the biggest muscles in your legs.
VASTUS MEDIALIS
The vastus medialis is one of four heads of the quadriceps muscle. You can find it on the inside of the knee. This muscle helps you extend your knee like during a leg extension.

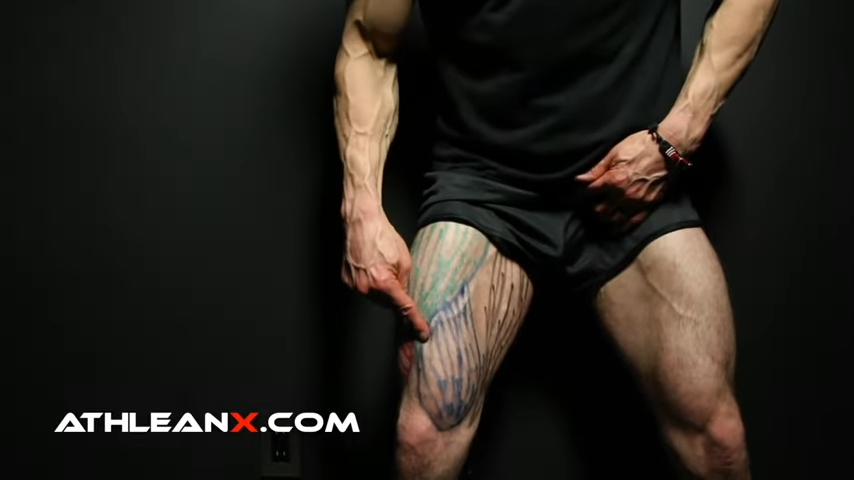
VASTUS INTERMEDIUS
The standard deadlift also hits the vastus intermedius, which also helps with proper knee extension although it’s tougher to see in an aesthetic way. It’s dead center on the quad.
VASTUS LATERALIS
The vastus lateralis is on the outside of your knee, and it helps with knee extension. This is another muscle targeted by deadlifts.
RECTUS FEMORIS
The traditional Deadlift also hits the rectus femoris, which can also be found on the front of the leg but it’s unique because it has an attachment above the hip, which aids in flexion.
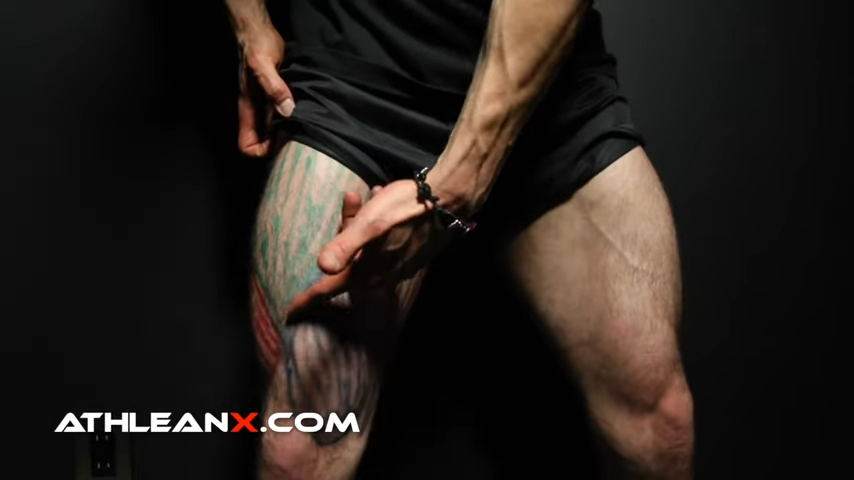
BICEPS FEMORIS
The biceps femoris is a part of what most people think of as the hamstring muscle. You can find it on the outside of the hamstring, and it helps with knee flexion like when you’re doing a leg curl. This muscle is one of the main muscles to be targeted by deadlifts.
SEMITENDINOSUS
The deadlift exercise also targets the semitendinosus, which favors the inside of your hamstring, and it also helps with knee flexion.
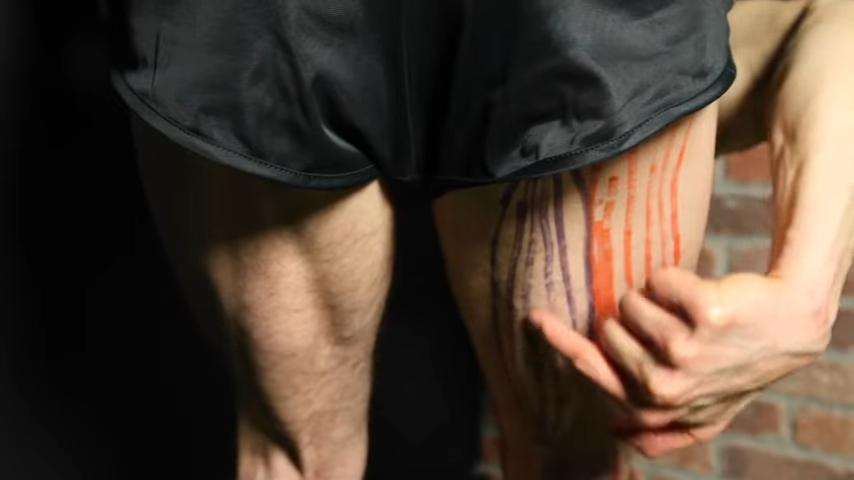
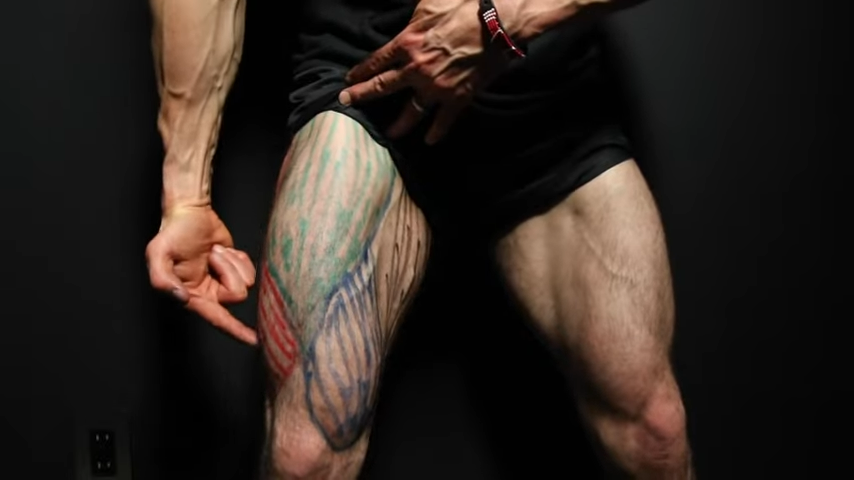
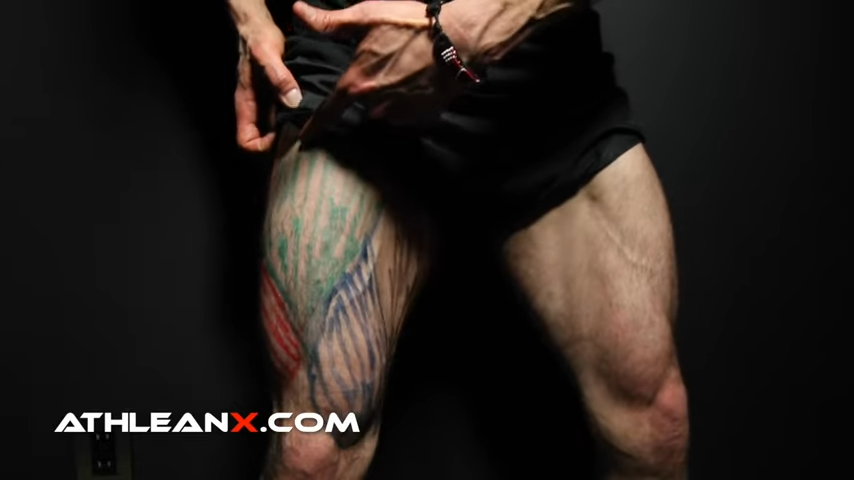
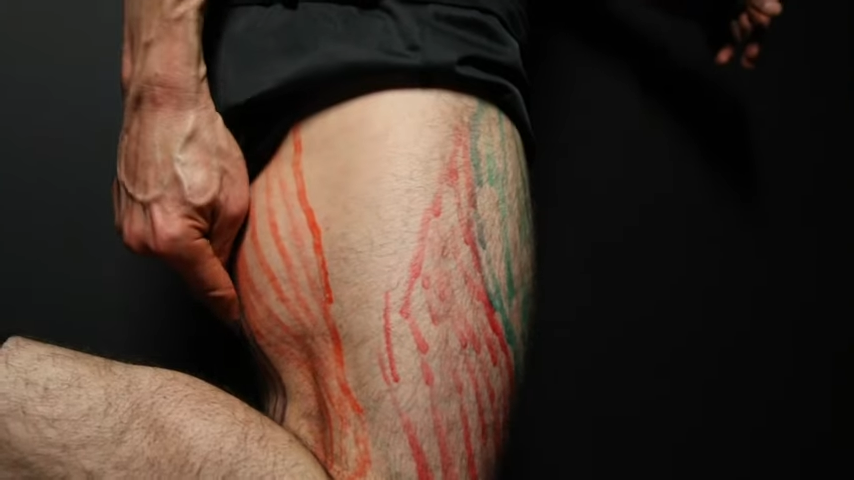
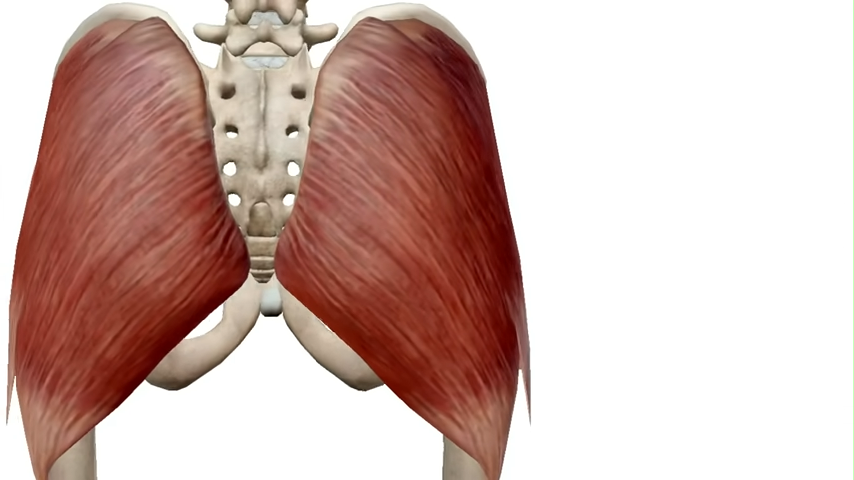
GLUTEUS MAXIMUS AND MEDIUS
Of course, the standard deadlift targets the glutes! Aside from the obvious aesthetic reason, it’s important to focus on developing your glutes and here’s why:
The glute maximus is an important hip extender and it also helps with slight external hip rotation.
Its neighboring muscle, the glute medius is needed to control the hip in the frontal plane through abduction and the transverse plane through hip rotation.
THE ADDUCTORS
On the inside of your thighs, you’ll find the adductor muscles, which help to stabilize you during movements like the deadlift.
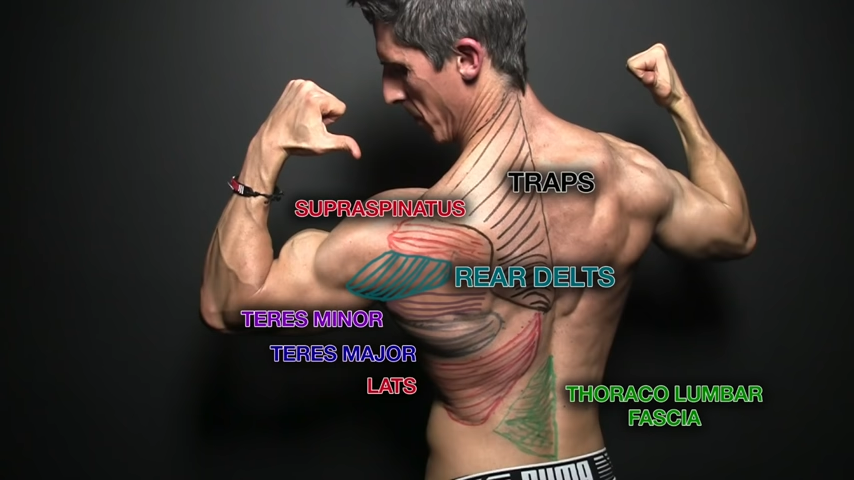
LATISSIMUS DORSI
Deadlifts hit a number of muscles in the upper body as well. Better known as “the lats,” this muscle is key to developing a wide back. During regular deadlifts, the lats are engaged and act more as stabilizing muscles than prime movers.
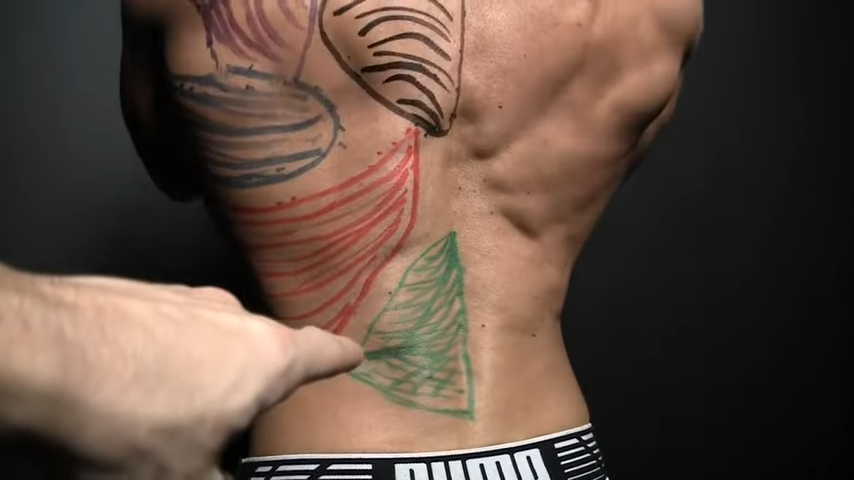
LOWER BACK AND ERECTOR SPINAE
As I’ll discuss below, the first part of the traditional deadlift is a fantastic leg movement, but it’s the second part of the pull that is a great back movement.
The pull part of deadlifts activates the lower back and erector spinae. The latter is made up of the muscles that run up your lumbar spine and help to stabilize your torso.
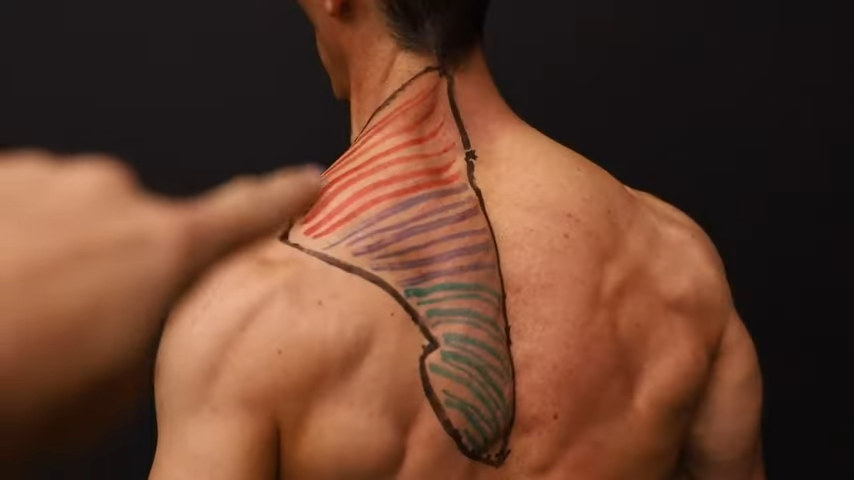
TRAPEZIUS
If you perform deadlifts without a shirt, you’ll notice that your traps light up like Christmas trees.
Again, the standard deadlift isn’t primarily targeting this muscle or the shoulders, but deadlifts require the involvement of the traps for the purpose of stabilization, especially across the shoulder girdle.
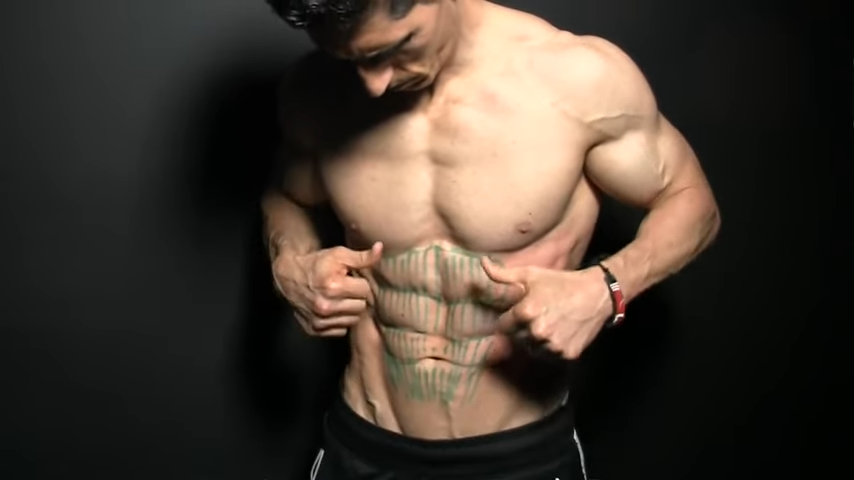
ABDOMINALS
You’re not going to build six-pack abs with regular deadlifts, but you’ll certainly see a difference in core strength.
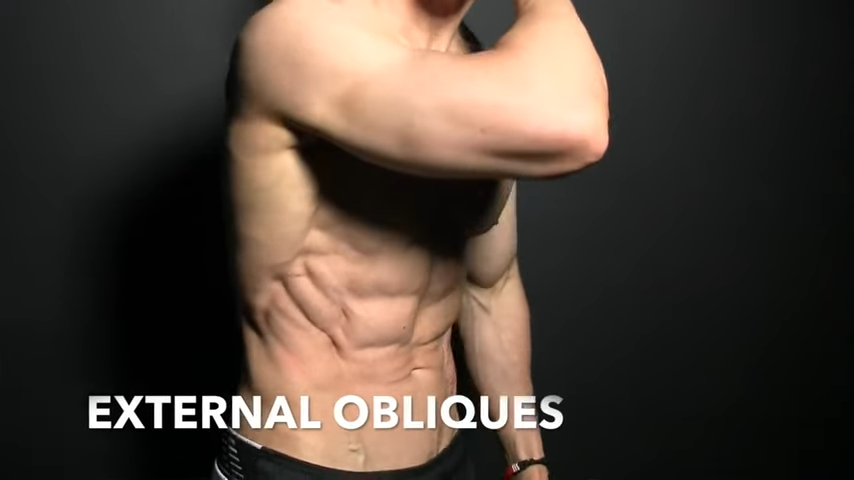
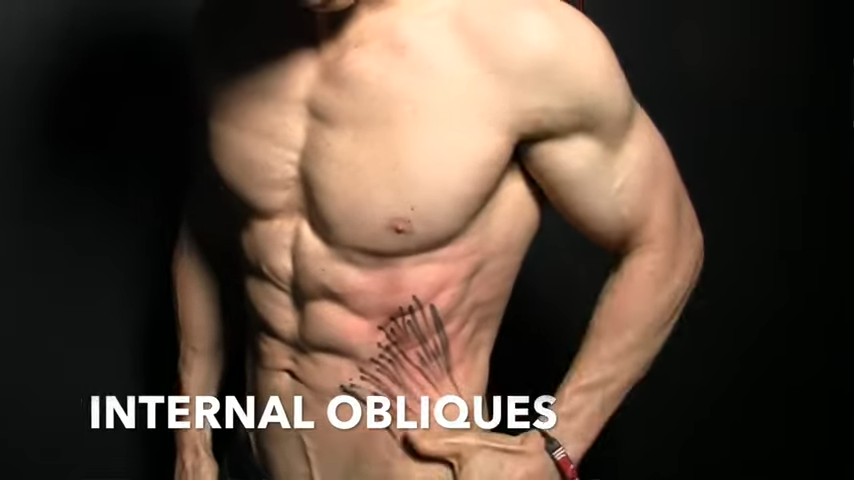
When you deadlift, you’re directly activating the entire core throughout the entire movement – abdominal muscles, obliques, lower back, and glutes. The abs are there to support your lower back, ensuring you maintain proper form and posture for injury prevention.
EXTERNAL OBLIQUES
INTERNAL OBLIQUES
MUSCLES WORKED IN THE DEADLIFT:
LEGS (QUADS & HAMSTRINGS MUSCLE)
- Vastus Medialis
- Vastus Intermedius
- Vastus Lateralis
- Rectus Femoris
- Biceps Femoris
- Semitendinosis
- Gluteus Maximus & Medius
- Adductors
BACK
- Latissimus Dorsi
- Lower Back & Erector Spinae
- Trapezius
ABS
- Rectus Abdominis
- External Obliques
- Internal Obliques
3) HOW TO DEADLIFT: THE WARM UP
I know, I know – You want to jump right into your deadlift program, but let’s back up a second here.
All good deadlift sessions start with how you get into a setup position to prepare your body to do this essential movement.
And I want to share my personal favorite ways for getting ready to deadlift. These stretches help me get loose and limber and put me in a stronger position to perform deadlifts well.
After you set up your deadlifting station, I want you to take a wide stance and put your feet up against the insides of the plates.
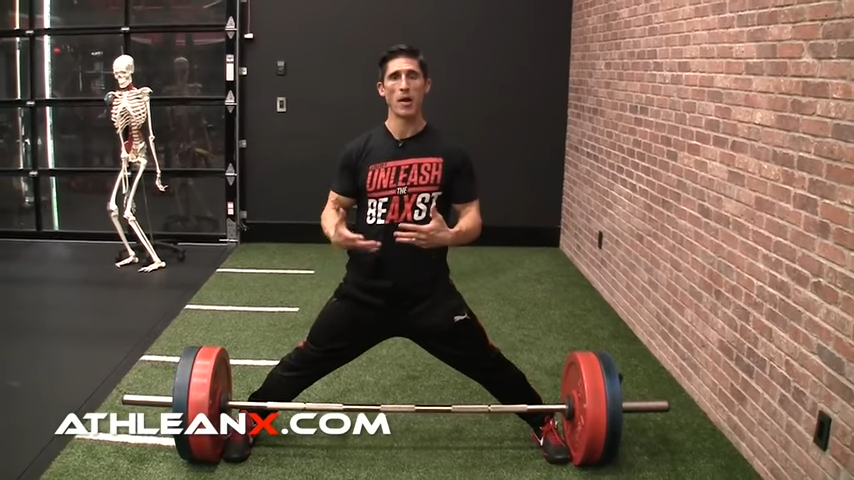
STRETCHING THE ADDUCTORS
You’re going to use them to stretch out your adductors in your groin. Why is that?
Well, thanks to the muscle breakdown above, you now know that the deadlift activates the adductors when you drive your knees out.
And it’s going to be important that you have adequate flexibility through your adductors to perform the deadlift exercise.
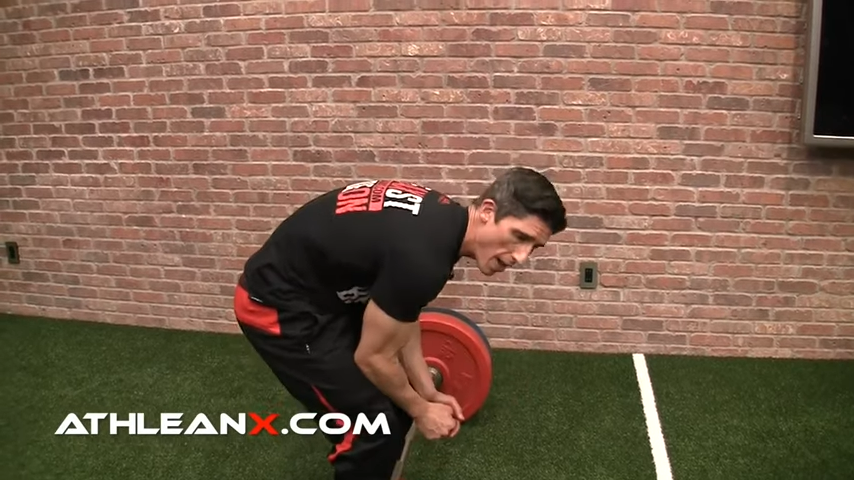
ENGAGING THE HAMSTRINGS AND PELVIS
Next, I want you to practice engaging the hamstrings and putting your pelvis in the proper position.
Lean forward where you would normally grab the bar and try to get yourself into an anterior pelvic tilt.
Keep your hands on the bar and your head up as you rotate your pelvis all the way down until it’s facing the ground. Look straight ahead and feel the stretch in your hamstrings.
I want you to really focus on the stretch in all those attachment points in your pelvis.
DEADLIFTING IN SECTIONS
Finally, I want you to perform a pre-deadlift movement pattern on all of your deadlift days before moving to heavier loads. This is great deadlift practice!
First get your body in position with feet shoulder width apart. You start with your hands on your thighs and do not remove your hands from your legs for the duration of this dynamic stretch.
First, focus on nothing but hip hinging. Slide your hands down from the hip muscles to the knees only. Do not bend your knees.
If you performed the stretches mentioned above, you’ll notice that the hip hinge feels really easy now.
Perform 10 hip hinges.
From here, maintain a strong low back and keep the lumbar spine neutral. Let your hands drop straight down by bending nothing but the knees.
You slide your hands from your knees to your feet via the shins.
Perform 10 shin sliders.
Work on going back up and feeling the first few inches of this. It should feel a lot like a leg press.
Perform 10 mini leg presses.
Now, put everything together and drive your hips forward as you slide your hands back up your body.
Perform 10 full bodyweight deadlifts.
Just use that movement pattern until you feel as if you’ve got it down, and then you’re ready to start lifting the bar for those deadlifts.
4) HOW TO DEADLIFT: THE DEADLIFT SETUP
Now we’re ready to actually approach the bar and set up for correct deadlift form.
Make sure you avoid heavy weights at first. I know the temptation is there to load it up with heavy weights but go with lighter weight until you master the proper form.
If you can, use weight plates that are all the same height and size.
The starting position begins with your feet in standing position.
There are actually two things you want to focus on when setting up your feet: width and depth.
FEET WIDTH
How far apart should your feet be for deadlifts?
The width of your feet for the deadlift should be the width of your hips for perfect form.
For a lot of lifters, this could be feet shoulder width apart, but don’t go by your shoulders – Focus on hip width.
For someone that doesn’t have a really wide physique like me, that could be pretty narrow.
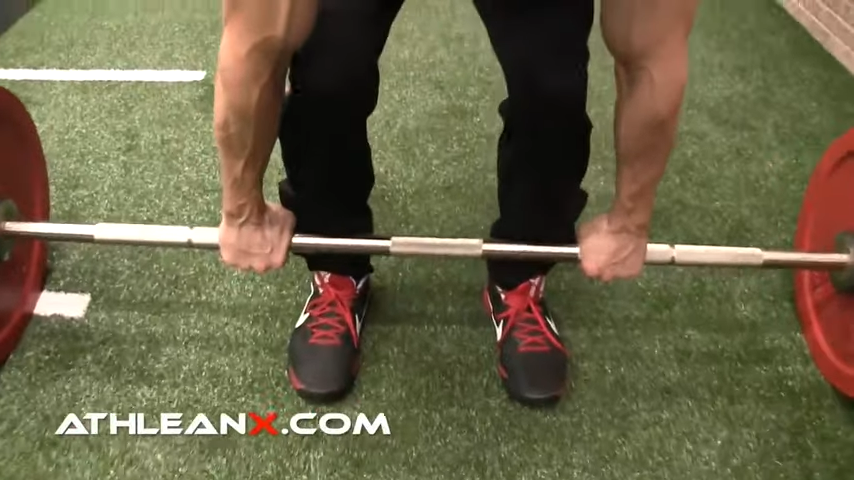
You’ll notice that I’m actually inside the non-knurled areas of the bar.
But for you, that could be a little bit wider. Either way, you just want to make sure that your feet are hip width apart for deadlifts.
FEET DEPTH
Now, how far under the bar should the feet go for deadlifts?
I like to use the following cue: Can you see your laces on the other side of the bar? If the bar is covering your laces, then you have to adjust.
Once you can see your laces on the other side of the bar, your shins should be about one inch away from the barbell. This is the proper position.
TYPE OF GRIP
With the feet in the proper place, we can focus on the proper placement of the hands with this grip guide for deadlifts.
There are two elements I want to cover here: the type of grips as well as the width of the grips. Grip strength and grip muscles do play a role, but this is something that you can work on and build up over time.
First, let’s talk about the type of grip positions.
You have three different options when it comes to how you’re gripping the bar.
Most commonly, you probably see the double overhand grip. This is the grip for beginners.
This double overhand grip type gives you the most balanced distribution of your upper body so you don’t create muscle imbalances.
The second option that you’ll see is the choice that many people make when their grip starts to fail before the working muscles.
I’m talking about a mixed deadlift grip.
The mixed grip is one underhand grip with one overhand grip. Think about how you would hold a baseball bat before hitting a ball.
The mixed grip allows the bar to stop rotating, which creates more stability.
The problem with a mixed grip is muscle imbalances. In order to eliminate some of the muscular imbalances that could occur, you would want to alternate the grips here.
In other words, for one set, have a mixed grip in which your left hand be the over hand, and in the next set, switch your mixed grip to right hand as the over hand.
Finally, you have a third option, which tends to be the option chosen by more advanced lifters. That would be a hook grip where you take your thumb, wrap it around, and then you wrap your fingers over your thumb.
Just a heads up: This hook grip is going to be very uncomfortable for beginners until they build up grip strength.
If you’re going to do this grip, you’re going to want to build up to this by starting with light weights. Eventually, you’ll get used to the discomfort, but start light in the meantime.
Without a doubt, this will be your most effective grip, and it will help you to avoid muscle imbalances that the mixed grip could promote.
GRIP WIDTH
Now, should you use a wide grip for deadlifts?
As far as how wide I want my hands on the bar, that brings up an important topic.
A lot of people think that the mixed grip is what is responsible for leading to bicep tears during the deadlift. Bicep tears actually happen when you take a wider grip than your body can handle.
I’ve found that people will sometimes want to grab the bar wide. When your grip is wide, you’re effectively shortening the length of your arms.
In general, by widening your grip, you lose about two to three inches of arm length. And this means you’ll need to go lower and deeper in your deadlift for every single rep. This is concerning because most people don’t have the mobility to go down those extra two to three inches.
As a result, you’re increasing the likelihood that you’re going to screw up the heavy lift by going wider and you could potentially hurt yourself.
So, the proper position for grips in deadlifts is to have your hands about an inch outside of your feet.
This slightly more narrow grip ensures that your hands won’t be dragging up the sides of your thighs.
But more importantly, if your arms are too close in this narrower grip, when you push your knees out, this will force you to perform a slight bend in the elbow.
And guess what, this will put a great deal of stress where it’s not wanted: in the bicep.
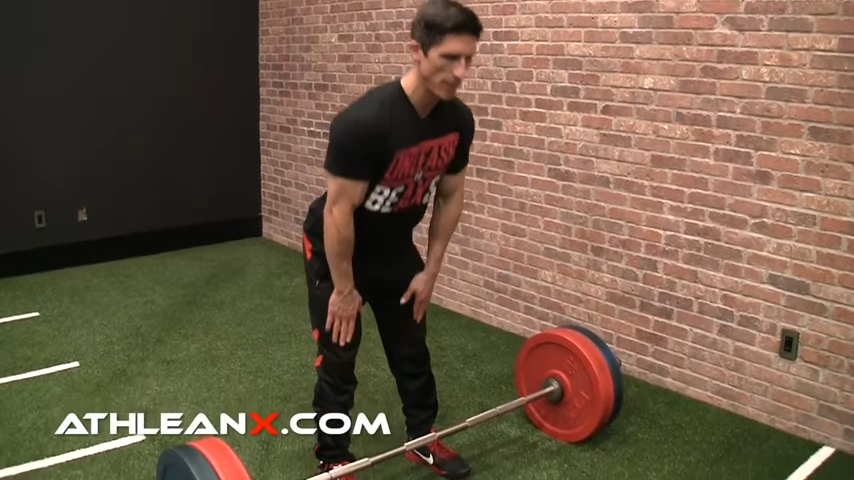
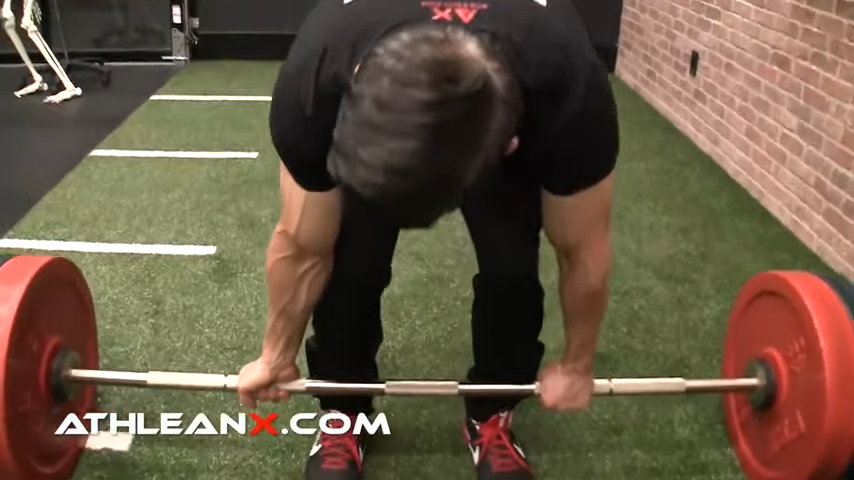
LOWER BACK PLACEMENT
Okay, we’ve got the feet in place, we’ve got the hands in place, and now we’ve got to get our body in place for correct form.
If you’ve followed what I’ve said to this point, the only goal you should have is to get your low back in the proper position to execute these heavier lifts.
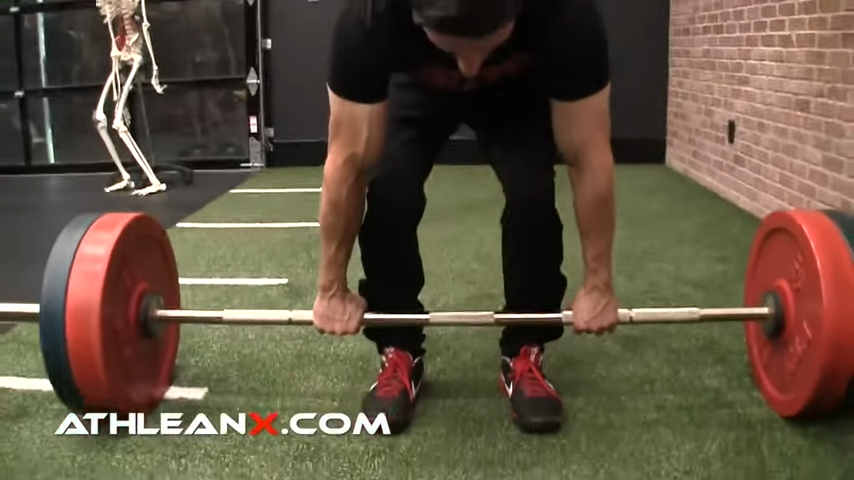
First, drive your chest upright, shoulders back, shoulder blades flat and your hips down. Also, keep your core muscles tight.
From here, you’ll feel the lats activating to actually pull you into that proper position. As you do this, think about performing a straight-arm push down because this will bring the bar further in contact with your shins.
Also, a side note, you want the bar against shins, but you don’t want to be cutting into your legs and earning yourself some bloody shins.
Consider wearing pants when you deadlift to avoid bloody shins.
Now, you DO NOT want a rounded lower back. You want to keep the lumbar spine neutral.
As long as the low back is in the proper position, it doesn’t matter how angled your torso is to the ground.
The angle of your torso is more of a factor of leg length and torso length, so everyone’s body is going to be slightly different.
5) HOW TO DEADLIFT: THE PULL
Finally, we are ready to pull the barbell for deadlifts.
But before you do that, you need to understand that this part of the deadlifts exercise is broken down into two parts.
Standard Barbell Deadlifts start as a leg exercise and finishe as a back exercise.
So, I’m going to break this down into the ground to the knee, and then from the knee up, focusing on the proper range of motion for each.
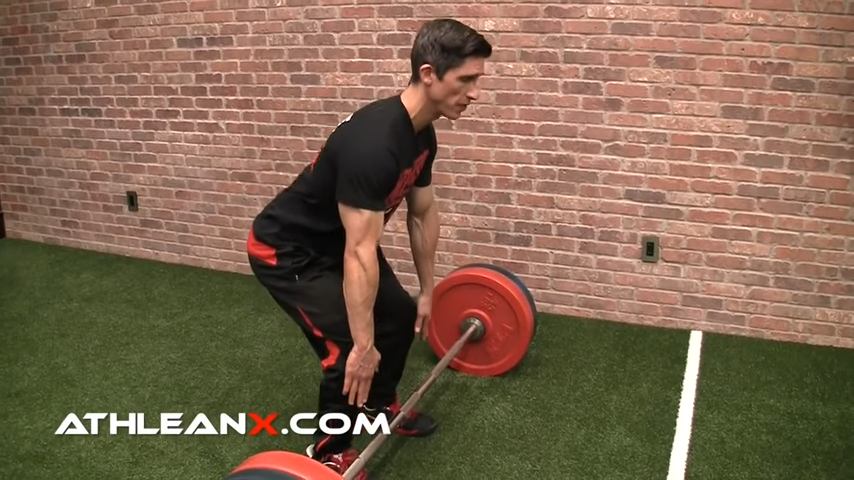
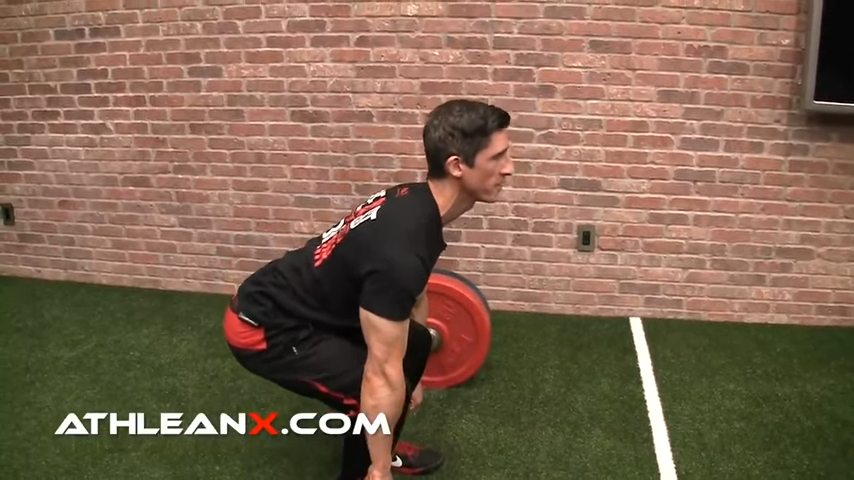
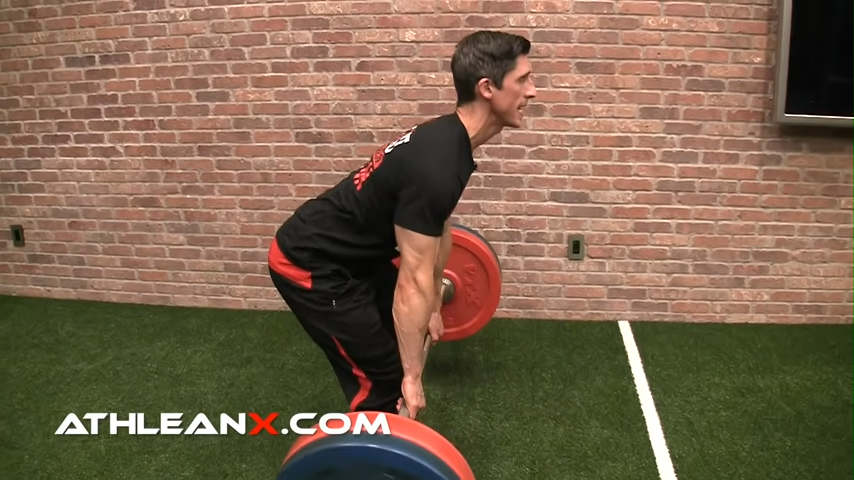
PART ONE: GROUND TO KNEE
The conventional barbell deadlift starts with a push of your legs off the ground until your hands are at the level of the knee.
Once your chest is out, your shoulder blades are together, your arms are engaged, and your lower back is down, you’re essentially going to perform a standing leg press.

You will “leg press” to the height of your knee, pushing with your legs, into the ground, as hard as you possibly can. Don’t forget to maintain contact with the bar against shins every inch of the way.
If you start to see space between the bar and you, it’s likely that you’re not doing what I said before, which is keeping the lats engaged.
Here’s another way you can look at this part of the traditional barbell deadlifts exercise, and I think it’ll look pretty familiar to those of you who love the leg press machine.
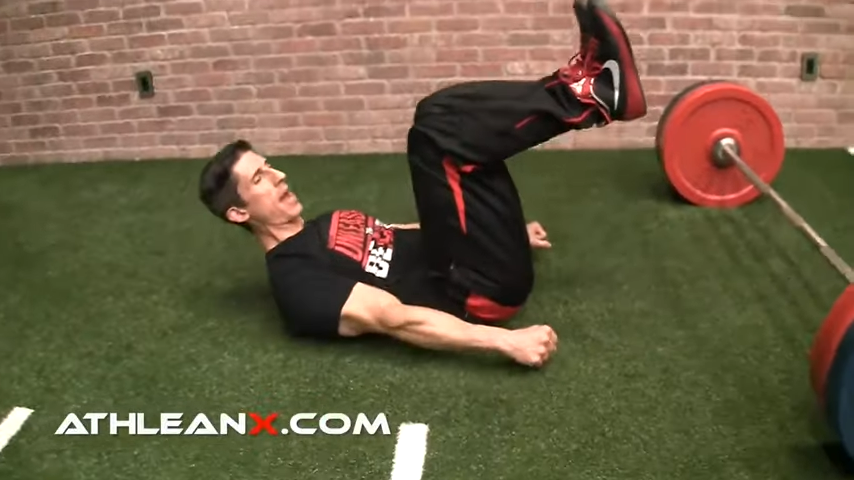
Lie on the ground and imagine you are using a leg press machine. Put your hands down where the handles would normally be and put your feet where the plate would be. From here, push away with your legs.
All that is happening during the first part of the pull of the deadlift.
You don’t bring your body closer to your thighs in order to feel like you’re pushing. You take your feet and push them away.
So, the same thing would apply during conventional deadlifts.
Again, the first part of the pull of conventional deadlifts is focused in the legs, NOT the hips.
Lifting with the hips throws your low back into a rounded bad position.
Which, again, is asking, and begging for a lumbar disc issue.
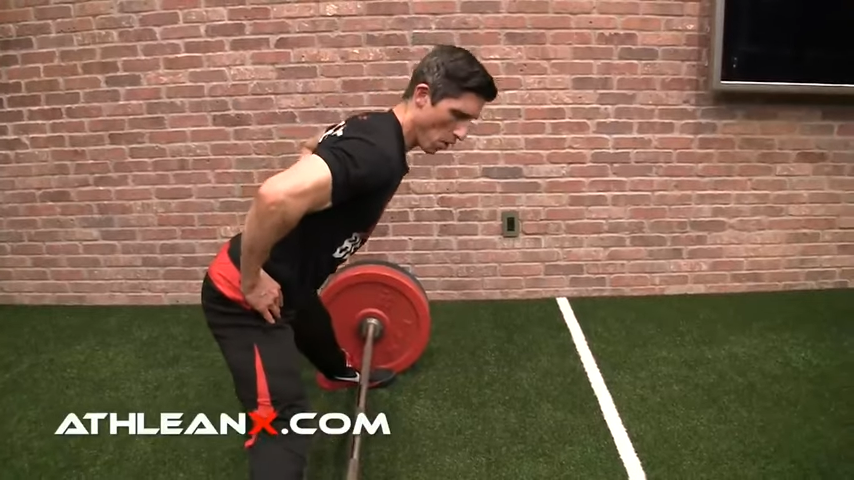
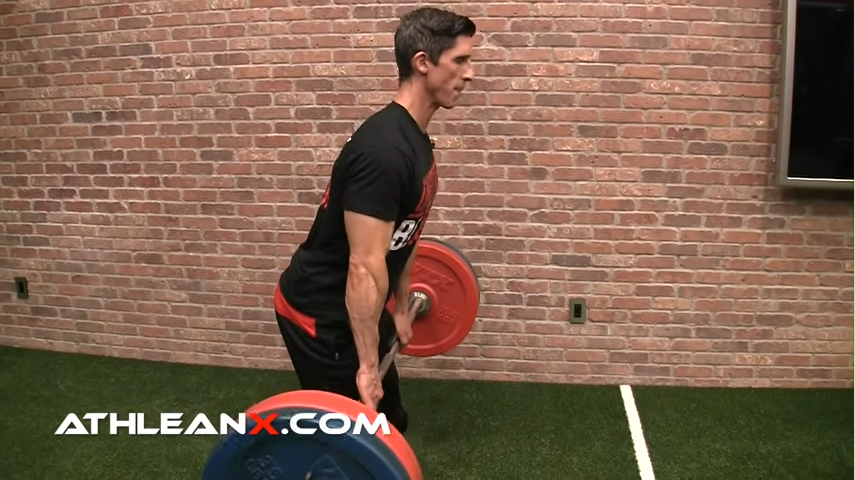
PART TWO: KNEES TO HIPS
Let’s take a look at proper hip position. Once you get to the height of your knees, that’s when your hips will start to kick in.
Then this will become a tremendous upper body exercise that hits lots of muscles in the back.
Drive through using the strong muscles of the hips. You’ll also use your low back extensors and traps to stabilize the bar.
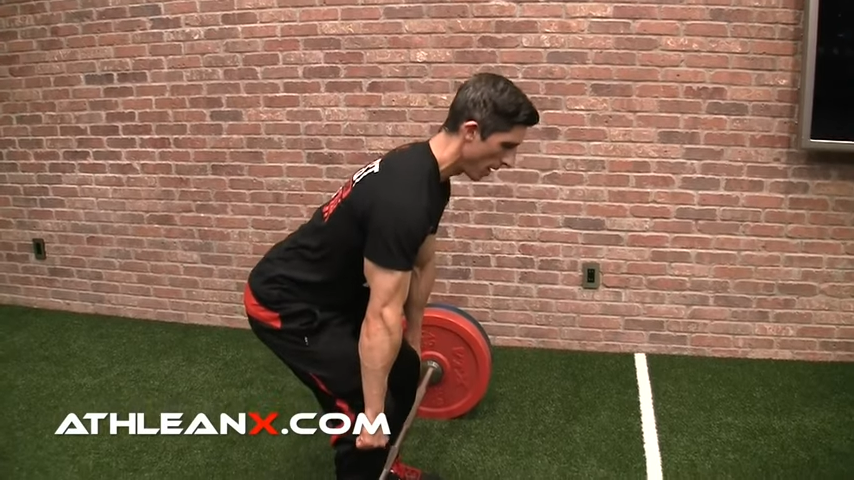
You’ll notice if you do this right, the timing is simple because you’re using your knees as the visual cue of when to kick this in.
As soon as your hands are at the level of the knees, boom! Drive your hips forward and bring the barbell to hip height until you are in upright position.
Again, keep that barbell right against your shins and thighs during conventional deadlifts.
That should be the goal on every, single rep.
6) HOW TO DEADLIFT: BAR TO THE GROUND
Now, on the way down you want to reverse the motion.
Start with the basic hip-hinge movement.
Right to the level of the knee, and perform a straight knee bend.
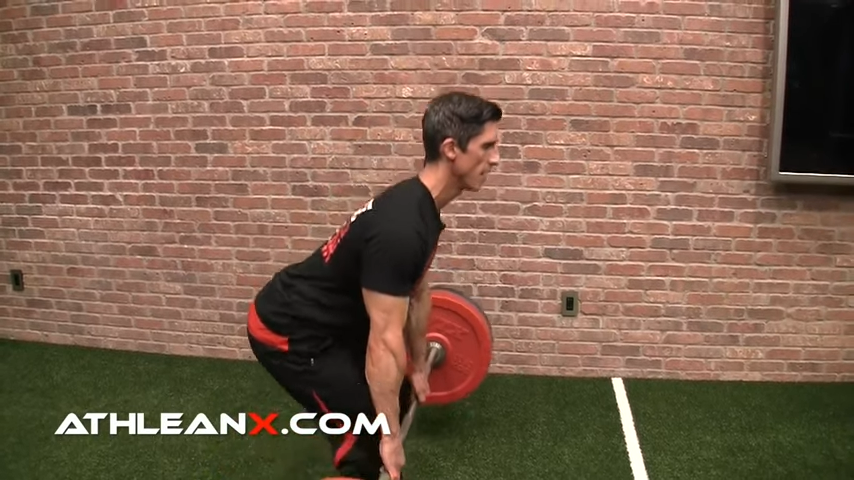
Again, once you get to the level of the knee, let the knees bend, and come straight down. You’ll see that the back stays right in the neutral position you need it to be.
HOW TO DO THE DEADLIFT:
- Warm Up: Stretch the adductors, engage the hamstrings and pelvis, and practice a few hip hinges
- Start in standing position. Place your feet hip width apart and grab the barbell with an overhand grip for beginners or with a hook grip if you are more advanced and prefer it. Position your hands at a width of about one inch outside of your feet, ensuring you have a balanced load.
- As you prepare to lift, drive your chest upright, shoulders back, shoulder blades flat and your hips down. Also, keep your core tight. Be sure your back is NOT rounded.
- With chest out, shoulder blades together, arms engaged, and lower back down, press through your legs into the full as you pull the bar upward, keeping the bar close to the shins until you reach approximately knee level.
- Once you reach knee level, drive through using the strong muscles of the hips. You’ll also use your low back extensors and traps to stabilize the bar. Drive your hips forward and bring the barbell to hip height until you are in upright position.
- Return to the starting position by reversing the hip hinge movement until the bar reaches your knees, and then performing a straight knee bend until the bar reaches the ground.
- Take adequate rest between sets of deadlifts.
Guys, on paper, deadlifts can seem pretty intimidating, especially when you see all of the components to them.
But once you go step by step in your beginner deadlift sessions, you’ll see that’s it’s actually a basic movement AND one of the safest compound movements to do.
Catch is that you have to do normal deadlifts with proper form to avoid risk of injury. Skip the heavy loads and focus on proper form until you feel comfortable with the deadlift. Refer back to this guide on deadlifts every time you work on your deadlift training program.
If you’re looking for a training program that takes all the details into account to help you build muscle and improve performance, check out our ATHLEAN-X programs.
- The heavy deadlift is a compound lift to include in your workout routine, but it’s commonly performed with bad form. However when performed with proper form, the regular deadlift is an excellent exercise for strength, power and muscle size.
- Before deadlifting, it is a good idea to use a little bit of preparation and be sure to get yourself into a strong position to perform on deadlift days. Stretch between the plates then perform each movement of the deadlift with body weight only for 10 deadlift reps each.
- Begin the setup position by placing your feet hip width apart, and make sure the ties of your shoelaces are visible beyond the bar when you look down at your feet.
- The hands should be just outside of your legs, with enough room to make sure that you aren’t scraping your arms against the outside of your legs on the way up.
- A strong grip can either be a double overhand, mixed grip, or hook grip.
- Get into proper position with your chest up, shoulders back, hips down, and arms engaged.
- Push through your feet while keeping your hips down during the first part of the movement. Once you reach the level of the knee, fire your hips forward as you drag the bar up your shins and onto your thighs.
- Keep pulling your arms down to your sides which will help to keep the bar close and will engage the lats to ensure stability of the shoulder girdle throughout the deadlifts.
- Reverse the movement back to the ground by first hinging at the hips until the bar is at the level of the knees and then simply bending the knees to get the bar back to the ground.
DEADLIFT FAQS
- To perform the dead lift, place your feet hip width apart and grab the barbell with an overhand grip for beginners. Position your hands at a width of about one inch outside of your feet.
- As you prepare to lift, drive your chest upright, shoulders back, shoulder blades flat, neutral spine and your hips down. Also, keep your core muscles tight. Be sure your back is NOT rounded.
- With chest out, shoulder blades together, arms engaged, and lower back down, press through your legs into the full as you pull the bar upward, keeping the bar close to the shins until you reach approximately knee level.
- Once you reach knee level, drive through using the strong muscles of the hips. You’ll also use your low back extensors and traps to stabilize the bar. Drive your hips forward and bring the barbell to hip height.
- Return to the starting position by reversing the hip hinge movement until the bar reaches your knees, and then performing a straight knee bend until the bar reaches the ground.
To ensure safety of deadlifting, especially if using heavier weight, you need to use proper form. To be sure that your lumbar spine is not rounded but in neutral position. For the dead lift, you should not do more than 4-6 sets per week. More than 2 deadlift sessions per week might not allow your muscles to recover, repair themselves and grow. Follow these guidelines to see serious muscle gains from your deadlifting.
Three important keys to proper dead lift technique are maintaining a neutral spine (not rounded), keep the core tight and pushing down through the legs and feet to create more leg muscle activity. Be sure to observe these 3 keys during all of your deadlift sessions, particularly before moving on to heavy loads. Follow these guidelines to see serious muscle gains from your deadlifting.
The deadlift is a great beginner exercise, but work on perfecting your form before moving to heavier weight. Deadlift practice is important for beginners. You'll want to perfect your hip hinge, keeping your spine neutral and pressing down through the legs during your deadlift sessions. The deadlift is a great exercise for increasing muscle fibre size and also muscle strength gain in beginners.
The deadlift is OK for beginners, but be sure to work on perfecting your form before moving to heavier weight. The deadlift is a valuable tool for any person looking to build size and strength, but be sure to pay attention to keeping a neutral spine, doing a proper hip hinge and pressing down through the legs during your deadlift practice. By practicing deadlifts with proper form, you'll be on your way to big-time muscle and strength gains!
A beginner should adopt a deadlift training program of no more than 1-2 sessions per week, and 2-3 sets of deadlifts per session. During your deadlift practice, be sure to practice proper form on every single lift. Effective deadlifting requires ensuring that the spine is neutral, the hip hinge is done with proper form, and that you are pressing down through the legs and feet on every rep, especially before working with heavy loads.
The best type of deadlift for increases in muscle mass is the traditional deadlift, particularly done with heavier additional weight. Effective deadlifting requires maintaining a neutral spine, performing a proper hip hinge and pushing down through the legs and feet into the ground. This is the best type of deadlift for building serious lower body strength.
REFERENCES

Jeff Cavaliere M.S.P.T, CSCS
Jeff Cavaliere is a Physical Therapist, Strength Coach and creator of the ATHLEAN-X Training Programs and ATHLEAN-Rx Supplements. He has a Masters in Physical Therapy (MSPT) and has worked as Head Physical Therapist for the New York Mets, as well as training many elite professional athletes in Major League Baseball, NFL, MMA and professional wrestling. His programs produce “next level” achievements in muscle size, strength and performance for professional athletes and anyone looking to build a muscular athletic physique.


")


")

")


")


