I’m pretty sure that everyone has some version of this story:
You walk into a gym for your first time and watch people easily perform pullups. I mean everyone seems to know how to do one. From the kids to the old people.
You stand beneath the pull-up bar, reach up, and give it a go. You start pulling and you immediately regret your decision.
You feel like everyone in the gym is watching you as you kick and squirm your way up the bar. You kinda sorta complete one rep and let yourself drop back down.
Embarrassed, you walk away from doing an actual pull-up and stick to lat pulldowns. Sound familiar?
Pullups are one of those exercises that everyone seems to know how to do except you…
Well, that changes today with this pull-up guide.
I want to show you guys exactly how to do a basic pullup with correct form, so you never have to live through that gym fail ever again.
BENEFITS OF PULLUPS
Before we get into the nitty gritty of proper form, let’s talk about WHY you should be including pullups in your workout routine. After all, if you’re not convinced, you might not give it your all.
A pullup is a bodyweight exercise that has been around for a long time. Pull-ups are one of the best upper body exercises for a few reasons:
1) NEUROMUSCULAR CONNECTIONS
First, they strengthen your neuromuscular connections.
When you first started to exercise, how awkward did you feel? Almost like your upper body had no idea what the lower body was doing?
Over time, the more you exercised, the more in tune with your body and health you became. This is what happens when you strengthen your neuromuscular connections.
And the pullup is a great upper body movement for doing just that because it activates the entire upper body. It also incorporates the lower body as we’ll see below.
2) UPPER-BODY STRENGTH
Speaking of the upper body, the pullup helps to build true muscular strength.
From your back and shoulders to your arms and a strong core, the pullup exercise increases raw strength gains. It also improves your grip strength.
3) BUILD LEAN MUSCLE
While you’re increasing muscular strength with the pullup, you’ll probably notice something else happening too.
You’re building a decent amount of lean muscle mass in all the major muscles in your back, latissimus dorsi, shoulders, and arms.
The pullup allows you to master your body weight and play with the tempo to increase intensity, making it an excellent muscle building exercise.
4) WEIGHT LOSS
From building upper body strength to increasing muscle mass, the pull-up is also an excellent way to burn excess calories and promote weight loss.
As a compound exercise, the pull-up activates most of the upper body. And this greater demand for fuel can support your goals of getting lean.
5) IMPROVES OTHER EXERCISES
Finally, when you focus on proper pull-up form, you’ll build technique that translates into other areas of fitness, especially other challenging exercises.
For example, when you focus on improving your deadlifts, you’ll notice a boost in your pullups, and vice versa.
The pullup is a classic and it’s been around for decades as a go-to upper body strength training exercise for a reason: it works really damn well.
The caveat here is that you have to perform it with proper form.
4 TIPS FOR HOW TO DO A PULLUP FOR BEGINNERS
Here’s a question I get asked a lot.
What if you really want to do a pullup but you’ve never been able to because you’ve never practiced.
I definitely understand this dilemma. You feel like it’s impossible, but I can assure you that it’s not. You just have to build up that fitness level.
Here are a few ways you can use the perfect form and technique I’m about to teach you while giving yourself some options for an assisted pull-up.
1) CHAIR OR BOX FOR SUPPORT
First, you can use a chair or a box to perform assisted pull-ups.
Again, you MUST know how to do a pullup. You need proper form here as much as without a chair. The chair or box is just there for support.
You can also use that chair or box to focus on negative sets.
2) NEGATIVE SETS (NEGATIVE PULL-UPS)
Also called eccentric training, a negative set is when you get help during the lifting portion, but the lowering portion of the exercise is all you.
In this case, starting position is standing on the box or chair to lift your chest to the pull-up bar, then extend your legs out in a hollow position and slowly lower yourself down.
The goal is to have an extended bar hang time by slowly lowering yourself.
Step back on the box or chair and do it again.
3) PERFORM PULLING EXERCISES
Another way to get yourself closer to being able to perform a pullup is to focus on similar pulling exercises, using weight to build your back, shoulder and arm strength.
There are different effective exercises that focus on pulling but they all hit the same muscles.
By strengthening these muscles with weight, you are getting one step closer to being able to lift yourself up to that pull-up bar without assistance.
Here are some of the best pulling exercises you can incorporate into your workout routine:
- Bent-over dumbbell rows
- Bent-over barbell rows
- Dumbbell Romanian deadlifts
- Barbell deadlifts
- Rope pulls
Depending on your level of experience, you might want to start with a resistance band if you have access to bands to ensure you’re getting the proper form down without overloading a barbell.
If you use a resistance band, move slowly and through the entire range of motion.
Make sure you feel confident with proper form before progressing to a weighted barbell.
4) PRACTICE, PRACTICE, PRACTICE
Finally, if you don’t try, you’ll never succeed.
It might not be pretty, and you might not get far at first, but you have to practice what you want to achieve. And what you want to achieve is perfect pull-up form.
I’d recommend trying to do pull-ups three times per week in your fitness plan, but you can use different pull-up variations.
For example, on Monday, you can perform negative pull-ups; on Wednesday, you can try assisted pullups, and on Friday, give it your best effort and try to perform a single (or more) classic pull-up.
Guys, if you practice pull-ups with the proper form that I’m about to breakdown for you, I promise you’ll be doing more advanced pullup variations in no time.
Some examples of advanced pull-up moves include weighted pull-ups, strict pull-ups (time under tension pullups), and L-sit pullups.
But before you think about trying weighted pull-ups, you must first master correct form for the bodyweight version.
Okay, now let’s get started with how to do a pullup… a proper pull-up.
HOW TO DO A PULLUP: THE PREREQUISITES
To kick off this pull-up guide, I’m going to cover several prerequisites that you’ll want to change or improve.
I’m covering these first because if you spend time fixing them, you’ll notice an amazing difference in your ability to do a pullup.
Before you even jump up to the pullup bar, I want you working on these things:
1) STRONGER ABS
To start, it’s going to be important to strengthen your abs.
Your abs are heavily relied upon to create stability and stillness under the pullup bar when you hang on it.
I’d recommend incorporating more hanging ab exercises into your routine, and this will start to strengthen your core in that environment.

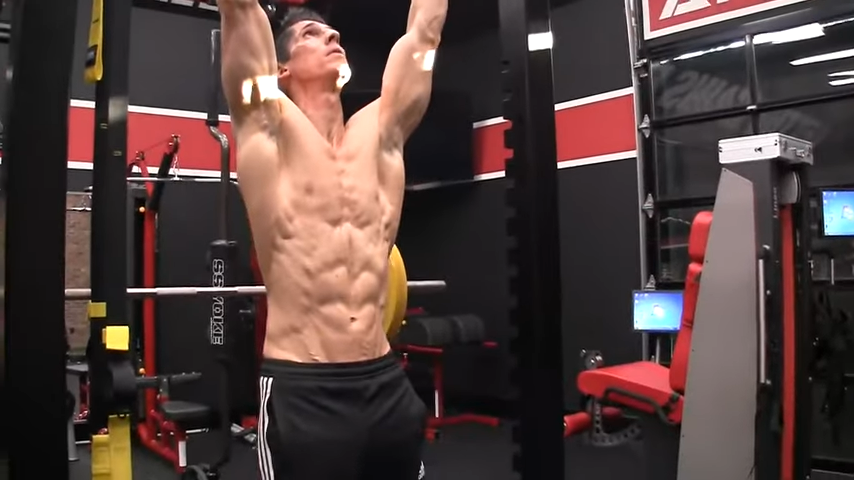
You’re going to have a tremendous transfer right over to the pull-up when you decide to do them.
Some exercises you can do to strengthen your abs and improve your stability while hanging from the bar include the hanging knee raise, hanging leg raise, and hanging oblique knee raise.
2) DEADLIFT
Next, you should work on strengthening your deadlift. As you’re working on increasing your pulling strength, that will transfer to the pullup.
You might be thrown off a bit since the deadlift pulls from the floor and the pullup is from overhead.
In this case, pulling is pulling.
The stronger you are at pulling, the better you’re going to be at pull-ups.

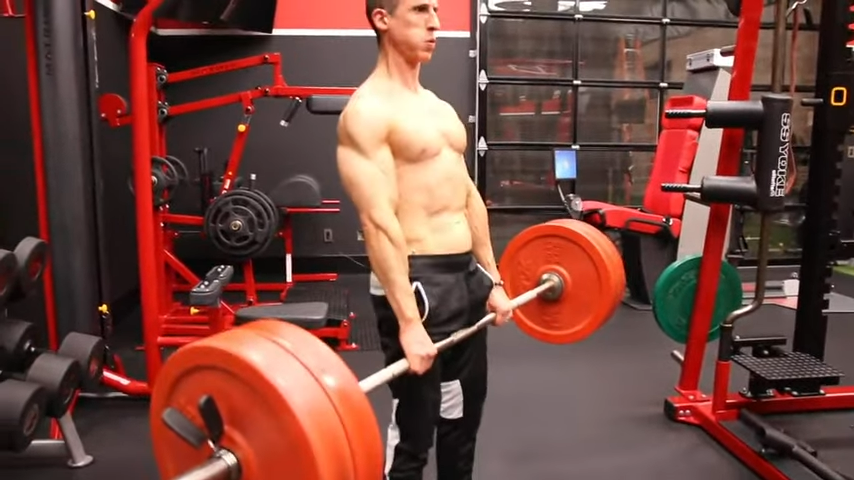
I can’t stress this enough: A deadlift won’t help you if you don’t perform it correctly.
Here’s a quick checklist on proper form, but I would encourage you to read my article on how to do a deadlift.
- Push through your feet while keeping your hips down.
- Pull until your hands are at the level of the knee.
- Fire your hips forward as you drag the bar up your shins and now onto your thighs.
- Keep the bar close and this will engage the lats to ensure stability of the shoulder girdle throughout the lift.
3) STRENGTHEN YOUR SCAPULAE
Third, scapular strength is one of those things that people tend to overlook.
And that’s not a good thing because your scapulae play a critical role in doing pullups correctly.
Your scapulae need to be strong and stable.
One of the best ways you can do this is by improving your straight-arm scapular strength.
A great exercise for this is the straight-arm pushdown.

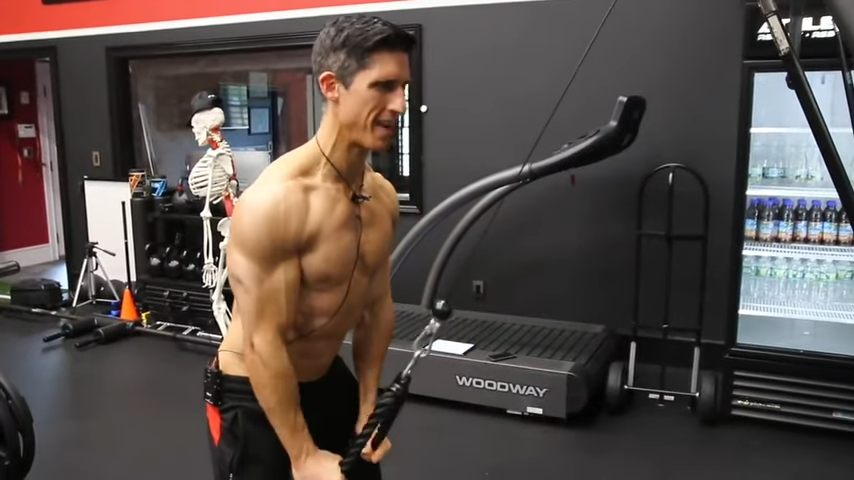
Include this in your routine and I promise you’re going to develop a lot more stability through your scapula.
And that stability is going to transfer over to your pull-ups.
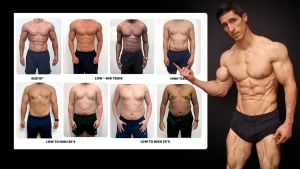
4) KEEP YOUR BODYFAT IN CHECK
Finally, the last prerequisite is your body weight to strength ratio.
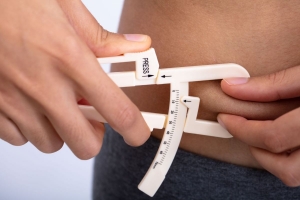
Carrying excess bodyfat will make the pull-up movement incredibly difficult.
We know that a guy who’s heavier and doesn’t have the strength to match that extra weight is going to have incredible difficulty doing pullups.
This is why having a good strength to bodyweight ratio will always be in your favor.
Work on getting that bodyfat percentage down and this will improve your ability to knock out more pullups than you can right now.
CORRECT PULLUP FORM
Now it’s time to discuss what you actually need to do when you put those hands on the bar.
Let’s dive into the setup of the pullup, and the best pull-up techniques.
Everything starts with your grip, elbow positioning, and what to do with your legs.
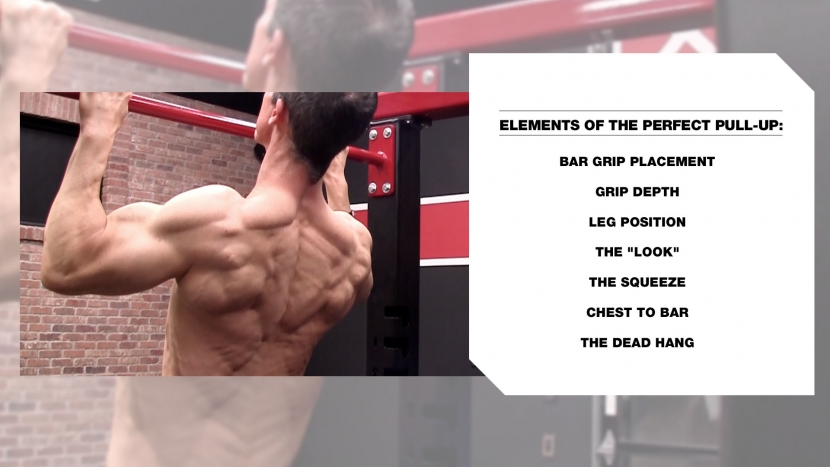
1) BAR GRIP PLACEMENT
When you get ready to do a pull-up exercise, how are you grabbing the bar? With an underhand grip or an overhand grip?
If you’re using an underhand grip (supinated grip), you’re doing a completely different exercise. And while chin-ups are a great exercise, it’s not our focus for this article.
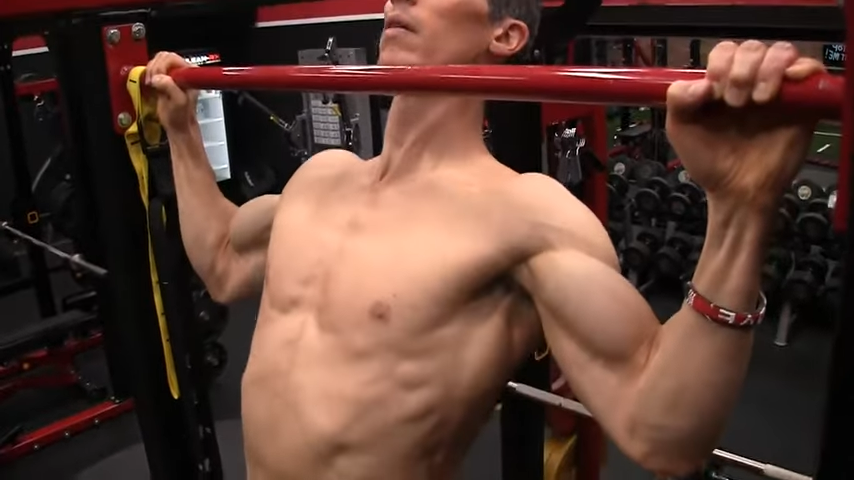
You should be grabbing the bar with an overhand grip (pronated pullup grip) just outside shoulder width as this will give you the optimal pulling position for a proper pull-up.

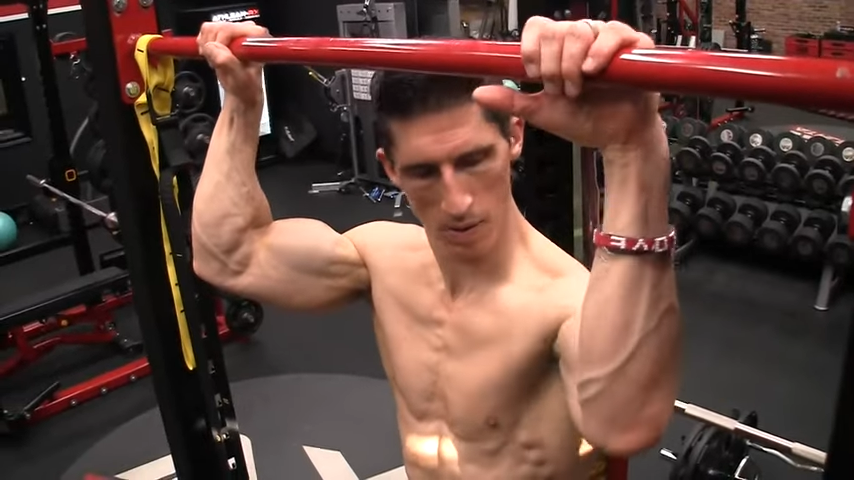
Placing your shoulders in the right position helps to do a few things:
First, it ensures that you can get your elbows out in front of your body.
Second, it will draw the shoulder blades back and put a bit of stretch onto the lats that will allow us to gain more power from them.
Finally, it takes some of the smaller muscles that are ill-equipped to do what we’re trying to do out of the equation.
If you go too narrow, this can cause the wrong muscles to take the brunt of the work. It will also limit the number of pullups that you can do.

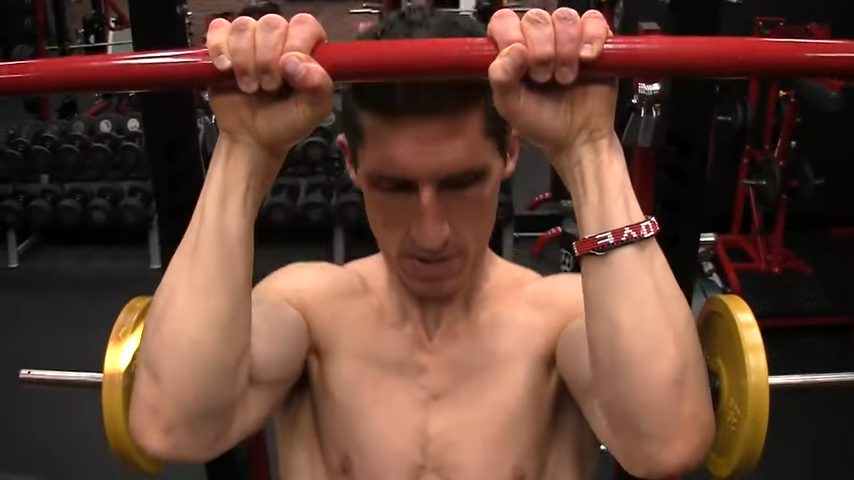
And if you go too wide, your elbows will go out toward the sides instead of in front of your body.

2) GRIP DEPTH
The next thing we can do is talk about the depth of our grip, or where your hands are gripping the bar.
Two of the most popular ways to grip a bar are the hook grip and the deep grip.
The hook grip is when you place most of the effort into your fingertips, and while this might be okay for the short-term like a pull-up competition, it’s not recommended for the long term.

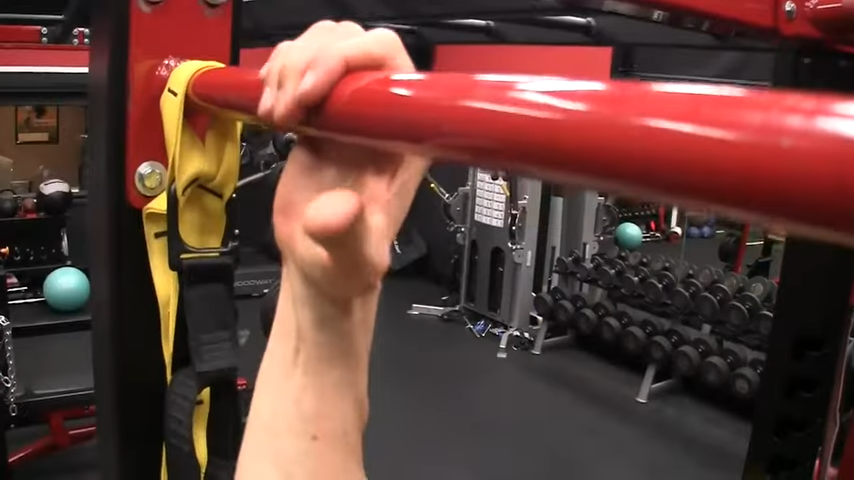
A hook grip allows you to do more pullups, but you’re inviting some long-term problems. You’re going to place too much stress on those deep finger flexors and medial elbow.
Eventually, this will turn into a stabbing pain of the medial epicondylitis.
But realistically, how often are you going to be in a pullup competition?
The truth is that you’re probably going to be doing pullups routinely as a part of your workout plan. What’s more, you’ll want to do them right and without irritation.
Sound right?
In this case, you’re going to want to grip a little deeper.

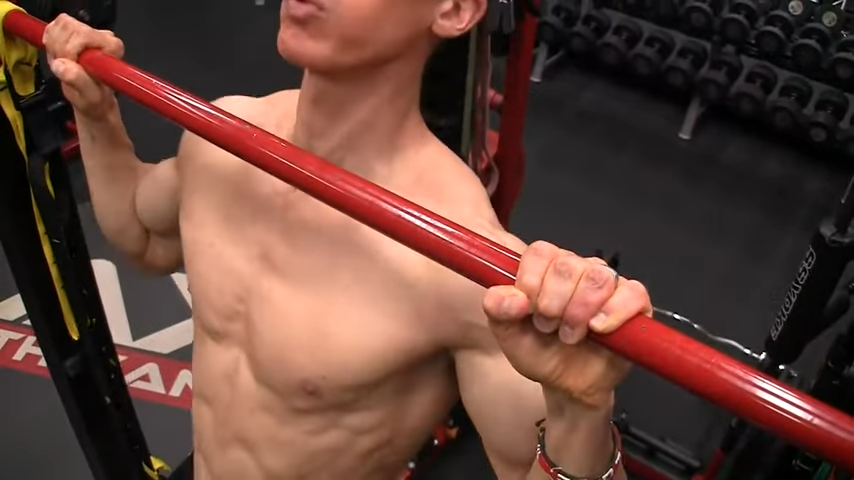
Make sure the bar is firmly against the palm and the thumb is lying over the fingers.
3) POSITION OF THE LEGS
This might surprise some of you but we’re going to talk about what to do with your legs.
“Wait, Jeff. This is an upper body exercise. What the hell do my legs have to do with this?”
Believe it or not, it matters.
Most people will bend their knees and curl their feet behind them as they try to do a pull-up movement. But this isn’t the optimal place to put your legs because you’re making it tougher for yourself.
Instead, you should place your legs slightly out in front of you in a hollow position.

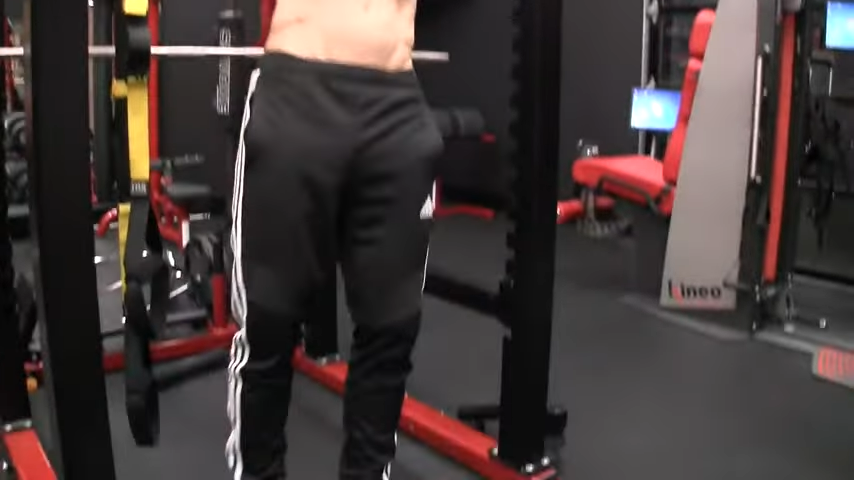
When you put your legs straight out in front of you, you are plugging a major energy leak.
It’s a miracle, if you’ve never tried it before, and I promise you’ll see instant changes in how many pullups you can do.
Here are a few pointers to keep in mind when doing a hollow position:
- Actively engage your calves by pointing your toes down toward the ground.
- Squeeze your quads and straighten your knees as hard as you possibly can.
- Squeeze your glutes.
- Tighten your abs.
Your whole body is one kinetic chain with that energy flowing up and down.
So, when you do this, you’re plugging all the potential places where the force that you’ll generate can leak out.
If you plug this energy leak, there’s nowhere else for that energy to go, other than right back up into the bar, down through your arm muscles.
And guess what. You’ll perform a better pull-up movement as a result.
HOW TO DO A PULLUP: THE PULL
Guys, get ready because now it’s go-time.
It’s time to jump into the actual repetitions of the pullup exercise.
1) THE LOOK
The thing you want to do first is look up, right at the bar.

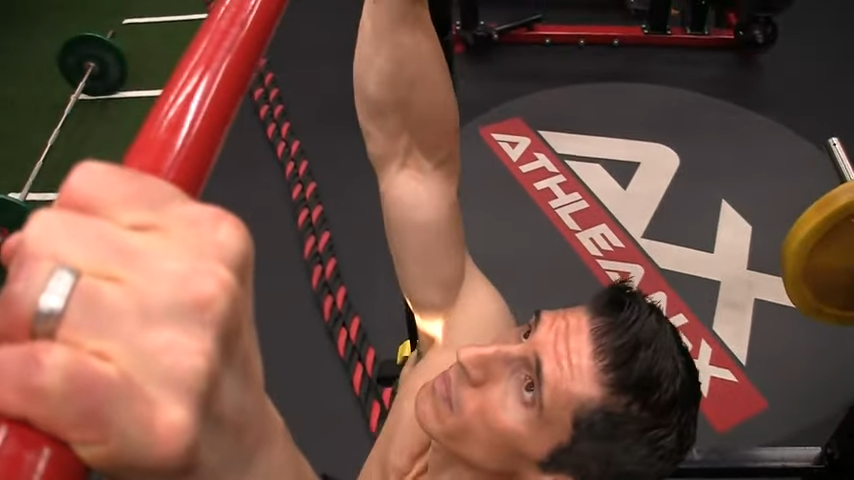
The reason for this simple change goes like this:
If you’re looking where you’re going, you’re going to get there faster.
But don’t think that you only need to pull to the height of your eye level. You still need to get that bar at least to your chin, if not to your sternum.
Don’t think of pulling your body off the floor and to the bar; think of pulling the bar to your body.
2) THE SQUEEZE
Now you’re going to initiate the pullup and to do that, I want you to squeeze the bar.
More importantly, I want you to focus on squeezing through your ring finger and your pinky finger.

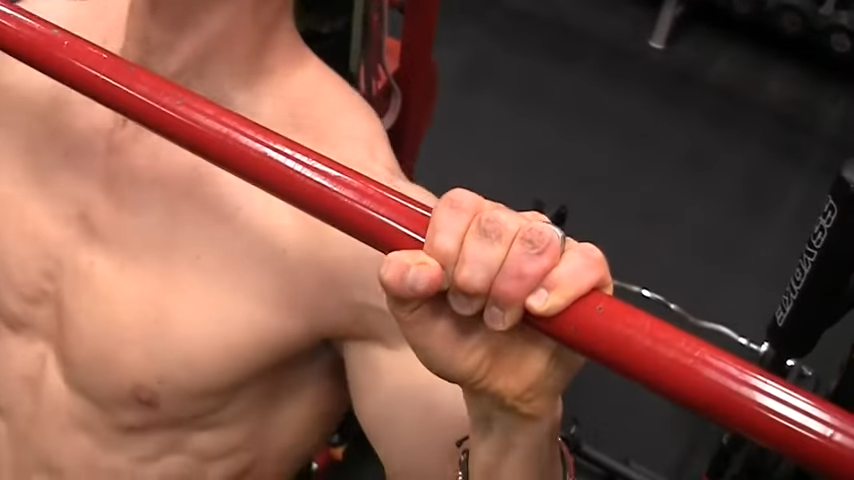
That’s because these are the two weakest fingers in your grip.
If you can consciously squeeze down through the weaker fingers, you’re going to strengthen your grip throughout your hand.
A stronger grip, and the ability to exert force into a bar is going to initiate the process of pulling with a good, strong force downward to get your body up.
3) CHEST TO BAR
Don’t think about pulling your body up to the bar. Instead, think about pulling the bar down to your body.
But while you’re doing it, I want you to attack the bar with your chest. Meaning, as you go in this direction, reach for it with your chest.

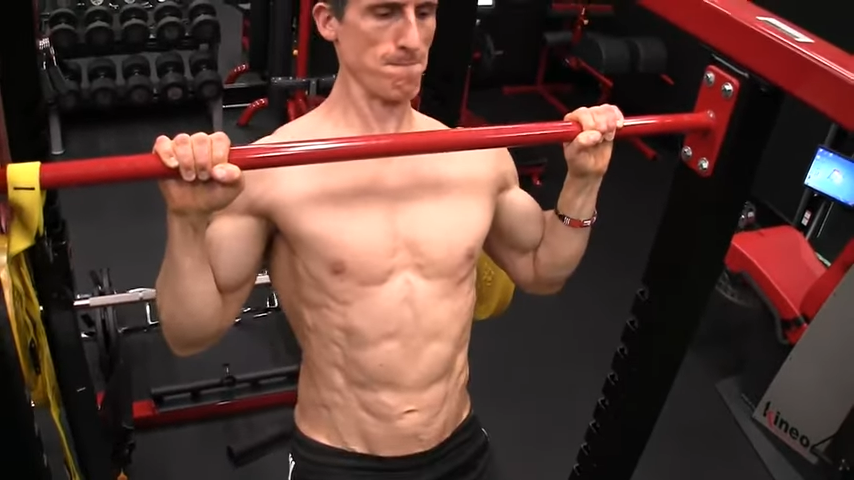
When you open your chest up, this does something incredibly important. It establishes thoracic extension.
Thoracic extension is not only going to make your repetitions easier, but it will increase the safety of this exercise when it comes to your shoulder.
4) THE DEAD HANG
Finally, let’s discuss what you should do when you reach the bottom of a pullup.
Should you dead hang? Yes, but if you’re like most people, you aren’t doing the dead hang correctly.
Most people will unpack their shoulders, causing their shoulders to come up to their ears.

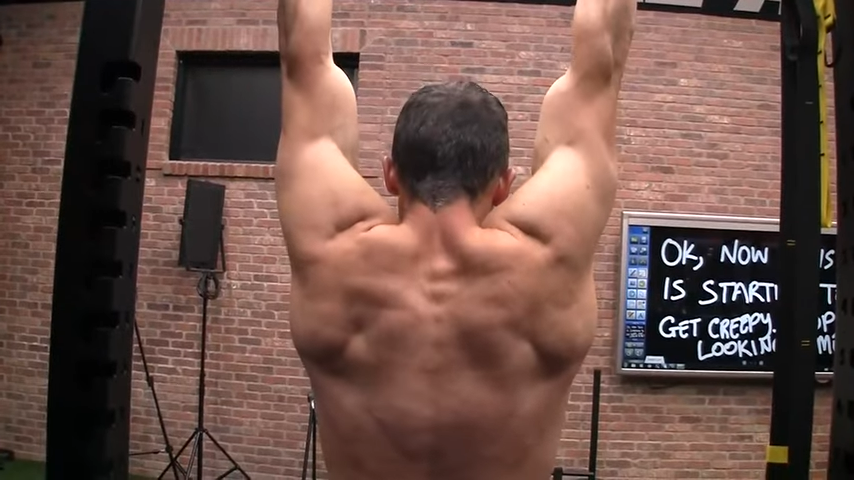
When there is no engagement of the muscle fibres of your upper torso and back, you are putting a lot of negative stress in certain areas such as your labrum.
This lack of stabilization places a lot of force and impingement stress up here in the joint itself.
Dead hang does not mean destabilize.
So, you need to learn to keep yourself engaged as you lower yourself in a pullup.

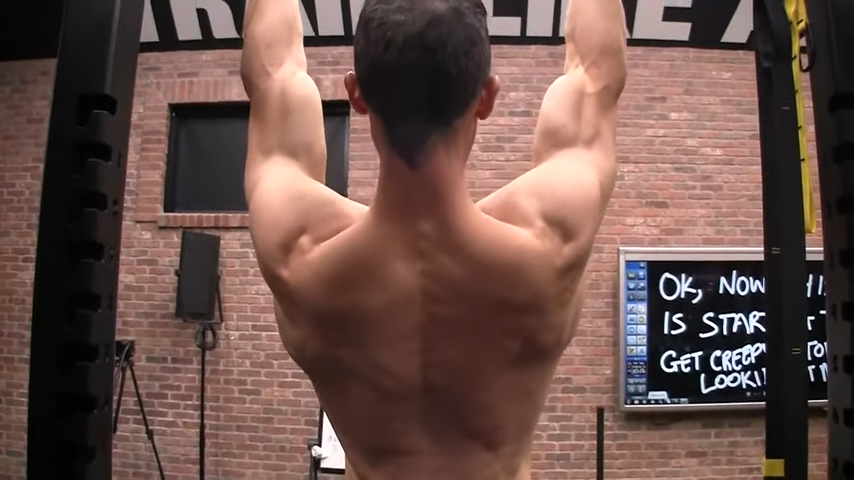
All that means is pulling down and back. Don’t let your traps go up near your ears.
Instead of allowing your shoulders to come up to ears when you hang from the bar, keep your shoulder blades down and back.


This, in conjunction with thoracic extension (attack the bar with your chest) allows for stable but mobile scapular upward rotation.
This means you’ll keep your shoulders healthy AND perform the pullup exercise correctly.
As you can tell, the pullup is not just as simple as grabbing the bar and hoisting yourself up.
Guys, I say this week after week, but it can never be said too many times:
Forget quantity. Forget the numbers and trying to maximum pull-up repetitions. Focus on the quality of your performance and the numbers will come in time.
If you’re looking for a training program that helps you put science and proper mechanics into every movement, you’ve come to the right place. Check out our ATHLEAN-X programs to see which is the best fit for your goals and fitness level, whether you’re a beginner or an advanced athlete.

- Pull ups are important to your workout routine because they strengthen your abs and scapulae as well as improve your deadlift. Using the best pull-up techniques will help you perform more pullups and ultimately build more strength and muscle gains.
- Lose excess bodyfat to make pullups easier.
- Grip the bar with a deep grip just outside of shoulder width. Don’t use a narrower grip.
- Your legs should be out in front of your body slightly, toes pointing down, quads flexed, glutes squeezed, and abs flexed to plug any energy leaks.
- Look at the bar and squeeze through the pinky and ring fingers as you pull yourself up.
- “Attack the bar” with your chest, and this will open your back into thoracic extension.
- As you lower yourself, don’t unpack your shoulders.
Jeff Cavaliere M.S.P.T, CSCS
Jeff Cavaliere is a Physical Therapist, Strength Coach and creator of the ATHLEAN-X Training Programs and ATHLEAN-Rx Supplements. He has a Masters in Physical Therapy (MSPT) and has worked as Head Physical Therapist for the New York Mets, as well as training many elite professional athletes in Major League Baseball, NFL, MMA and professional wrestling. His programs produce “next level” achievements in muscle size, strength and performance for professional athletes and anyone looking to build a muscular athletic physique.
