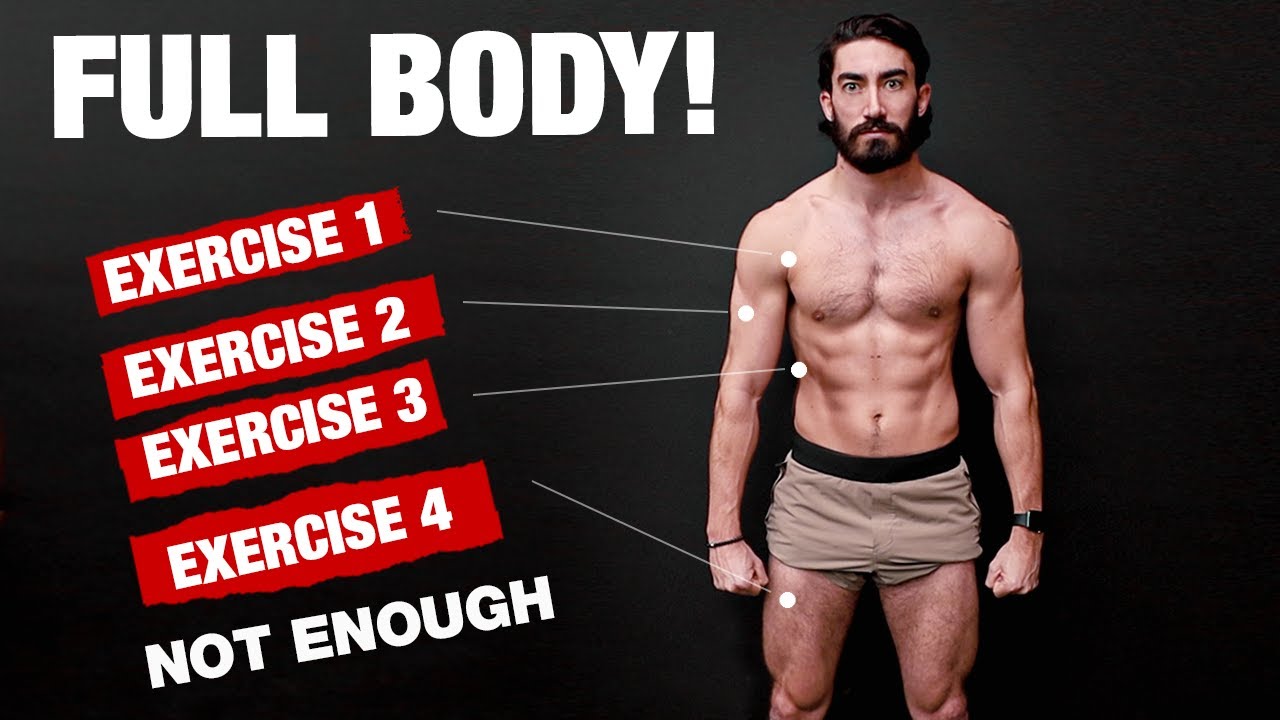
BEGINNER FULL BODY WORKOUT
Are you new to training, especially weightlifting?
Are you staying out of the gym because you’re not sure where to start and what approach to take?
This is the article you’ve been looking for.
I’m going to breakdown not one, not two, but THREE levels of beginner workouts that will keep you busy over the next few months.
More importantly, you’ll understand the 10 types of moves that are needed for a complete and well-rounded beginner full body workout.
Let’s start breaking down the 10 essential movement patterns that every beginner must master.
PERFECT BEGINNER WORKOUT BREAKDOWN
Before I jump into the exercises of this beginner total body workout, I want to explain how everything is set up so you can develop healthy habits in your training.
And this all starts with the different fitness levels of beginner workouts that are based on the complexity of the movement patterns.
THREE LEVELS OF WORKOUTS
There are three levels of beginner workouts.
Level One is what I’d call the break-in period. These basic moves are for the absolute beginner, which means some of them are going to be bodyweight exercises. When weights are used, the exercise will not be complicated to perform.
Level Two moves past the novice period and involves using weights exclusively, but there is a heavy emphasis on increasing neuromuscular efficiency so that you can tackle the more technical exercises in Level Three.
It’s during Level Three that you’ll graduate to more advanced moves, specifically compound movements that target several major muscle groups at the same time. For example, it’s in Level Three where you’ll find the more advanced exercises such as Barbell Back Squats, Barbell Bench Press, and Barbell Deadlift.
These levels and the accompanying exercises are arranged in a way to maximize neuromuscular development. You’ll also see improvements in strength gains, fat loss, and muscle growth.
Regardless of what level of “beginner” you are, I’d recommend starting from Level One and going through each subsequent level. I want you to do this because there could be some critical developments that you miss if you jump right into trying to go for those big and heavy lifts.
And this is regardless of whether you have zero or some experience in the weight room. Better to start fresh and do it right. Afterall, you might have some muscular imbalances that you’re not aware of.
By starting at Level One and working your way through each level, you’ll correct any muscle imbalances and set the stage to perform the bigger lifts properly.
10 TYPES OF BEGINNER EXERCISES
There are 10 types of exercise movement patterns, and these exercises are split up differently each week.
The 10 types of beginner exercises include the following:
- Horizontal push
- Vertical push
- Horizontal pull
- Vertical pull
- Hinge movement pattern
- Squat movement pattern
- Static lunge movement pattern
- Dynamic lunge movement pattern
- Core flexion movement pattern
- Carry movement pattern
As I mentioned above, I’m going to go over each level of exercise, based on complexity of movement.
After that, I’ll provide you with a full THREE months of workouts based on these same exercises. No surprises here – just a fool proof exercise plan.
With that said, let’s get started with Level One.
LEVEL ONE BEGINNER EXERCISES
Now that you know what to expect, let’s get started by reviewing each exercise in Level One of the best beginner full body workout.
Make sure to read through the ENTIRE article before trying this workout.
I know you’re excited to get started, but there are important points for each level that you need to be aware of before picking up a dumbbell.
PUSH-UP
The first movement pattern is something we call Horizontal Push, and this is where we use the shoulders, chest and triceps.
What better exercise to start with than the classic Pushup?

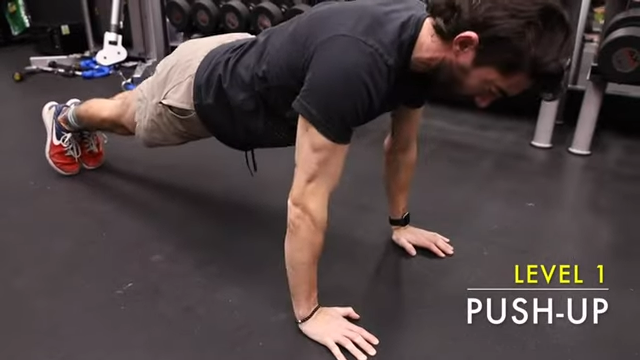
I like the Standard Pushup as a Level One exercise because it demands that you build some scapular control as you place your hands firmly on the ground.
Get in a plank position with your palms flat on the ground and shoulder-width apart. Your feet should be hip width apart. From this push-up position, you can either keep your legs straight or bend your knees to perform a Modified Knee Pushup. The latter is best for anyone who can’t do a Pushup with perfect form.
Bend your elbows and lower your chest to the ground, then press back up to the starting position. Remember to keep your core tight the entire time!
ONE-ARM DUMBBELL PRESS
We move on to the next movement pattern and this is Vertical Push.
We’re talking mostly about the shoulders and the triceps performing an overhead pushing movement in a vertical direction.
Naturally, I’d want to start with a One-Arm Dumbbell Press.

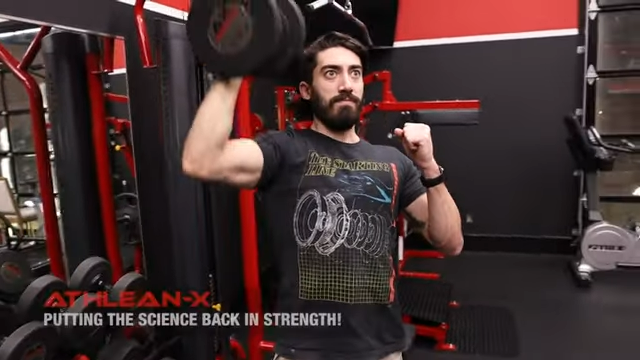
It’s easier to move with one arm at a time, which gives you the perfect opportunity to spot those imbalances between the right and left side. Also, there’s less of a concern about core control by using just one dumbbell at a time.
Hold a dumbbell in one hand and place the other hand on your hip or at shoulder level. Bring the dumbbell to shoulder height, then press it straight up as you favor toward the front just a bit.
In other words, don’t put your shoulder in a position to where it’s moving backward. Make sure the shoulder is favoring a forward movement. Press the dumbbell overhead until your arm is straight. Finally, lower the dumbbell back to the starting position and repeat. Then switch to the other side when you’ve completed all of your repetitions.
CHEST SUPPORTED ROW
We then move to the next movement pattern, Horizontal Pull. For this pattern, we’re talking about biceps and back, and I want to start you off with the Chest Supported Row.

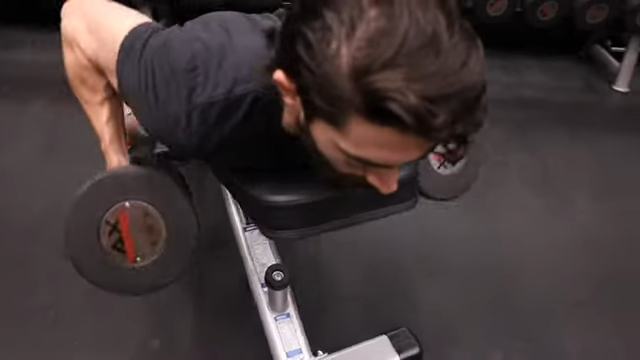
When we get in this position, we don’t have any demands on our low back strength. Instead, we can focus on our ability level to get stronger and develop those pulling muscles.
Place a pair of dumbbells on the floor in front of an incline bench. Lay on the bench, reach down and pick up the dumbbells. Focus the contraction in your back as you pull the dumbbells up. Once your upper arms are parallel with the floor, pause and slowly return to the starting position.
LAT PULLDOWN
Next up, we have the Vertical Pull movement pattern. For weightlifting beginners, there’s no better exercise than the Lat Pulldown.

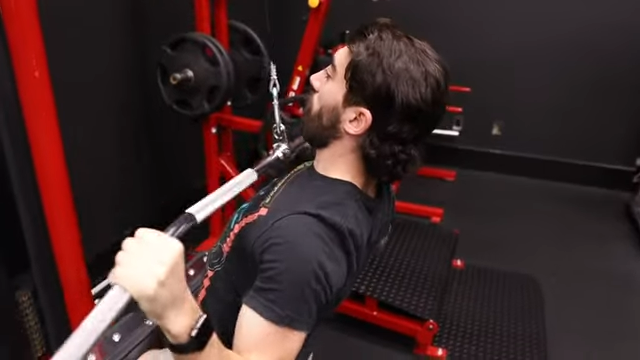
Sit down on a Lat Pulldown machine with your knees bent and feet flat on the floor. Grab the bar with an overhand grip, hands shoulder-width apart. Lean back slightly then bring the bar down to your chest leading with your elbow. Remember to focus that contraction on your lats.
If you don’t have access to a Lat Pulldown machine, you can simply use a band over a pullup bar and do a banded version of a Pulldown.
BANDED PULLDOWN

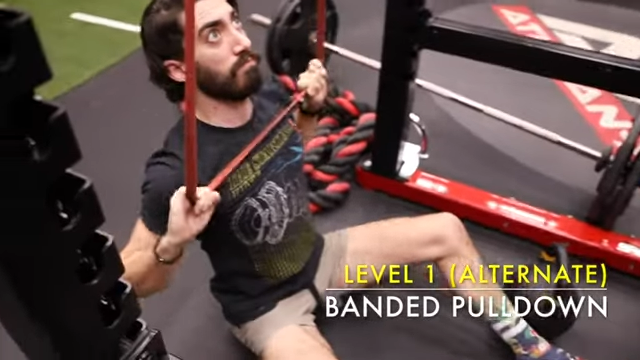
You’ll use the same movement cues as above, but you’ll use a resistance band that is secured over a Pull-Up bar or a similar stable surface.
CABLE PULL THROUGH
Next, we move to the Hinge movement pattern, and the Cable Pull Through is great for beginners.

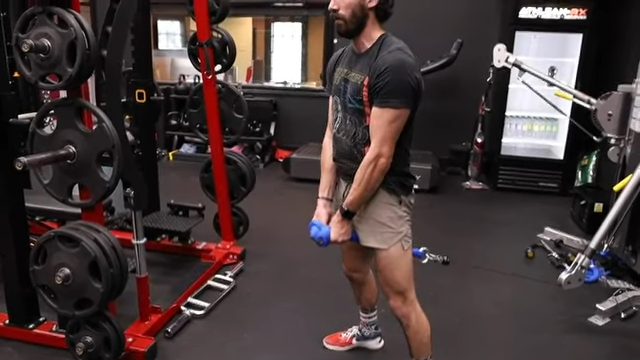
Hold both ends of a rope attached to a cable machine with both hands. Step out until the weight has lifted from the stack. From here, you’re simply focusing on hinging back at the hips and then using powerful hip extension to drive yourself back to a vertical position.
DUMBBELL DROP SQUAT
We move on to the Squat movement pattern, which emphasizes your ability to move your body up and down in a set space.
Since our end goal is the Barbell Squat, we want to start with an easier variation. I recommend the Dumbbell Drop Squat.

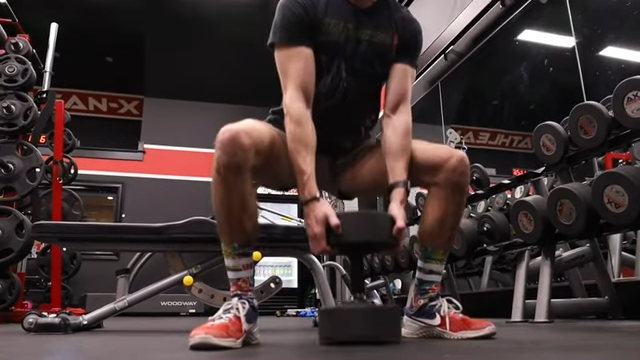
The thing I like about this exercise is that it will teach any beginner the exact placement of their body as they perform the squat. This happens because the dumbbell will drop right down through the center of gravity and take your body into the right squat position.
Hold the top of a dumbbell with both hands. Place your feet shoulder width apart. Watch the angles of the toes and turn them out. Kick your hips back as you lower yourself straight down. Pause at the bottom then focus the contraction in your quads as you stand up.
BODYWEIGHT SPLIT SQUAT
The seventh and eighth movement patterns are related because they are variations of the Lunge.
As an athletic strength coach, I can tell you that the Lunge is one of the most overlooked yet incredibly beneficial movement patterns that you need to master.
The Static Lunge is your next movement pattern.

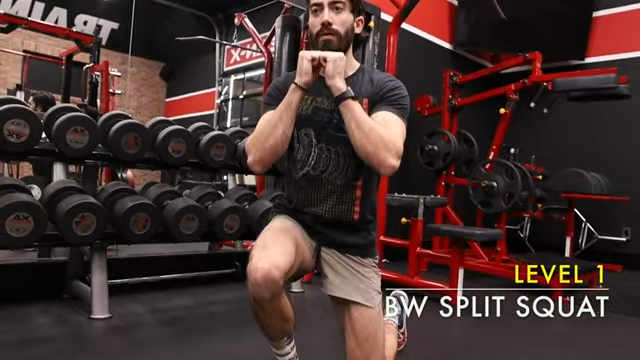
And the best exercise for this movement pattern is a basic body weight Split Squat.
In this first level, you don’t have to worry about using a heavy weight or a light weight. You won’t be using any weight here.
Put your feet shoulder width apart. The goal is to move your body up and down in space, similar to a squat, but with one leg out in front of the other. Start with the left knee out in front then switch sides after you get through your reps.
BODYWEIGHT REVERSE LUNGE
Next, you’ll move to the Dynamic Lunge movement pattern.
Again, you’ll focus on using only your body weight, and for this pattern, I chose the Reverse Lunge.

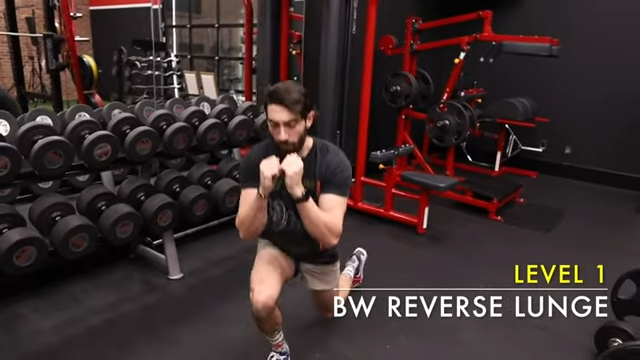
I like the Reverse Lunge because it’s more forgiving on the knees if you have any current knee issues. A Walking Lunge is great but only if your knees are strong and solid.
Start with your feet together and your hands on your hips. Move your feet about hip-width apart; maybe a little more depending on your size and build. Step backward with your right leg, keeping your left leg in place.
As you step backward, lower your hips until your legs are bent at about a 90-degree angle. Your front knee should be directly over your ankle, and your back knee should be close to the ground.
Keep your torso upright and engage your core. Return to the starting position by pressing through your front heel to straighten your left leg and bringing your right leg forward to meet it. Repeat on the other side.
ROLLUP
We move on to the ninth movement pattern here and that’s Core Flexion. Why a core-focused movement pattern?
The flexion of the spine and the rotation of the pelvis are crucial to learning how to contract your abs properly.
We’re going to start with something very simple in Level One called a Rollup.

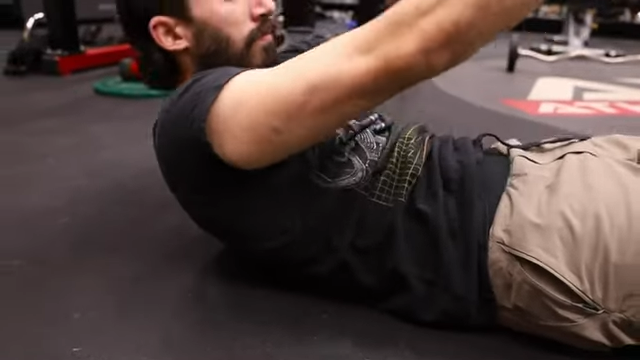
This is a Pilates movement that teaches you not only how to get up off the ground, but how to control your core movements segment by segment as you lower yourself back down to the ground.
SUITCASE CARRY
Our final movement pattern is the Carry. I’d argue that this is another one of those incredibly important but often overlooked movement patterns.
Why? It helps you learn how to build your grip and hand strength and to be able to dynamically move it in space.
For Level One, you’ll start with a Suitcase Carry.

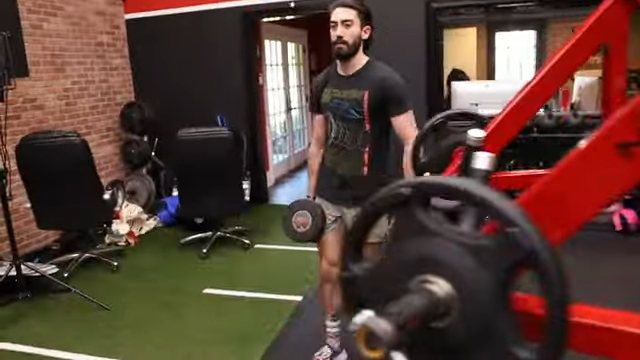
Holding a single dumbbell at one side, you will walk a set distance before switching the dumbbell to the other side of the body. Light dumbbells are okay here. Eventually you’ll progress to a heavier dumbbell.
As always, keep perfect posture. Don’t allow yourself to slouch. Stand up straight and walk. If you notice your posture going south or if your grip starts to fail, the set is over.
LEVEL TWO BEGINNER EXERCISES
After a month of Level One exercises, you’ll graduate to Level Two.
These exercises build off what you learned and mastered during your first month.
Seeing as how these new exercises are slightly more complicated, I want you to take the same level of dedication into learning these. Mastering this level of exercises will make it a lot easier to transition to the more technically complicated exercises like the Barbell Back Squat and Barbell Deadlift.
With that said, let’s get started with your second month of exercises.
DUMBBELL BENCH PRESS
Back to the Horizontal Push exercise, we have a Dumbbell Bench Press.

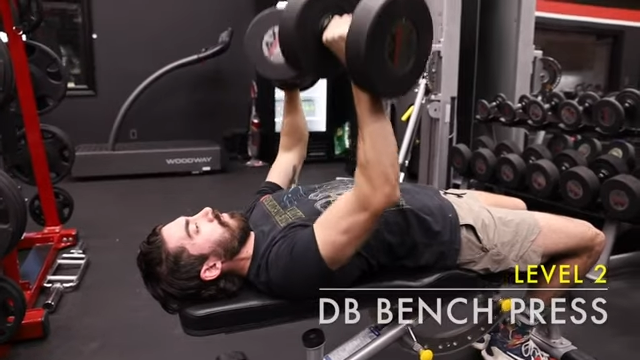
We take away the ground providing us with stability and we now have to build stability ourselves.
The good thing about using dumbbells is that because they can float freely, if you have any stark imbalances between the right and left sides, you’re going to see it here. And that’s a good thing as it will highlight what you need to work on.
Holding a pair of dumbbells, sit on a flat bench and lay back. Plant your feet firmly on the ground and press the dumbbell straight up above your chest, extending your arms.Lower the dumbbell back down to chest level, tucking your elbows close to your body. Pause and repeat.
DUMBBELL SHOULDER PRESS
Your Level Two Vertical Push movement is the Dumbbell Shoulder Press.
Instead of using one side, you now have to push both of them together.

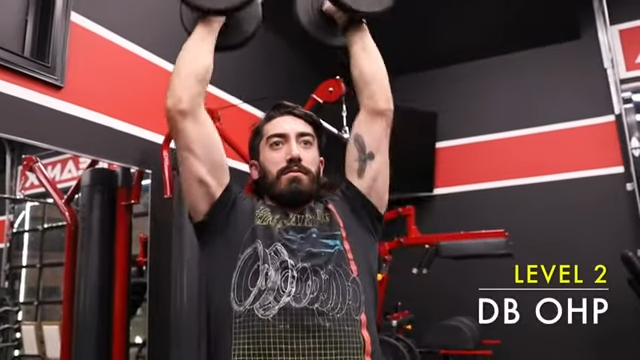
This additional weight being moved over your head requires more core stability and control.
This will help you get stronger where it counts for the Level Three version of this exercise: the Barbell Overhead Press.
Starting with dumbbells at shoulder level, follow the same movement instruction as above but do so with a pair of dumbbells.
DUMBBELL TRIPOD ROW
Your next Horizontal Pull is the Dumbbell Tripod Row.
You still have a little bit of support, but you’re not having to support your entire body with your low back.

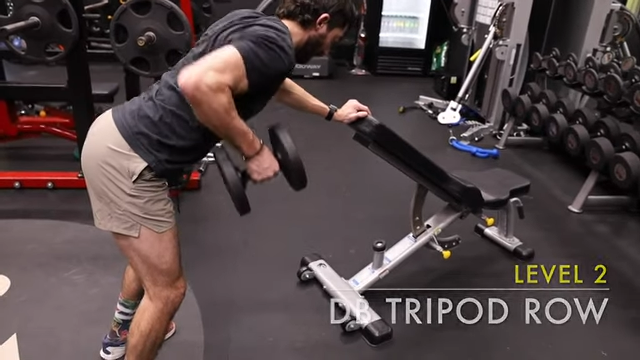
During this exercise, you have minimized that level of support and increased the demand on your pulling muscles to move the weight.
Same as before, pull the dumbbell back, leading with the elbows. Pause when the upper arm is parallel with the ground before slowly returning to the starting position. Rinse and repeat.
ASSISTED PULL-UP
We then move to the next Vertical Pull exercise, and that’s the Assisted Pullup.

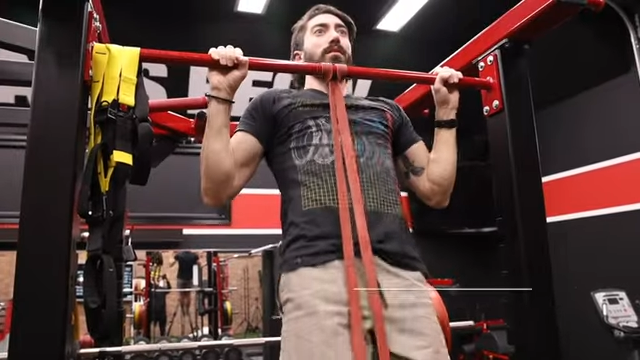
If the end goal is to perform a Pullup, this variation will help you get there. The resistance band is going to reduce the amount of weight you’re pulling by 50 to 80 pounds, depending upon the resistance of the band that you’re using. I wouldn’t recommend using light bands here.
Secure a resistance band around a Pull-Up bar, and place your feet in the bottom end. Take a grip just outside of shoulder width and focus on bringing your chest to the bar. Slowly let yourself down and repeat.
ROMANIAN DEADLIFT
Your next Hinge movement pattern is the Romanian Deadlift.

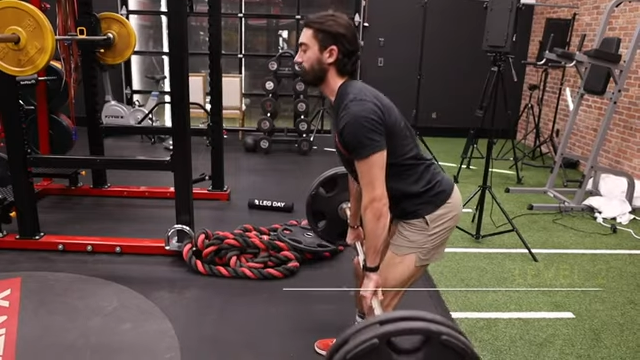
I like the RDL because it mimics the same movement as a traditional Deadlift, but you don’t have to worry about taking the weight from the ground.
In this case, you’re simply learning how to use those hips in an abbreviated range of motion to get through that powerful hip extension.
GOBLET SQUAT
Next up, you have your next Squat movement pattern: the Goblet Squat.

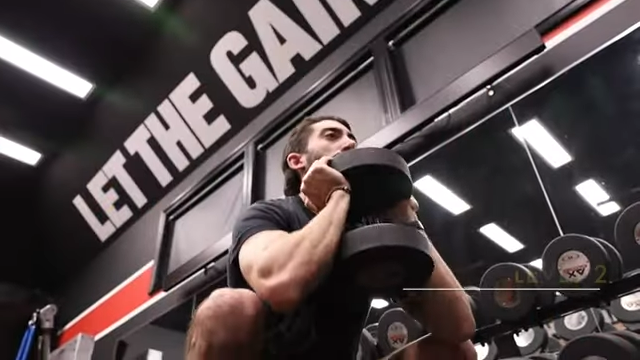
It’s a bit more challenging because the weight is moving from the bottom of your body to the top.
This will teach you how to control that weight, preparing you for a perfect transition to Level 3, which is the classic Back Squat.
DUMBBELL SPLIT SQUAT
From here, you move on to your next Static Lunge movement pattern.

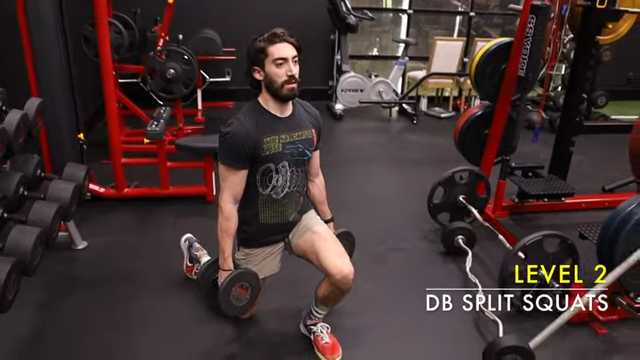
You’ll take the same exercise from Level One and add weights, giving you the Dumbbell Split Squat.
Naturally, you want to make sure you’re working each side.
SINGLE-SIDED REVERSE LUNGE / SUITCASE REVERSE LUNGE
For your next Dynamic Lunge movement pattern, you’ll perform the Single-Sided Reverse Lunge.

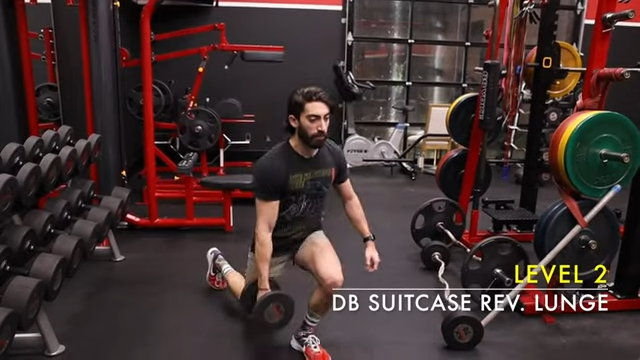
You’ll perform that same Reverse Lunge movement but you’re throwing a dumbbell into the mix.
This exercise is going to demand increased stability of your hips in the frontal plane while you perform the movement pattern you learned in Level One.
JACKKNIFE
And that brings us to your next Core Flexion movement pattern: the Jackknife.

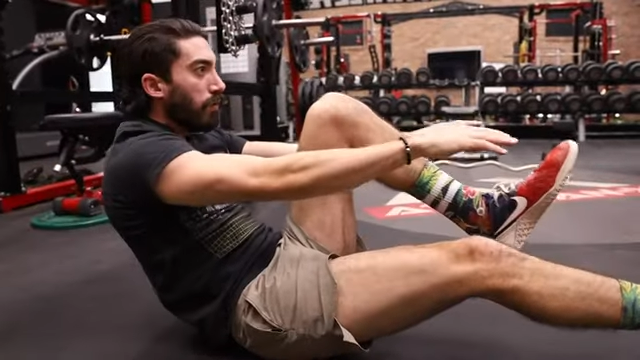
This one is similar to the Rollup, but you’re going to keep your legs off the ground.
By doing this, you’re adding some additional weight resistance without using dumbbell or external weights. You’re simply using your own body weight.
FARMER’S CARRY
Finally, you have your Level Two Carry movement pattern, which is the Farmer’s Carry.

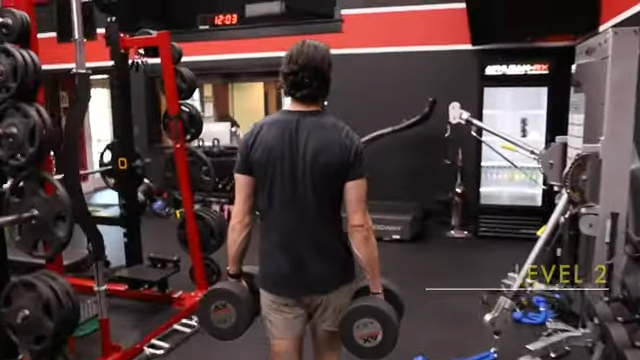
For the Farmer’s Carry, you’ll have a dumbbell in each hand, which is obviously going to increase the amount of load that you’re carrying around.
Just like before, keep a strong posture throughout. Once your posture or grip go south, it’s time to call it a day.
LEVEL THREE BEGINNER EXERCISES
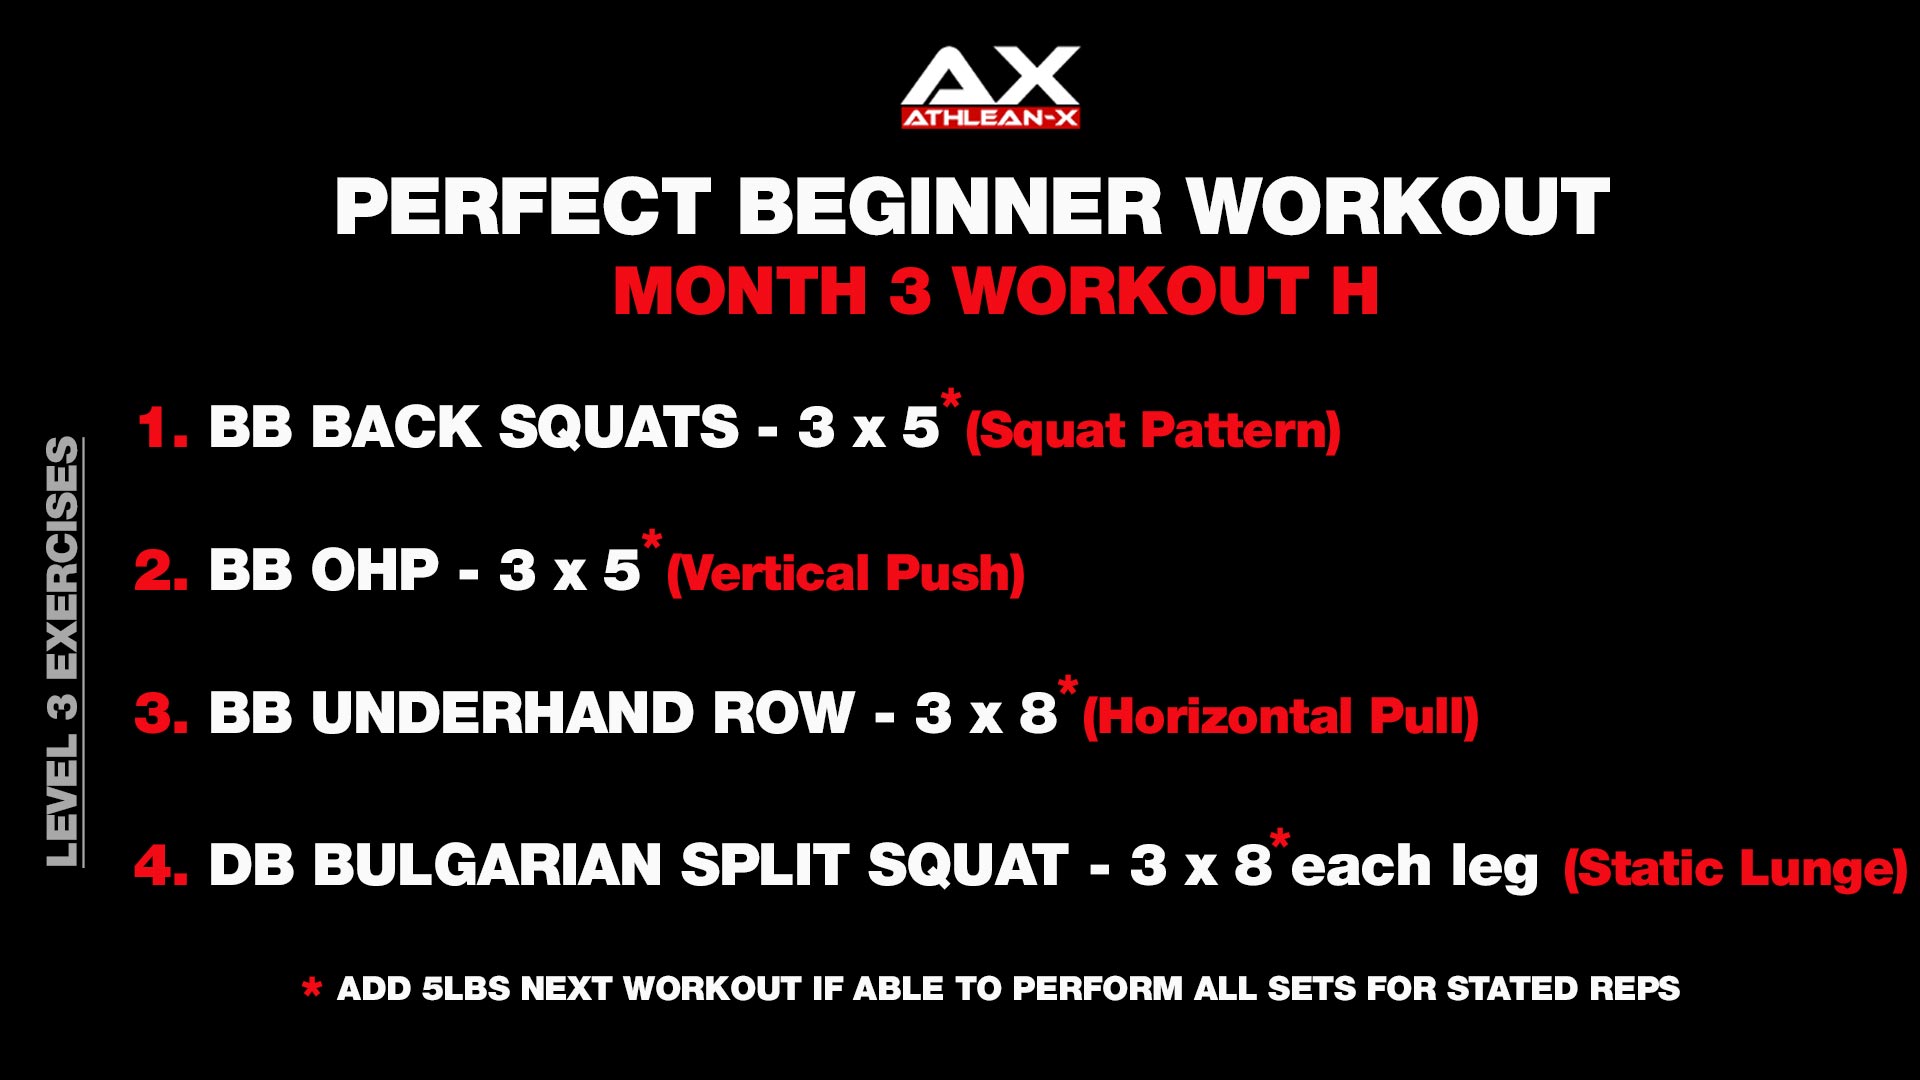
During your third month, you’ll start with some of the most important yet functionally complicated strength exercises.
If you moved through the first two levels of this exercise program, you should be ready to easily start performing these exercises.
Still, I’d suggest starting out with light weight until you know that your form is flawless.
With that said, let’s get started with your next level.
BARBELL BENCH PRESS
We kick off Level Three with your first Horizontal Push movement pattern: the Barbell Bench Press.

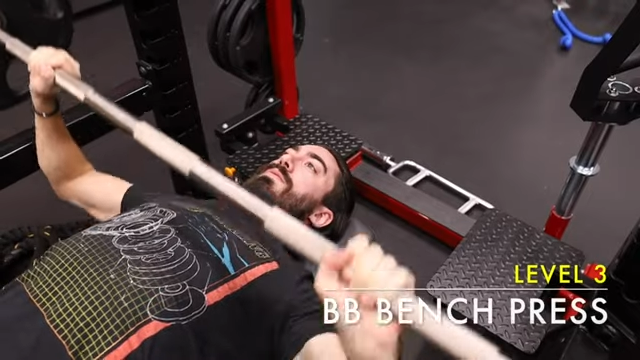
Following the same movement pattern from Level Two, you’ll focus on pushing a barbell as opposed to a dumbbell.
This is an important distinction because if you had started off with a barbell, you could have easily concealed those muscle imbalances I talked about above.
By going through the program as I lay out, you’ll correct those imbalances and you’ll be ready to jump right into this movement.
BARBELL OVERHEAD PRESS
Your Level Three Vertical Push movement pattern is the Barbell Overhead Press.

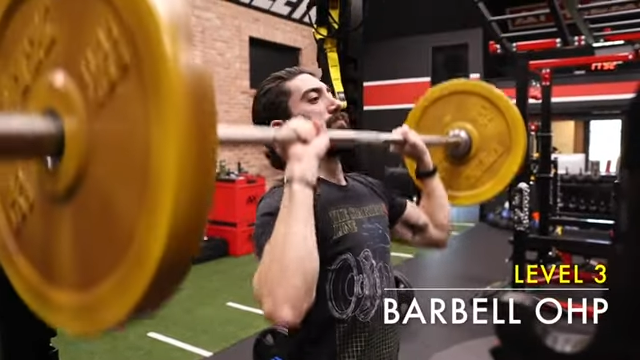
With this exercise, you have to move your body around the bar as opposed to moving the dumbbells around your body. This is going to increase the complexity, but you’ll see huge gains in strength and muscle gains with this one.
You can also use heavy weight here, but only after you feel comfortable with your form.
UNDERHAND BARBELL ROW
Next up, your Level Three Horizontal Pull movement pattern: the Underhand Barbell Row.

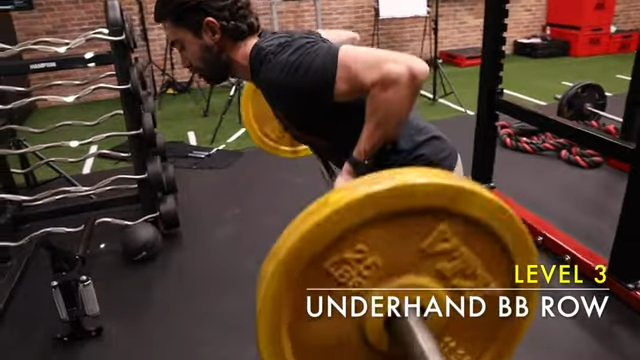
The Barbell Row demands the support and strength of the low back to keep your body in the right posture and position.
Once your lower back is strong enough to do so, you can increase the weight load.
PULL-UP
Next up, you have your Vertical Pull movement pattern, which should be no surprise as you’ve been working toward this for two months now.
It’s the classic Pull-up exercise.

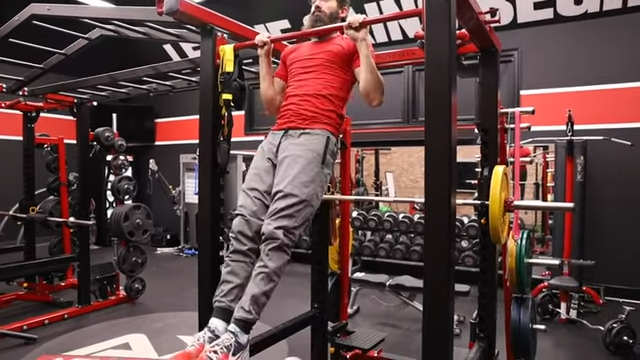
You’ll perform the same movement as Level Two, but you won’t have the same assistance.
It’s all about good form here. If you can only perform a couple of reps without assistance, that’s okay. Focus on quality, not quantity.
DEADLIFT
Which brings us to your next Hinge movement pattern. Again, no surprise here, but you’ll finally be moving over to the traditional Barbell Deadlift.

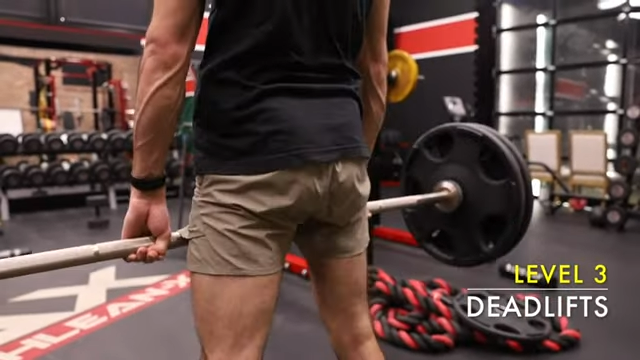
Remember, it’s not about pulling with your upper body at this point but learning how to pull with your posterior chain and hips.
These are some of the most powerful pulling muscles in the entire body if you learn how to do it right.
The Deadlift is the gold standard of posterior chain strength and development, so take your time with this exercise and learn to master your form and execution.
I have an entire article on how to deadlift that you should read over a few times before jumping into this one.
BARBELL BACK SQUAT
Your Level Three movement pattern is the Barbell Back Squat.

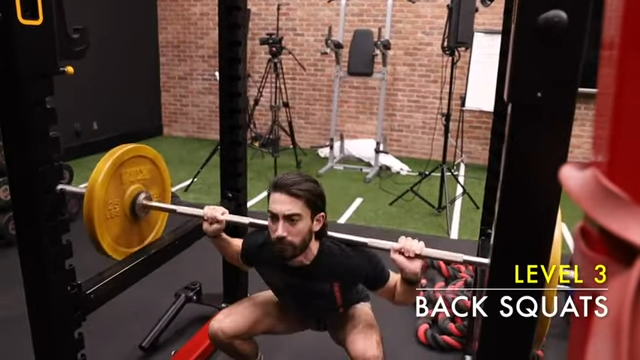
You’re going to be able to use the most amount of weight while still staying true to the mechanics you learned in the previous levels.
But again, I can’t stress this enough: QUALITY reps. Forget about the numbers. Just make sure your form is perfect for each and every rep. Squat with the lighter weights if you need to, but don’t let your ego drive this one.
DUMBBELL BULGARIAN SPLIT SQUAT
For your Level Three Static Lunge movement pattern, you’ll perform one of my favorite exercises of all time, the Dumbbell Bulgarian Split Squat.

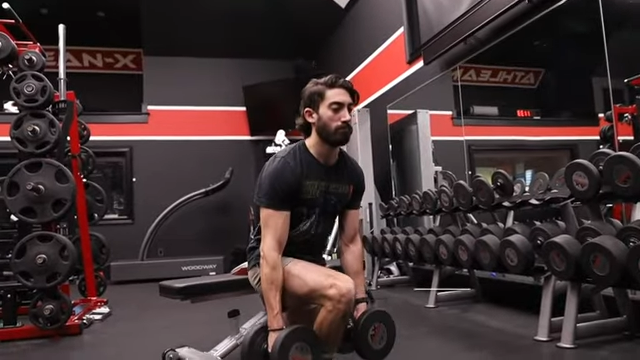
You’ll use the same form that you mastered in the previous level, but now you’re adding another dumbbell.
DUMBBELL REVERSE LUNGE
For your Dynamic Lunge movement pattern, you’ll perform the Dumbbell Reverse Lunge.

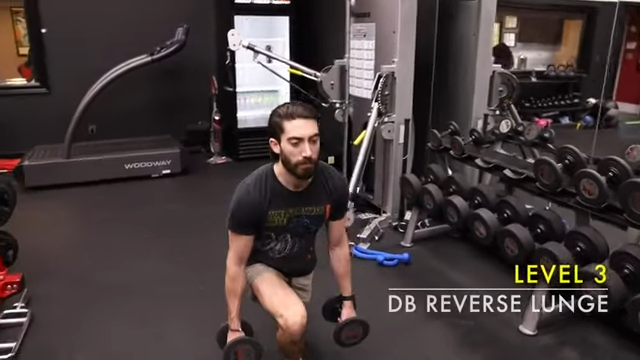
Just like with the Bulgarian Split Squat, you’ll upgrade to a pair of dumbbells, but you’ll use the same form you did in the previous level.
While it might be tempting to perform this as Barbell Reverse Lunges, I’d recommend sticking with the dumbbells for now.
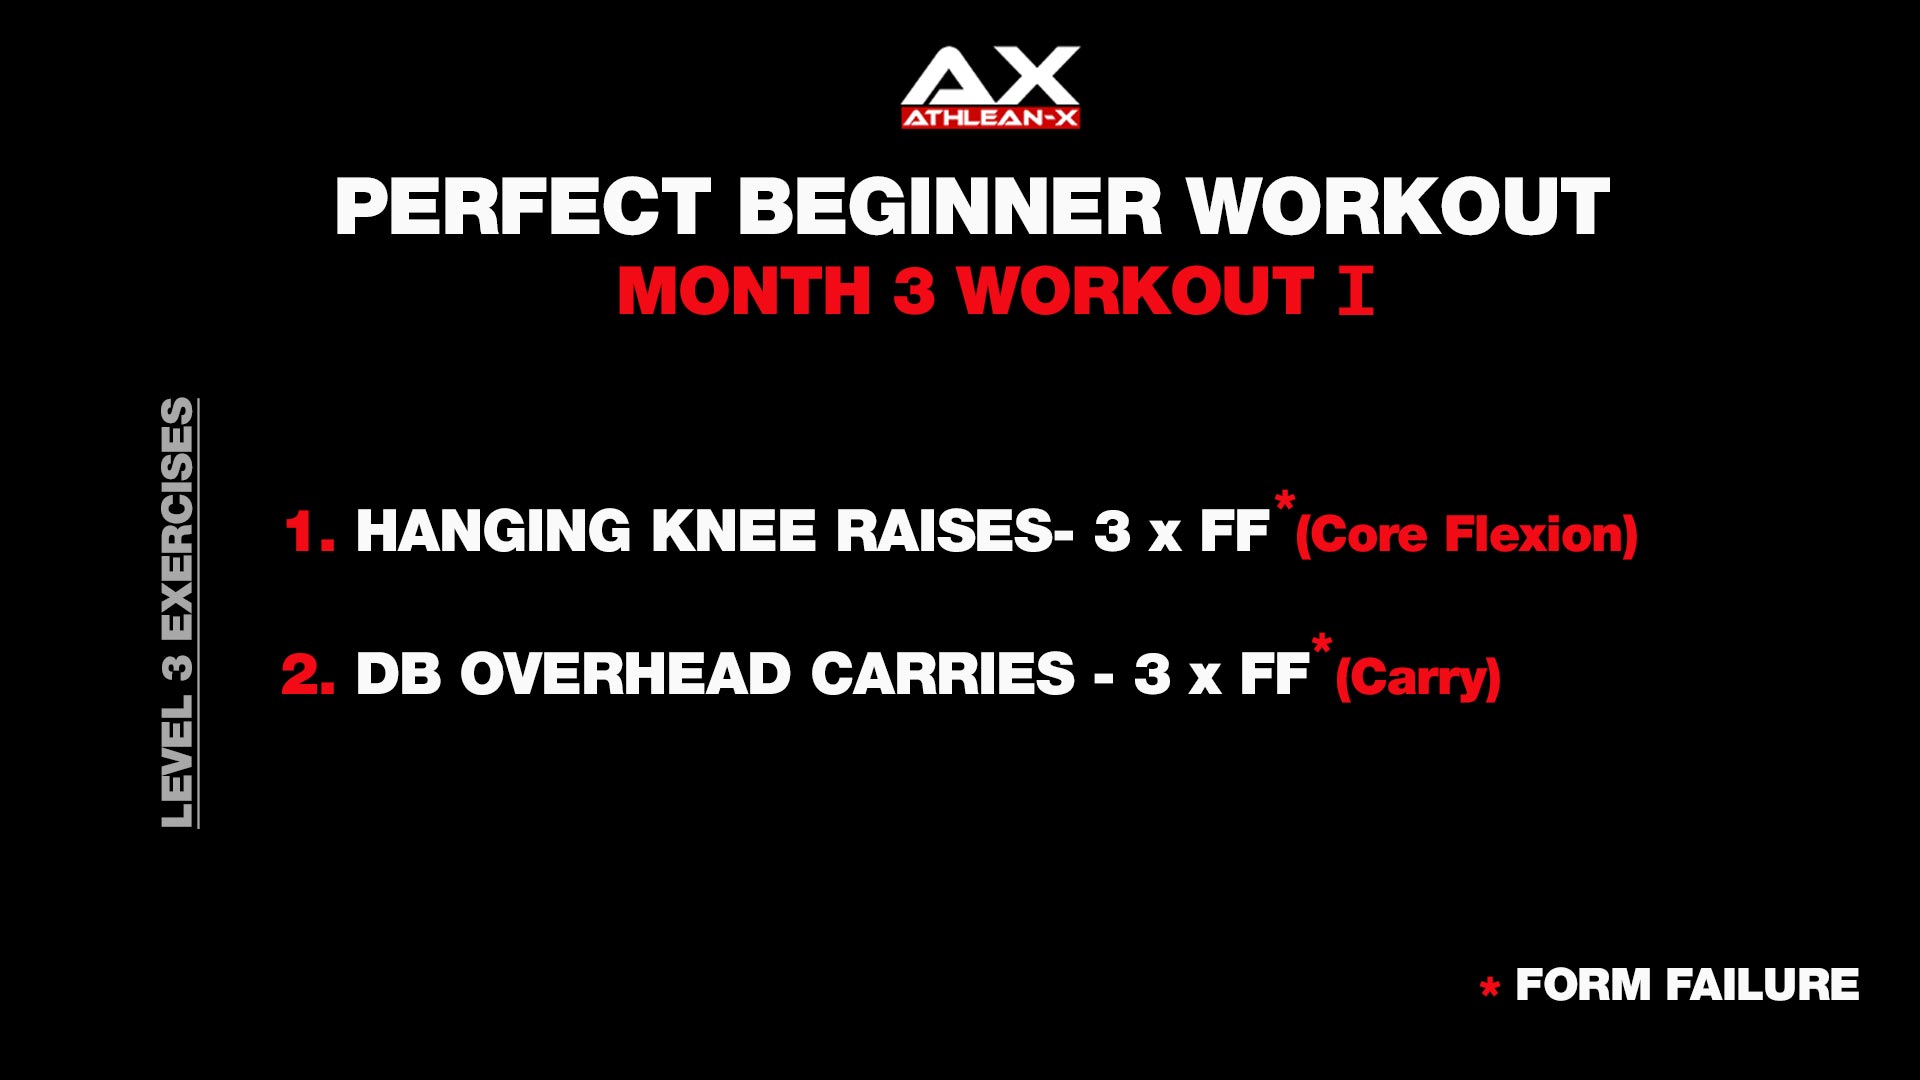
HANGING KNEE RAISE
Your Level Three Core Flexion movement pattern is the Hanging Knee Raise.

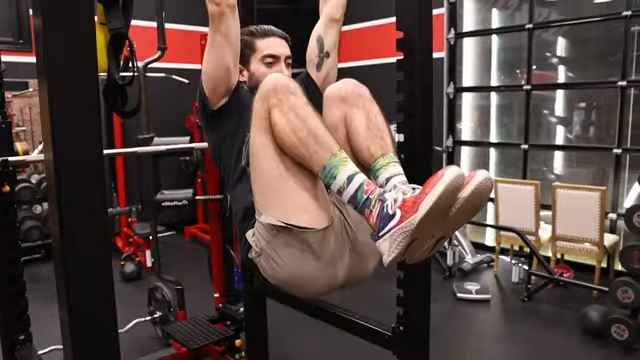
This exercise is going to demand that your body can be controlled while hanging from a bar.
The most important point to focus on is trying to curl the pelvis. Don’t just use the hip flexors and lift the knees up. Build that mind-to-muscle connection with your abdominal wall to curl the lower body upward.
OVERHEAD CARRY
Let’s bring this workout home with your final Carry movement pattern: the Overhead Carry.

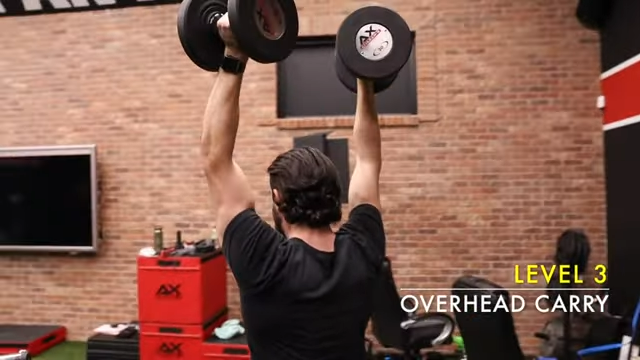
Once you get those arms up overhead, there’s a lot more core demand placed on your body.
Maintain perfect form as move forward. If the heavier weights become too much, you feel your body slouching, or your grip starts to fail, then safely put the weights down.
BEGINNER WORKOUTS: MONTH ONE
Now, that you know exactly which exercises you’ll perform over the next three months, you’ll want to know how to put it all together.
For the next three months, you’ll be working out five times per week with your day of rest coming on Saturday and Sunday.
Here’s the exact plan you need to follow to work your way through these levels and movement patterns.
DAYS OF THE WEEK
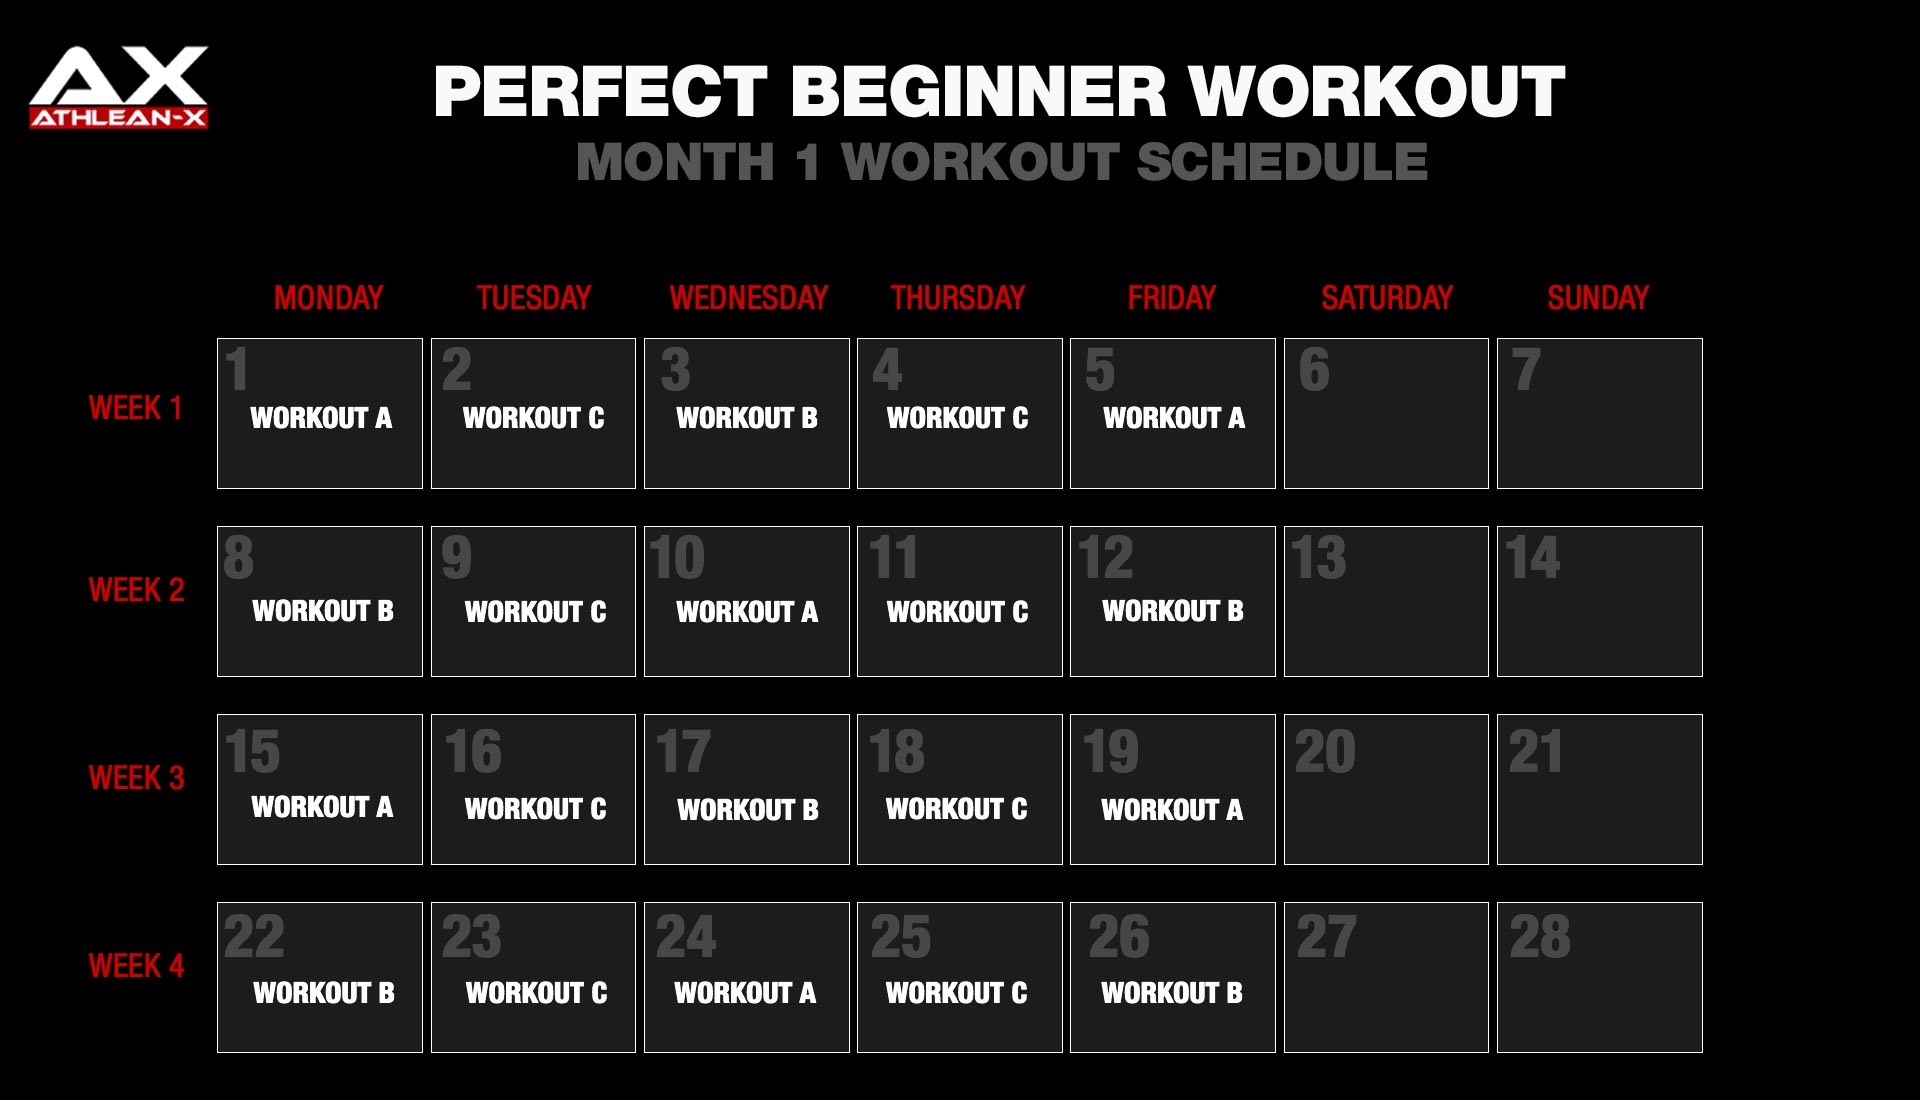
Your first month of training is divided into three workouts: A, B, and C.
The A and B workouts are your total body workouts, and they are performed in an alternating fashion on Monday, Wednesday, and Friday.
For example, during week one, you’ll follow an A-B-A format. In week two, you’ll follow a B-A-B format. You’ll repeat this through weeks three and four.
The C workout will fall on Tuesdays and Thursdays throughout the entire month.
You have your days of the week figured out, but how do we split the exercises over the course of A, B and C?
EXERCISES FOR EACH WORKOUT
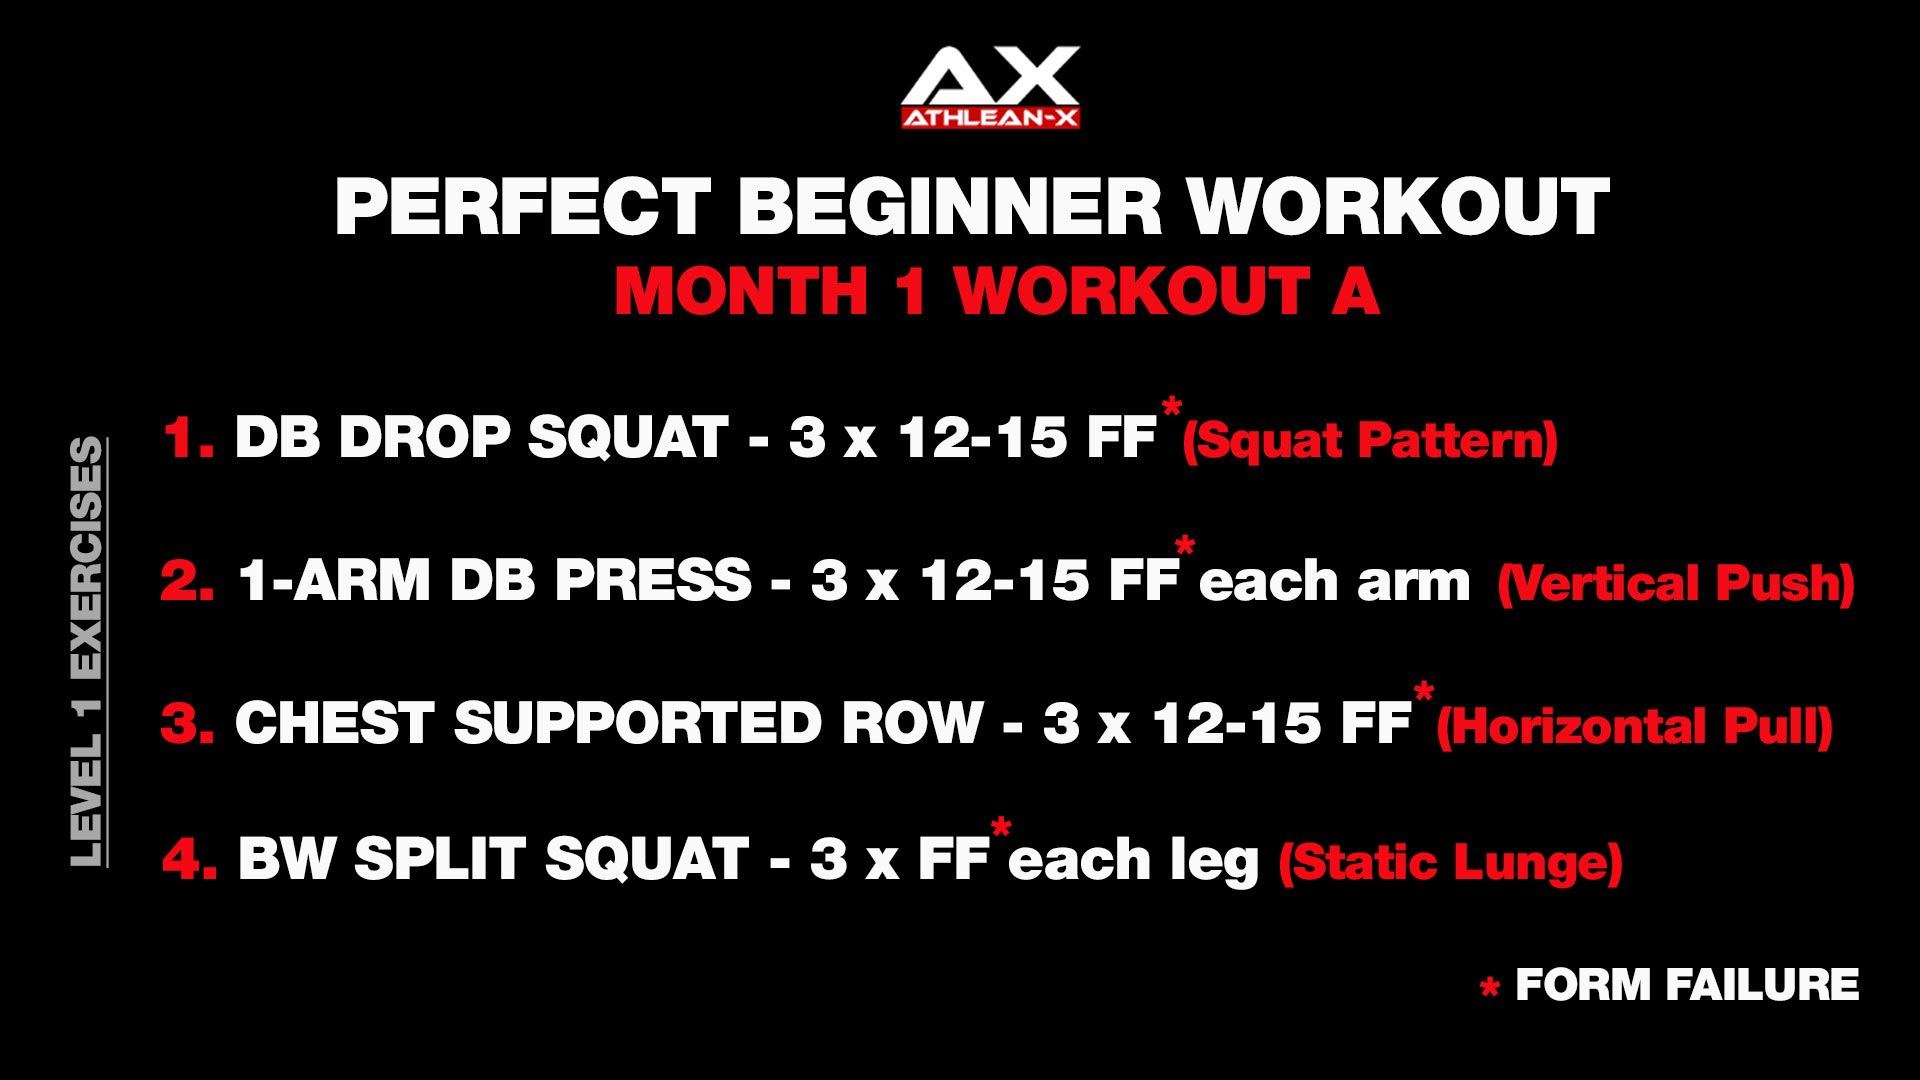
For Workout A: you’ll perform the following movement patterns:
- Squat
- Vertical Push
- Horizontal Pull
- Static Lunge
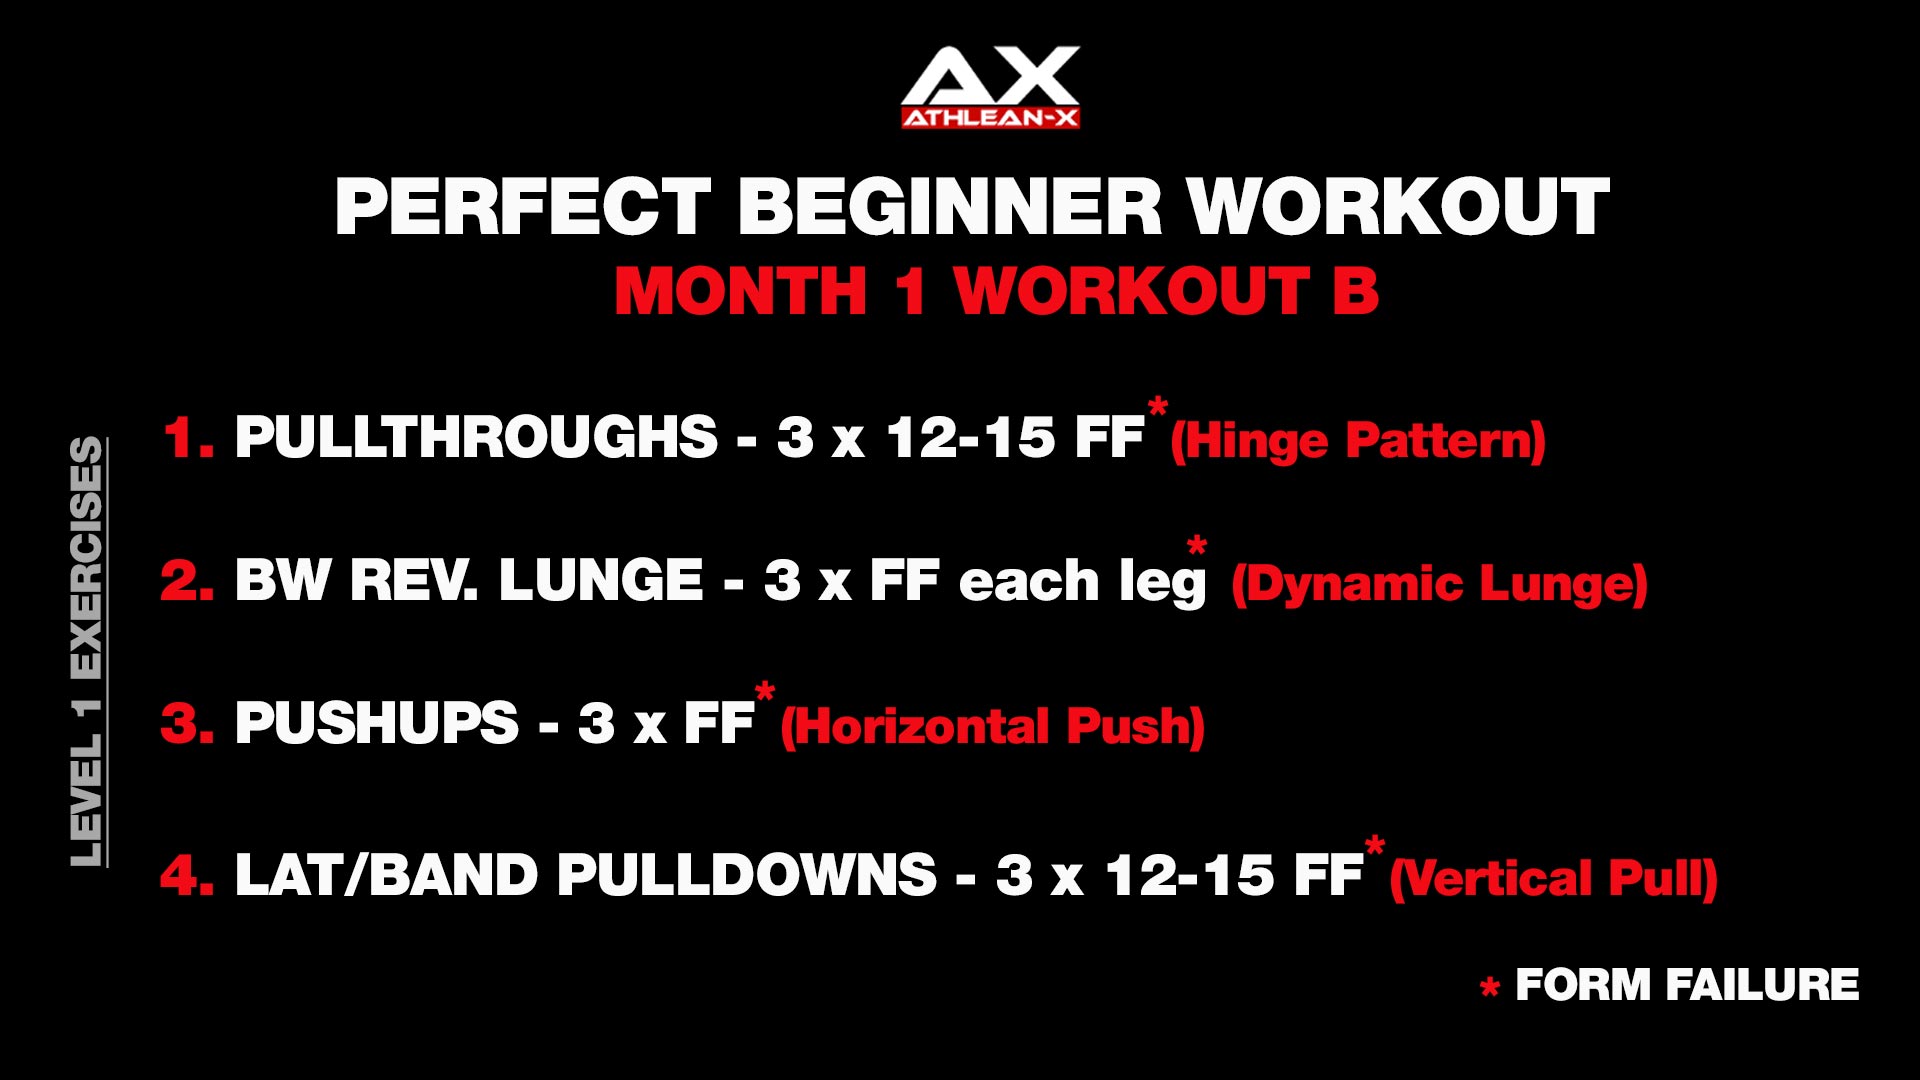
For Workout B, you’ll perform the following movement patterns in this order:
- Hinge
- Dynamic Lunge
- Horizontal Push
- Vertical Pull
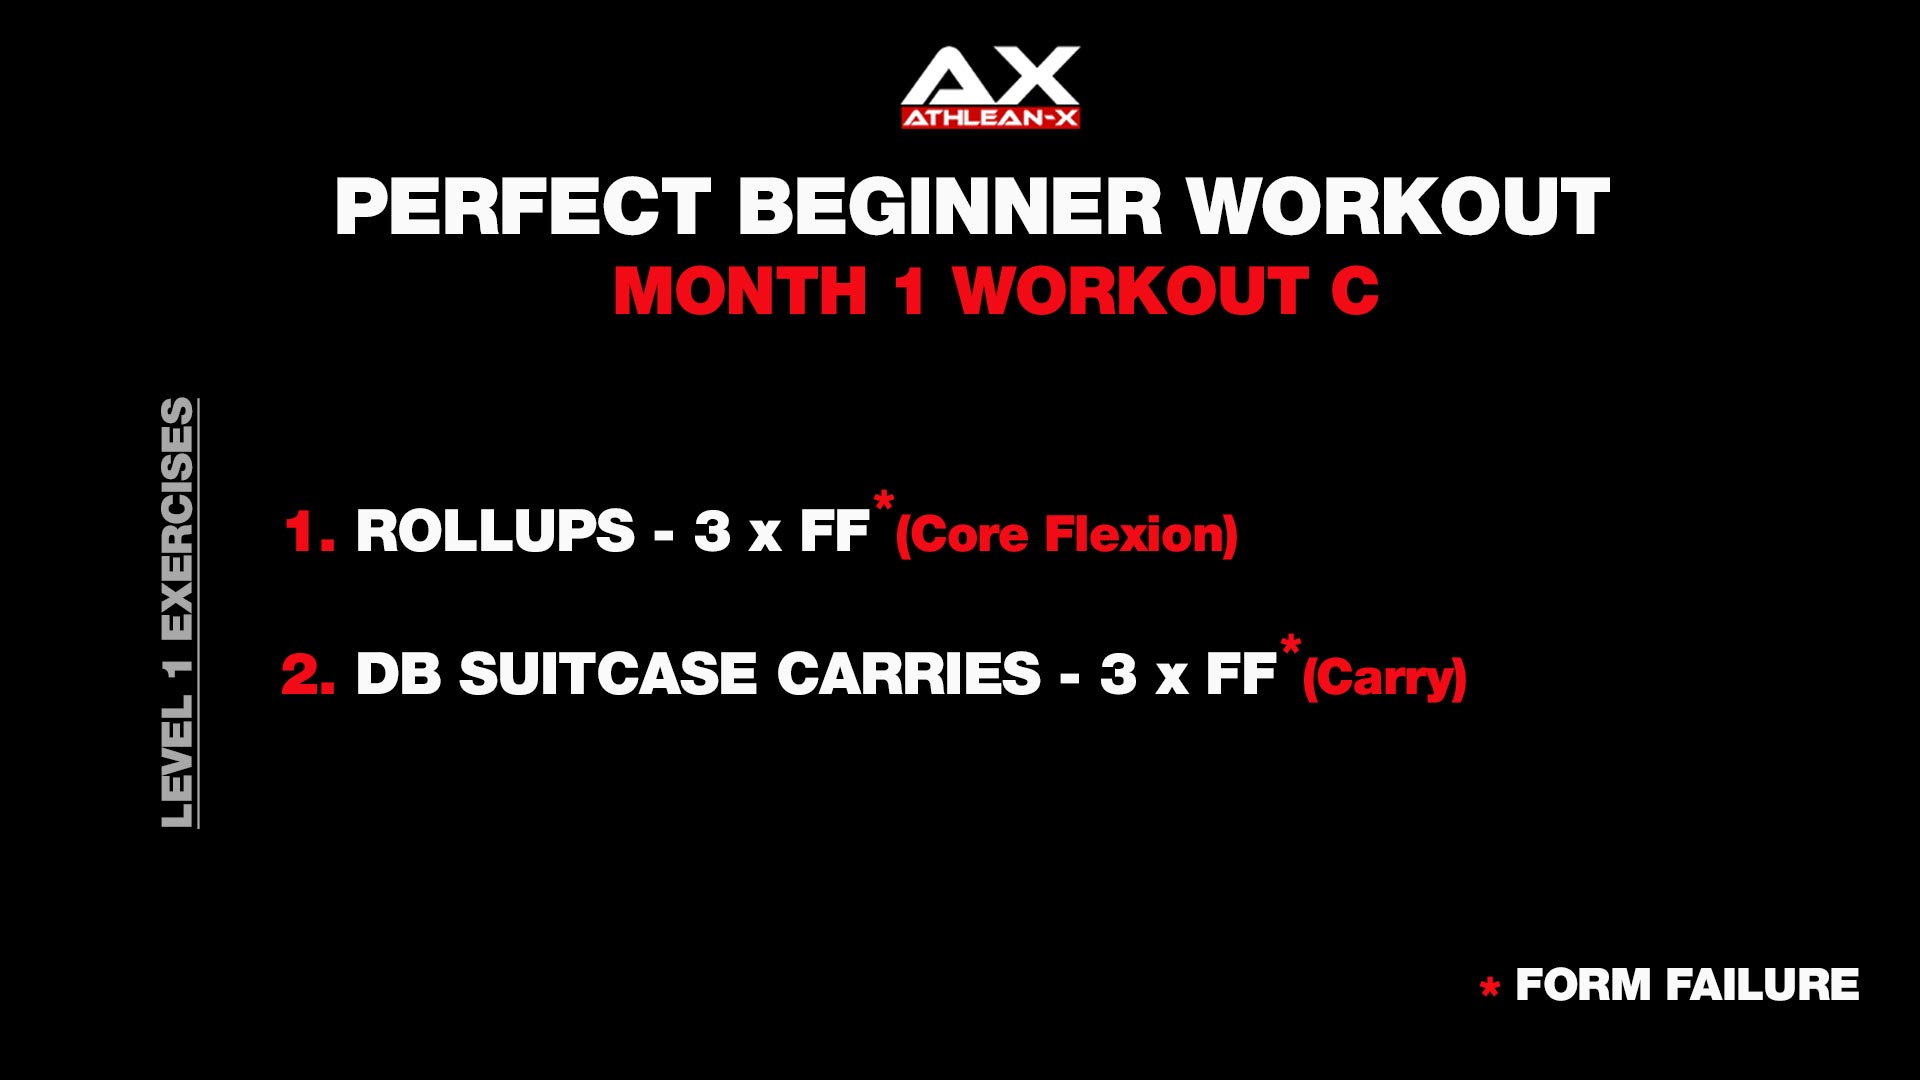
For Workout C, you’ll pair together the Core Flexion movement pattern and the Carry movement pattern.
Each of these exercises is going to be performed for three sets to 12 to 15 repetitions.
If you’re performing a bodyweight exercise, you’ll go until you reach Form Failure or muscle failure. Now the goal here is to build up your ability to perform and master these basic movements. It’s not about loading the weight yet, which is why the rep range is higher.
Even if you’ve already tried doing a Bench Press, for example, I want to ensure that you learn how to build that foundation from the ground up in order to master these movements. These bodyweight moves will set you up for nothing but success down the line.
Each of the workouts in Month 1 do exactly that and prepare you for the next month.
BEGINNER WORKOUTS: MONTH TWO
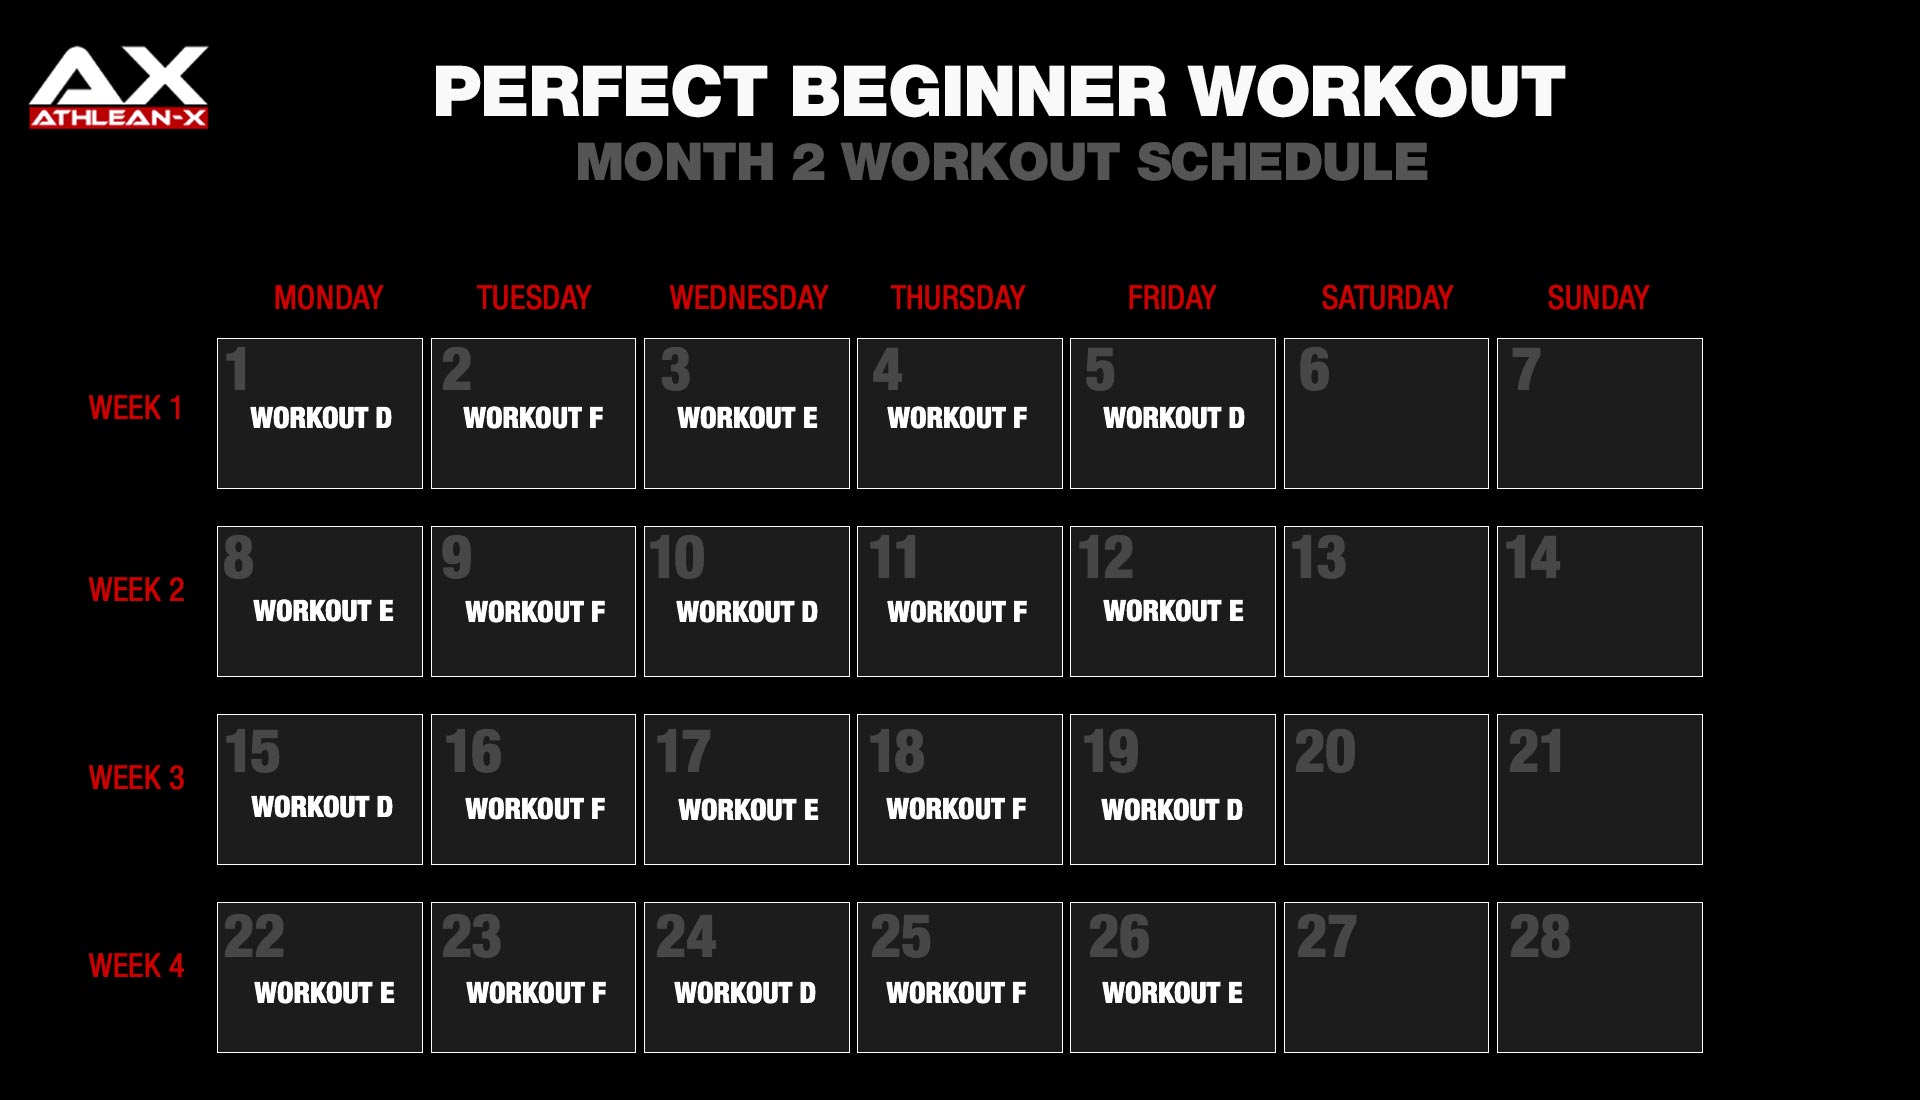
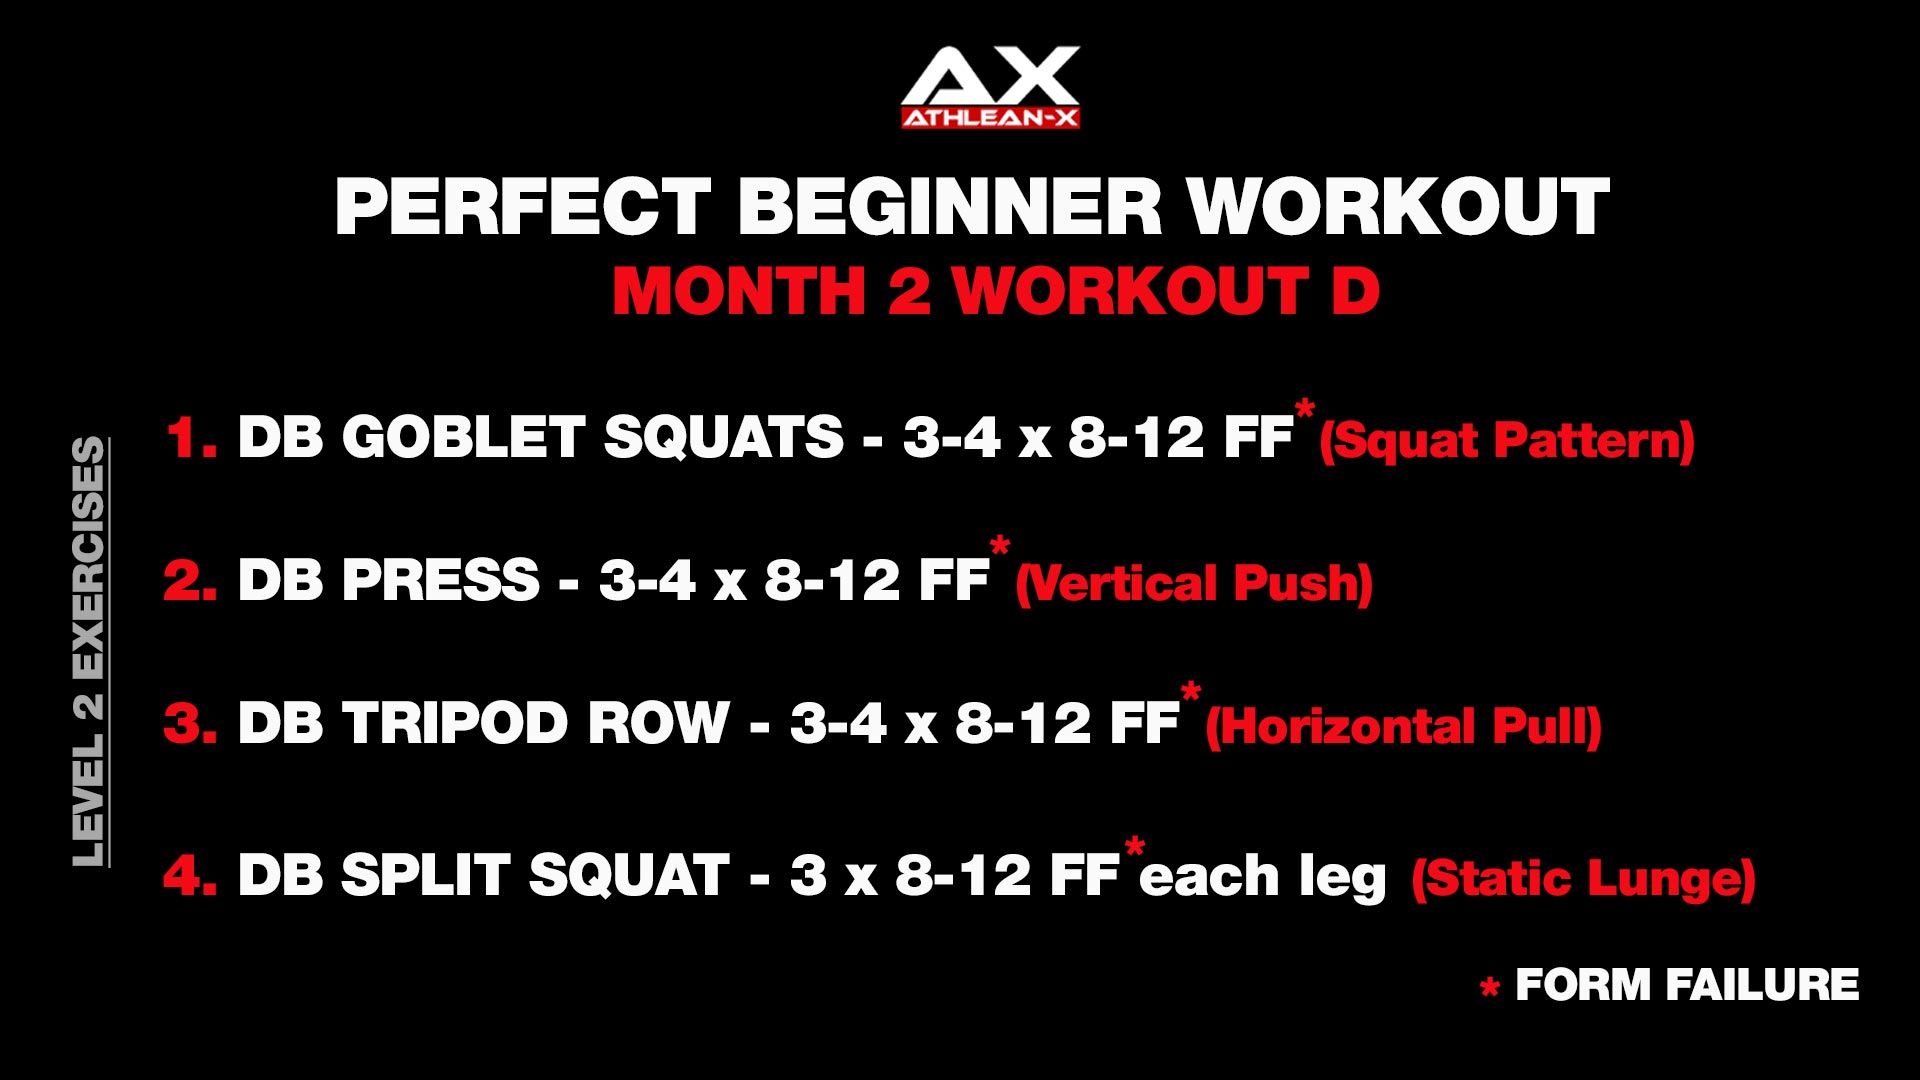
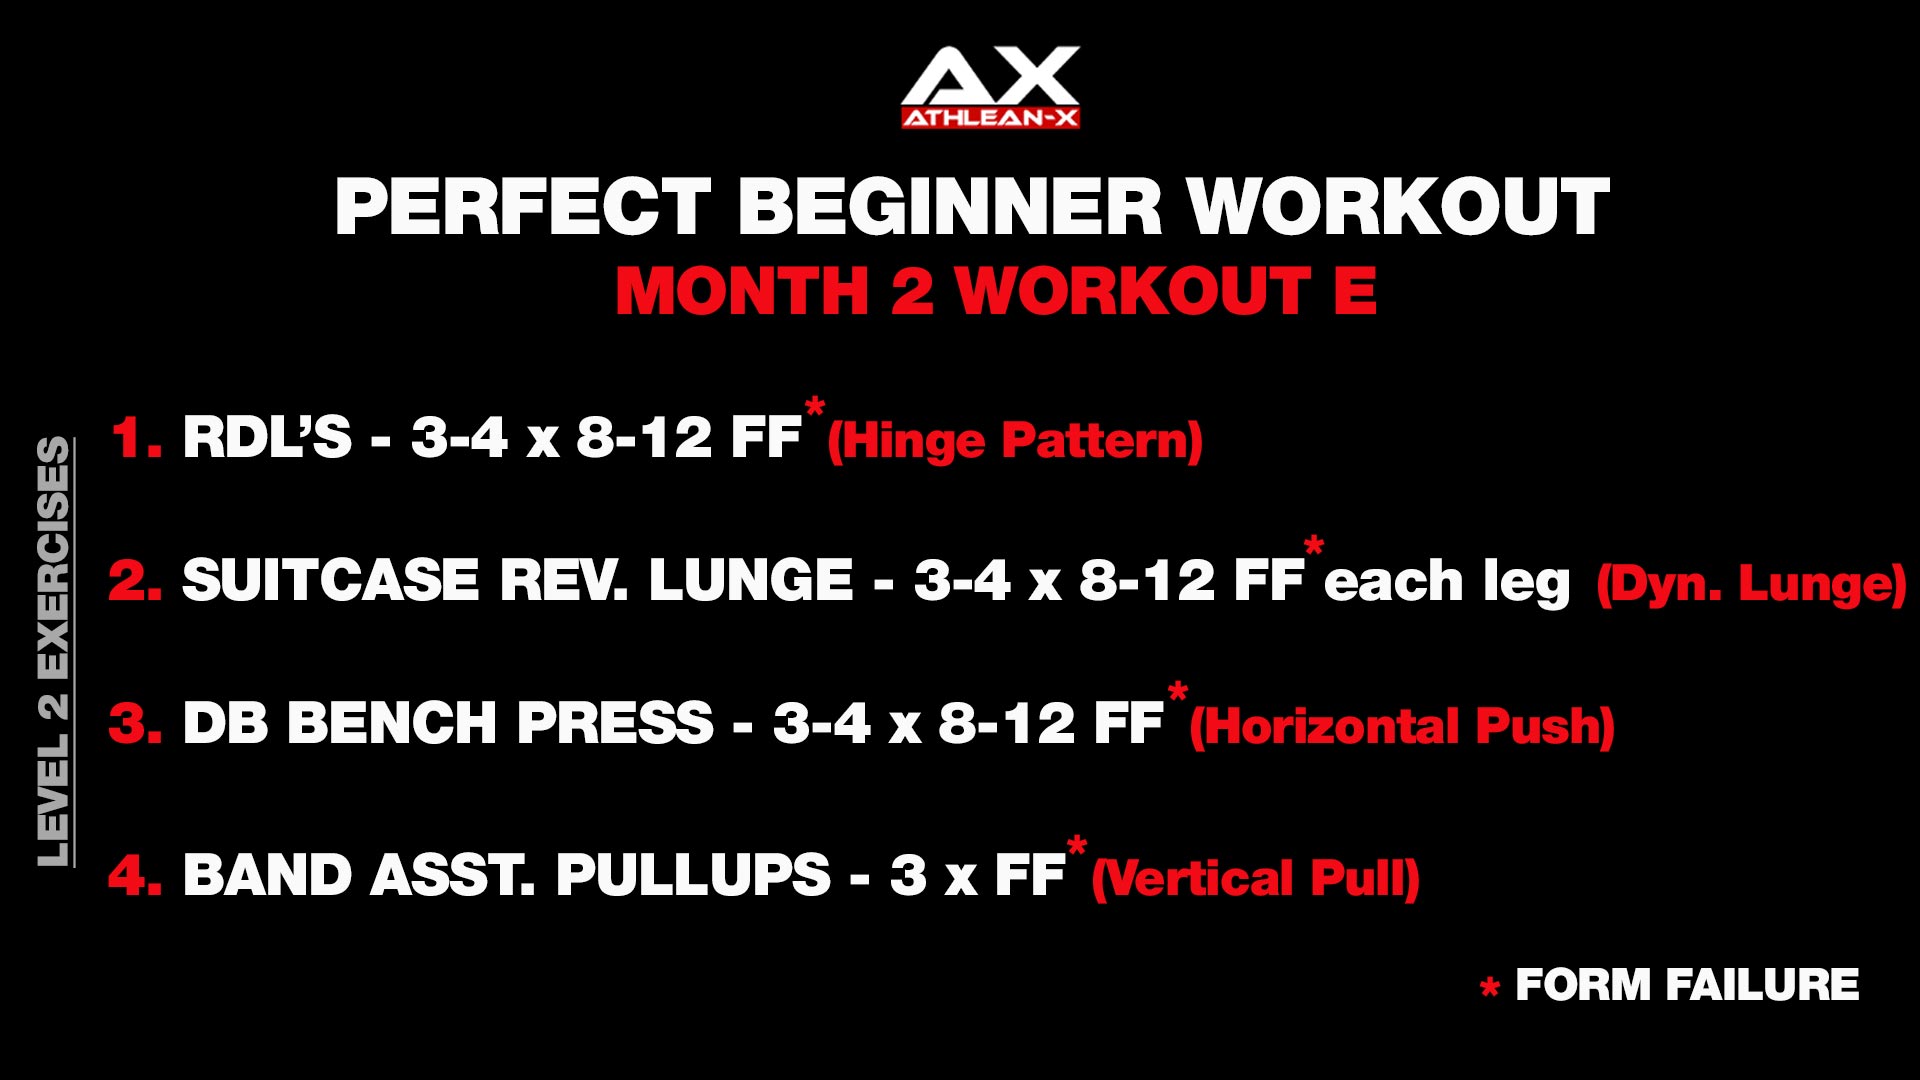
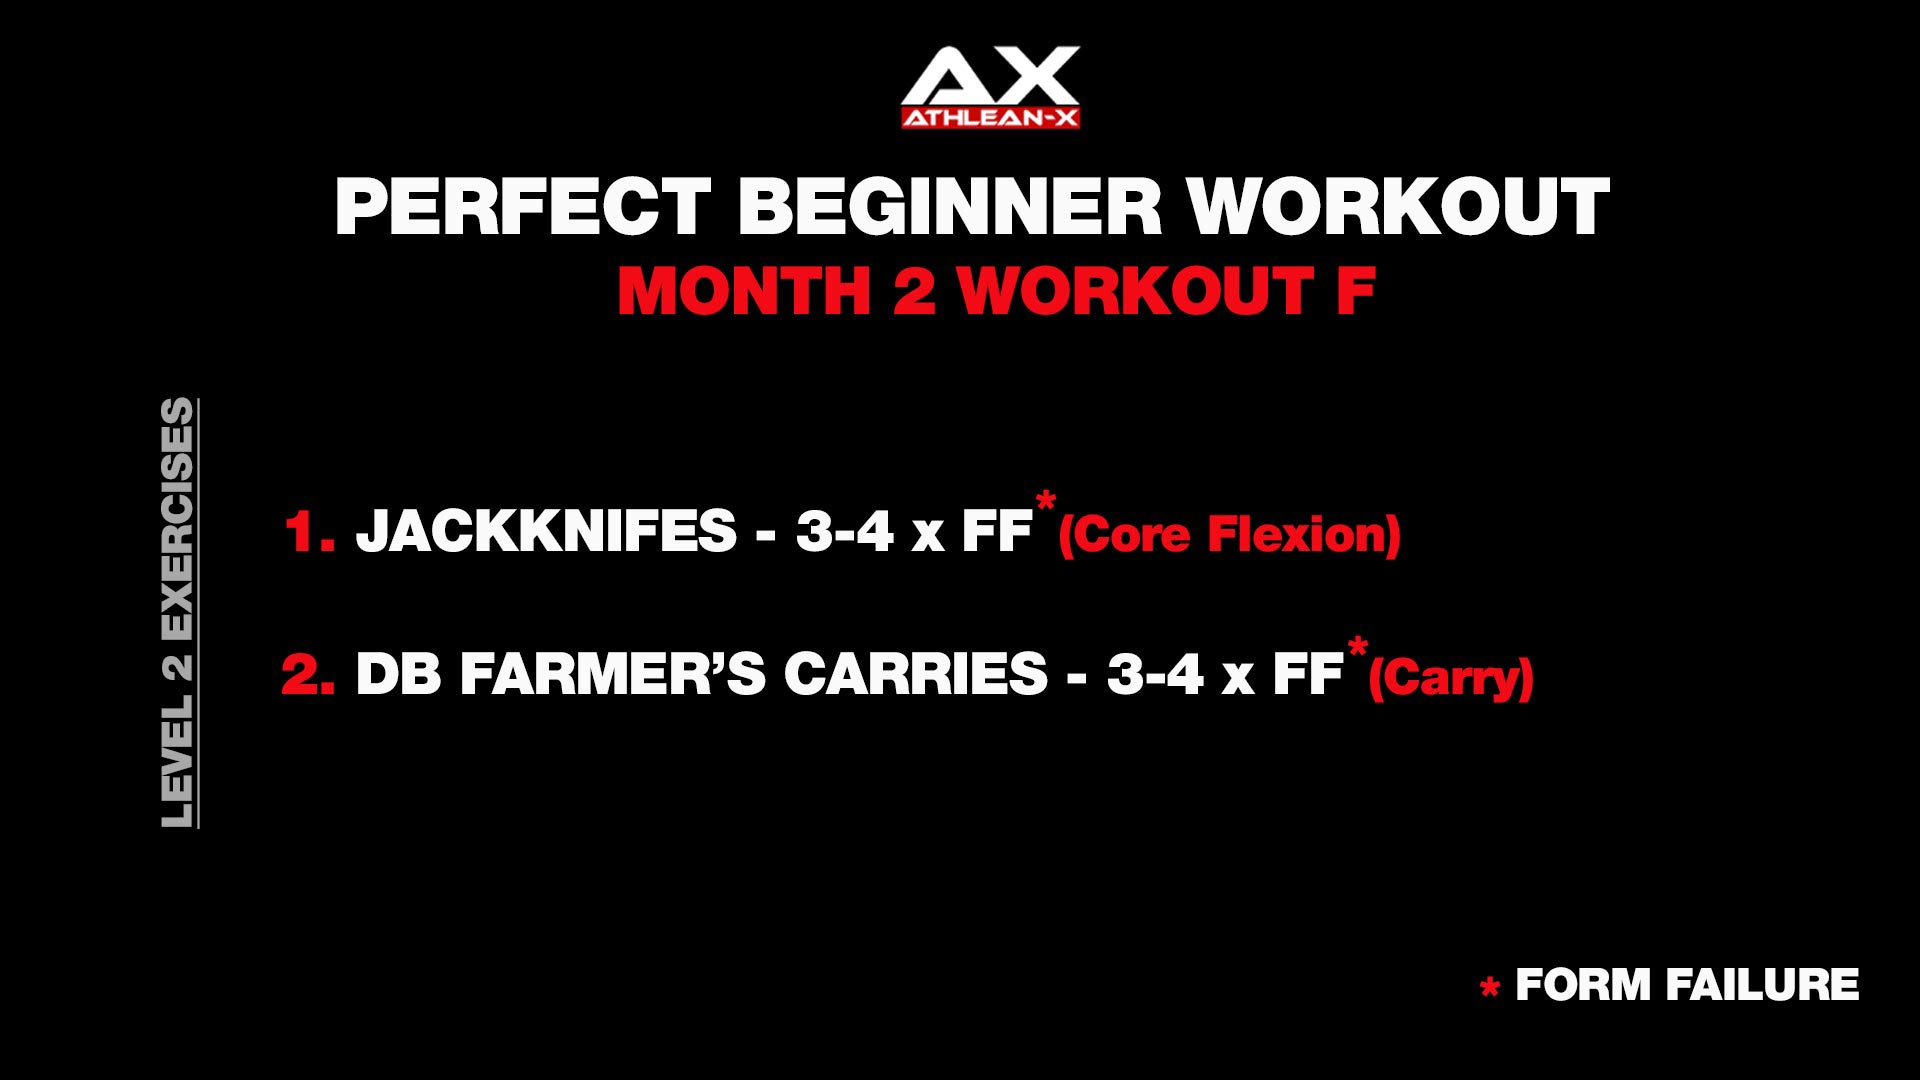
For Month Two, the resistance training structure is going to stay the same with Workouts D, E, and F.
Just like before, Workouts D and E will be total body workouts done in alternating fashion on Monday, Wednesday, and Friday.
And then we have those core muscles and carry workouts done on Tuesdays and Thursdays.
With the Level Two exercises, the goal has changed. You’ll transition away from building that foundation to trying to build strength upon that foundation. That means the reps and sets will change as well as the exercises.
The reps are going to drop down to the 8-12 reps, picking a challenging weight that will allow you to fail within that rep range. But not so heavy that you can’t complete every single repetition with proper form.
I’m also going to give you the option of adding an additional set to build upon that volume as you continue to build your experience in these movement patterns.
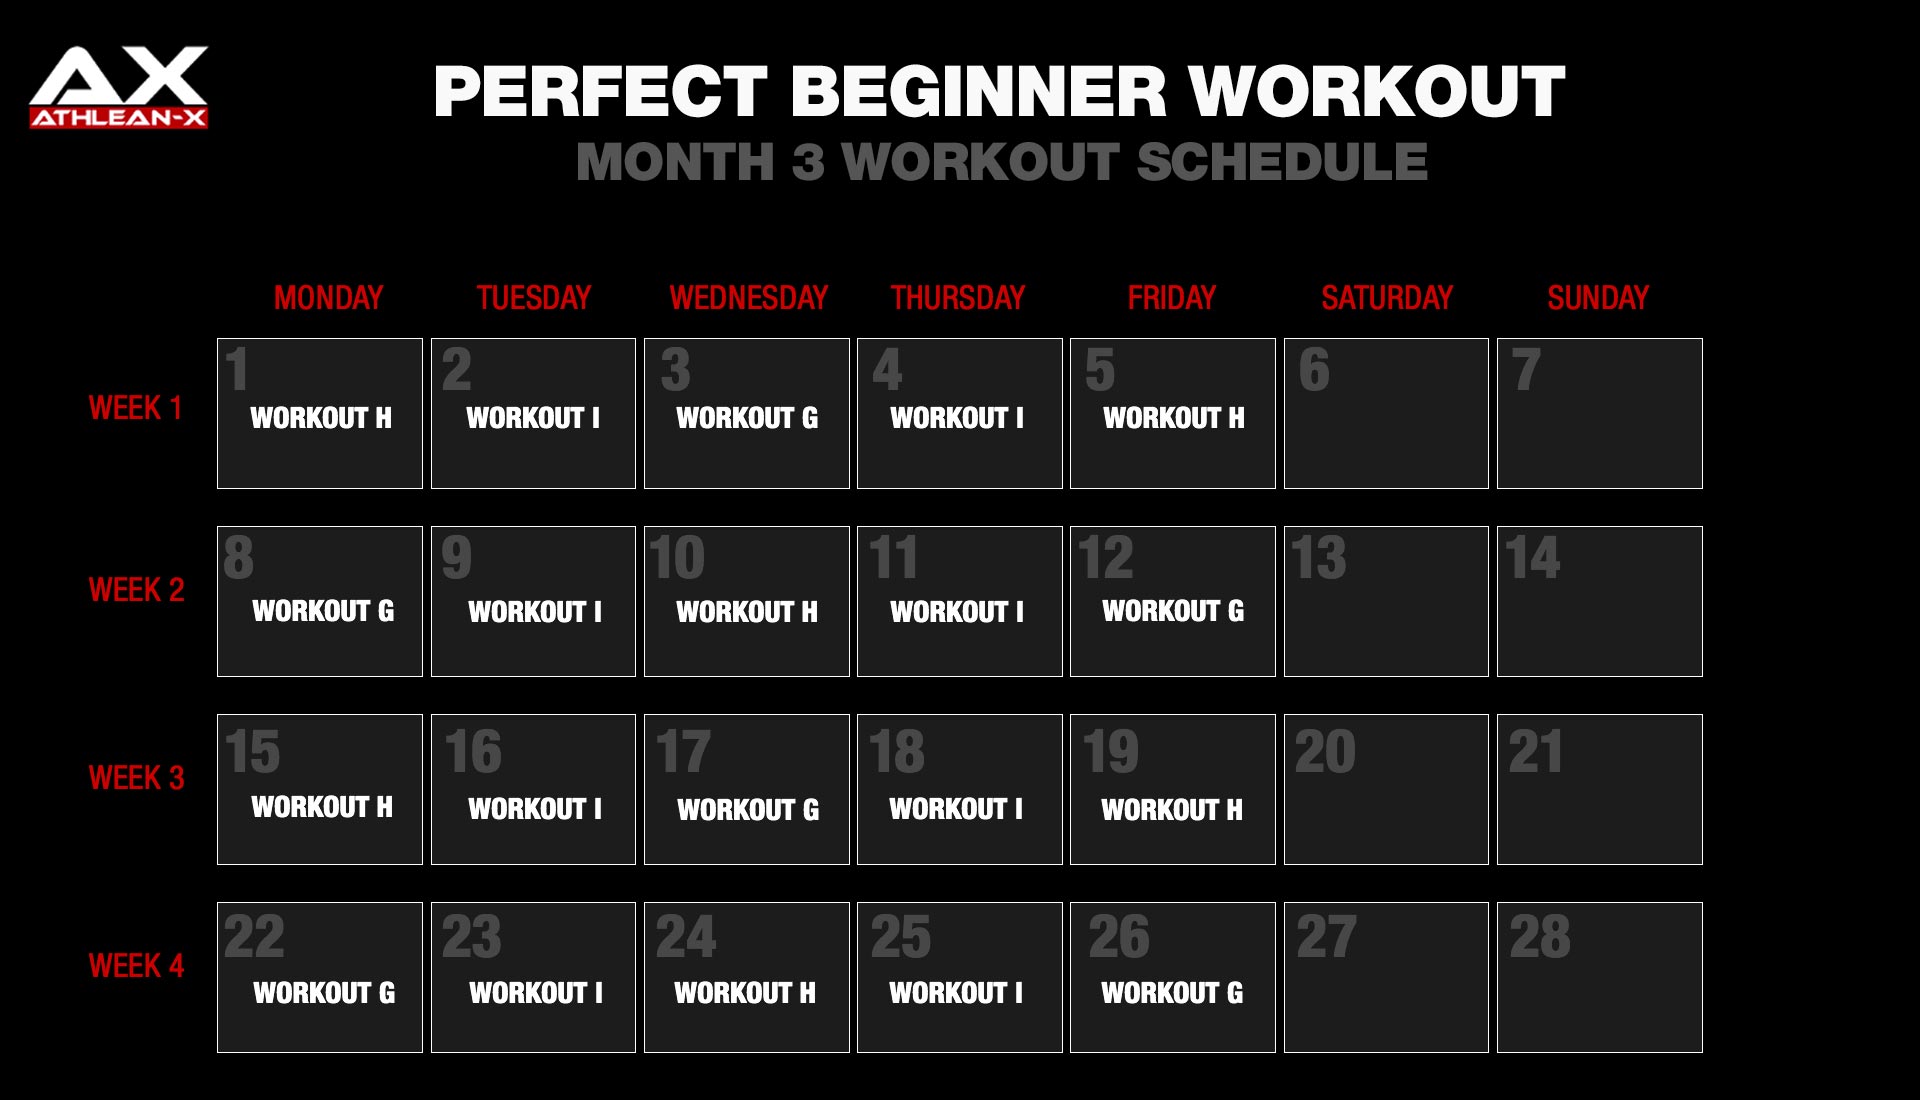
BEGINNER WORKOUTS: MONTH THREE
With Month Three, you can perform the following workout for longer than the four weeks of the previous workouts.
Now that you’ve built that foundation up, you’re going to break it down again with the H, G, and I workouts.
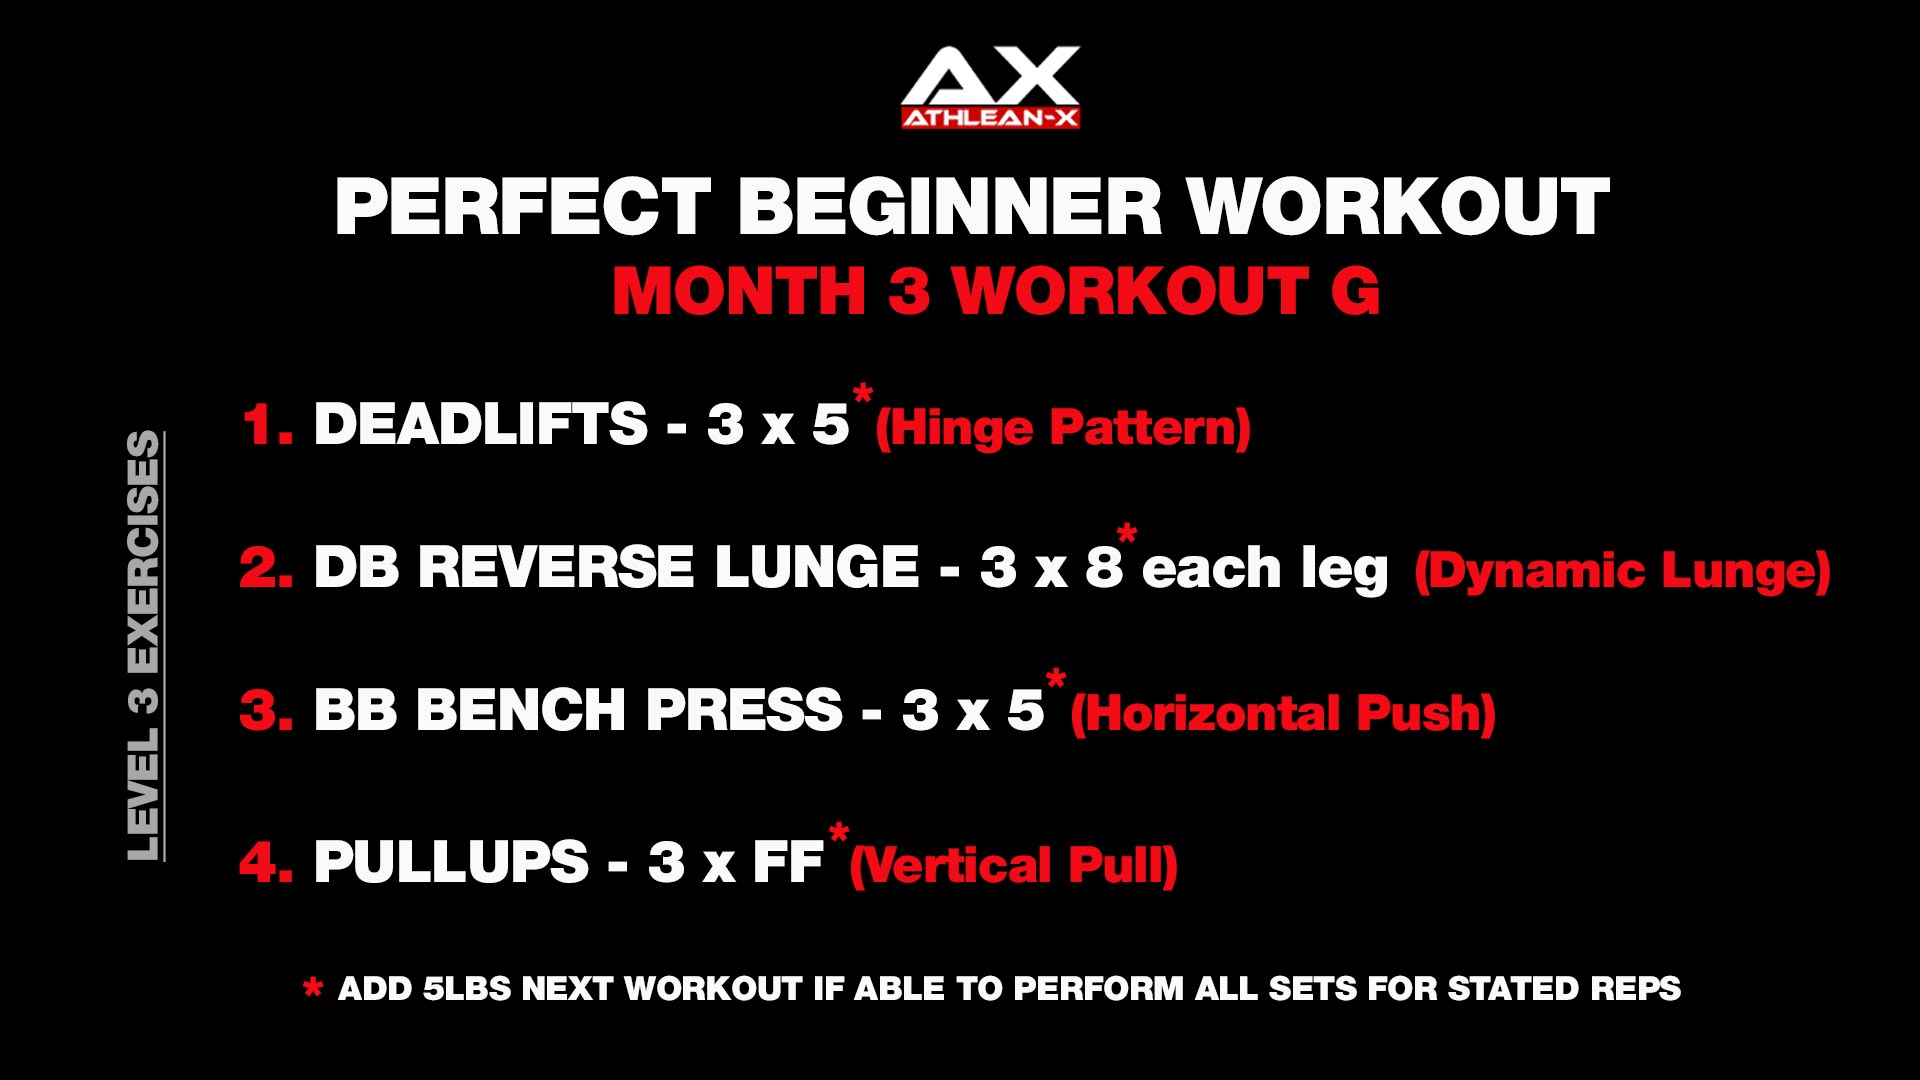
You’ll perform the same grouping of movement patterns, but now we introduce those Level Three exercises.
What you’re left with are the traditional barbell exercises that you can perform for strength using three sets of five to eight repetitions. The idea is to build upon that foundation of strength by progressively overloading these movements over time. You would do that by adding five pounds to each workout on each lift but only if you are able to successfully achieve the three sets of five in the previous workout.
In terms of the weight that you’re going to start with, I’d recommend picking a weight that you know you can perform the five reps for, but is still going to challenge you. If for some reason you didn’t get all three sets of five, then you would repeat the weight that you used the previous workout.
If you aren’t able to hit the sets and reps, you might have overshot the weight that you chose. In this case, I’d recommend dropping down by five pounds and repeat until you can master all three sets of five.
And with that, you’ve got a step-by-step game plan. And where would you go from here? It really is up to you.
If you want to continue to build your strength, you can stick to the Level Three workout and continue to add weight.
You can also shift your goals to muscle growth, staying within three to five sets of 8 to 12 repetitions.
No matter which you choose, make sure you stay dedicated to high quality movement and form.
I wanted to make sure that our beginners out there had something to follow where they could make the best gains and experience the most success possible.
If you’re looking for more beginner-friendly workout programs, you’re in luck. Check out the inks below to see which of our ATHLEAN-X programs is the best fit for you.

- In my three-month workout for beginners, each month consists of three workouts. You have a full-body workout for the first two workouts. The other workout focuses on your core and grip/forearm strength.
- The total body workouts are alternated three days per week on Monday, Wednesday, and Friday while the core and carry workouts are repeated every Tuesday and Thursday.
- The weekends are reserved for your rest days and recovery.
- The exercises in this beginner workout routine are grouped by movement patterns. Instead of focusing solely on specific exercises, I want the beginner trainee to think about how their bodies are moving and why that movement is important so that they may substitute in other exercises down the line with a knowledge of why they are acceptable alternatives.
- The ten movement patterns are: Horizontal Push, Vertical Push, Horizontal Pull, Vertical Pull, Hinge, Squat Lunge, Dynamic Lunge, Core Flexion, and Carry.
- Over the course of the three months of this beginner workout plan, you will see that the exercises that fit each movement pattern will change. By either increasing the complexity of the exercise or the amount of load that can be used on the exercise, we can ensure progressive overload is met while giving your target muscles the stimulus they need to grow bigger and stronger.
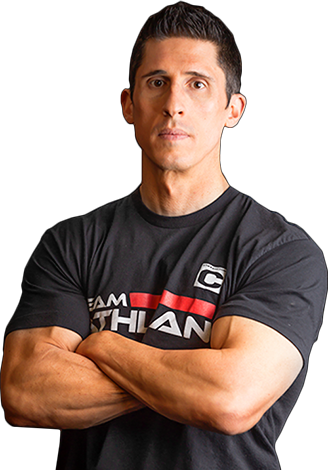
Jeff Cavaliere M.S.P.T, CSCS
Jeff Cavaliere is a Physical Therapist, Strength Coach and creator of the ATHLEAN-X Training Programs and ATHLEAN-Rx Supplements. He has a Masters in Physical Therapy (MSPT) and has worked as Head Physical Therapist for the New York Mets, as well as training many elite professional athletes in Major League Baseball, NFL, MMA and professional wrestling. His programs produce “next level” achievements in muscle size, strength and performance for professional athletes and anyone looking to build a muscular athletic physique.
